




1
Grant Williams was targetted in defence by the All Blacks
3


 Share
Share 
Springboks halfback Grant Williams was an unusual No.9 selection for South Africa.
The main reason being that at Eden Park last year the All Blacks unsettled him, throwing South Africa off their game. New Zealand already had a recipe that worked, yet Erasmus and his team went again with Williams. For the second time, it backfired.
Every coach loves versatility. Williams can cover wing, which was needed in this game, but they forgot to keep the main thing the main thing. The No.9 has to be the best halfback first and foremost. If the No.9 is harassed and put under pressure, the entire cohesion of the backline or shape is out of sync.
Here’s an astounding stat on Williams. All five of the All Blacks’ tries came against him. It was a mismatch in defence the All Blacks liked, and they went after it with success four times in attack, while the charge-down try by Fabian Holland was from Williams’ box kick.

In the Bok defence system, the No.9 is the closer on the edge, the last man to shut the play down. It’s an important role. But Williams is not Faf de Klerk.
De Klerk was special in that regard. Only Faf could produce plays like that, flying out of the line to put spot tackles on outside backs. Williams can adequately tackle, but he can’t make dominant contact like De Klerk.
With the All Blacks camped on the Boks’ try line, Cam Roigard sights the match-up on the edge, Jordan versus Williams.
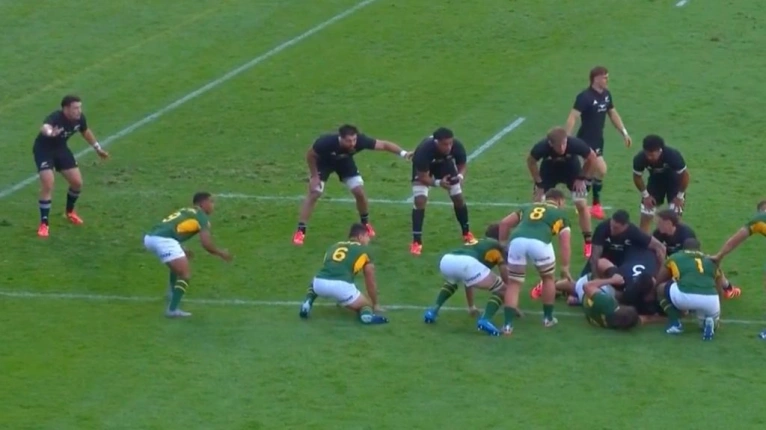
Jordan has a little bit of space, but it’s just bigger body on smaller body. Roigard likes the one-on-one and fires a flat cutout direct to Jordan to crash over.
The second All Blacks try is a classic move that has been a staple of the playbook against South Africa going back to Steve Hansen’s years.
It’s a basic attacking pattern off a set piece: crash one phase, usually through the 12, then switch back down the short side to pick mismatches against the tight five.
On this occasion, they use Jordie Barrett to crash on the first phase, play one extra forward carry the same way on the second phase, then switch on the third.
The extra phase is added so Barrett can reload and get involved. His long ball is the best in the world in 2026, and they want to use it.
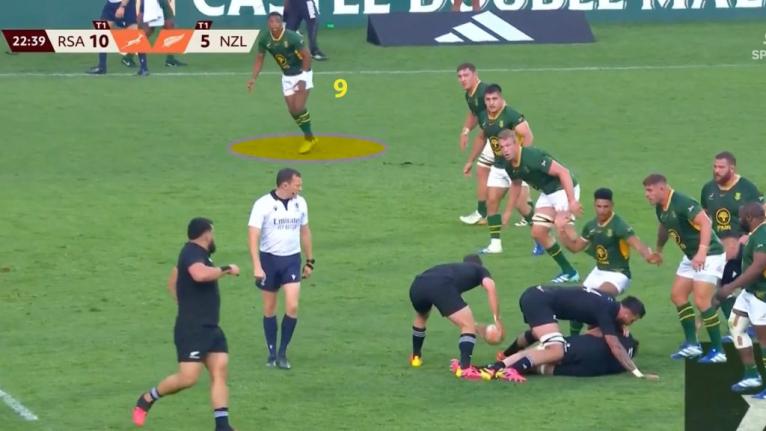
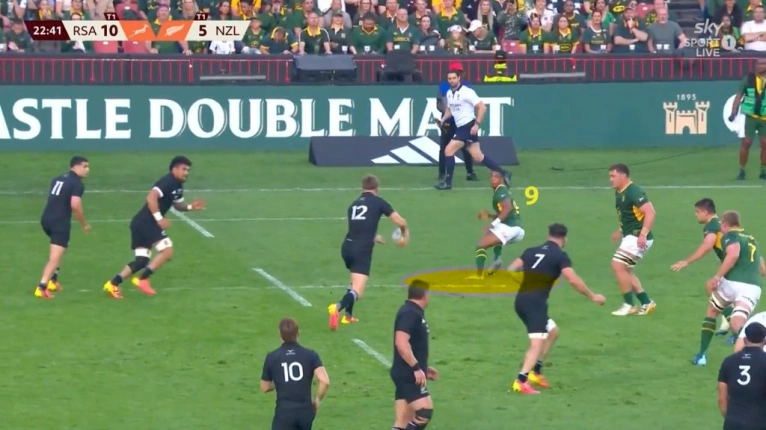
As expected, Grant Williams is the backside protection and last man on the edge following the lineout, and this is the matchup the All Blacks wanted to target.
At this point in the game, Williams is still playing halfback, and Jesse Kriel is on the right wing. Kolbe shifted to the left to cover for the injured Kurt-Lee Arendse.
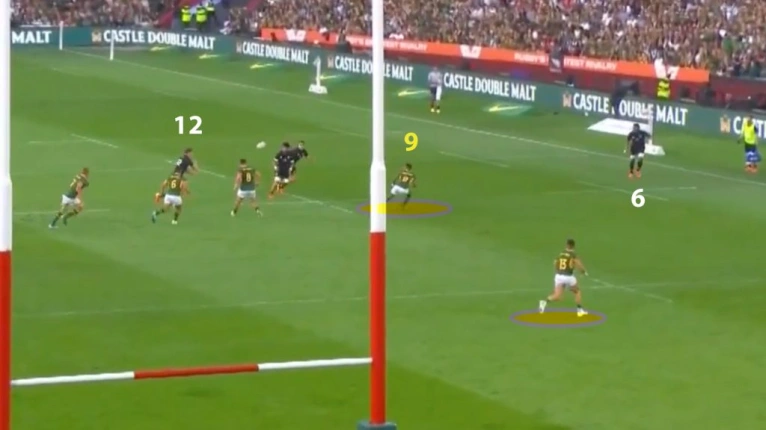
Barrett’s long ball found Tupou Vaa’i in space down the left-hand touchline.
Vaa’i made a great play in the two-man tackle of Williams and Kriel to offload the pass back inside to winger Josh Moorby, who slipped the inside tackle of Du Toit and raced away.
Williams understandably couldn’t bring down Vaa’i by himself due to the size mismatch. That’s all that was needed to give the All Blacks a lane to score.
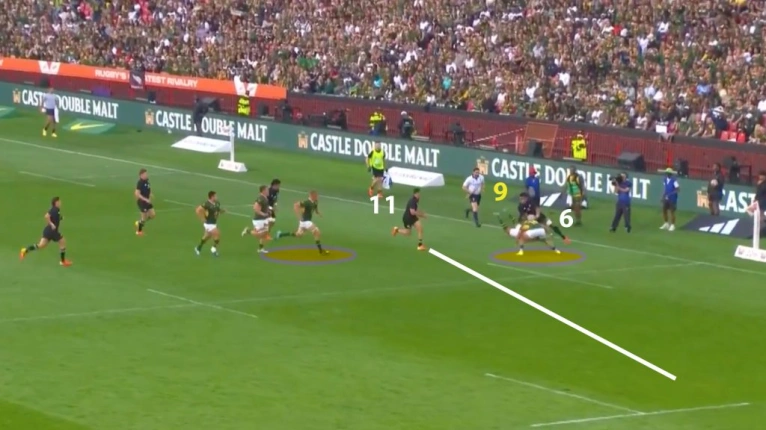
Du Toit’s effort is exceptional. If you look at where he was when Barrett released his pass, he’s the furthest away from Vaa’i of the loose forwards.
He’s outworked both De Villiers and Wiese to make a tackle attempt. If Wiese had the hustle of Du Toit, maybe Moorby doesn’t score.
The third All Black try is the charge down by Holland off Williams.
When the All Blacks had a scrum five metres out from the Bok line in the 59th minute, Williams is now on the left wing permanently after Kolbe was forced off with injury.
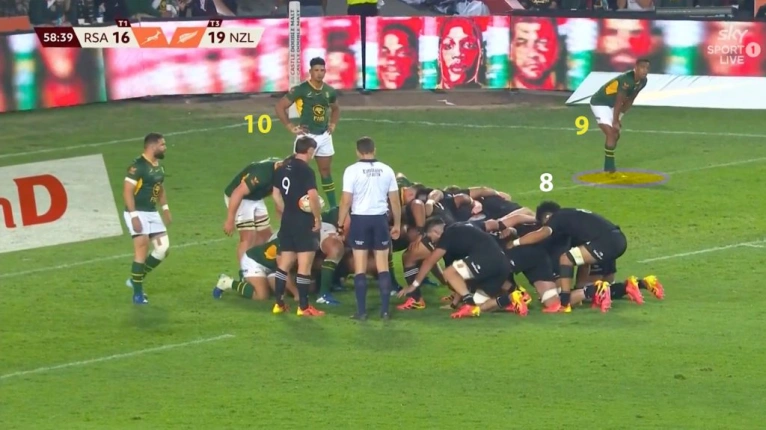
Every man and his dog could have predicted that Ardie Savea would break right and go at Sacha Feinberg-Mngomezulu from this scrum.
It was a play they showed against Ireland when Savea powered through Sam Prendergast at Eden Park.
In this scenario, Savea carrying at the No. 10 would hopefully attract the blindside flanker into a breakdown, isolating Williams on the next phase if Savea was unable to bully his way over.
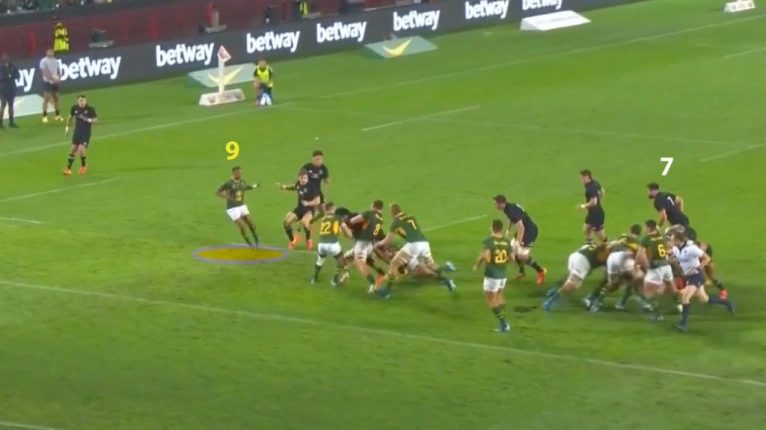
Savea is taken down by Wiese and Feinberg-Mngomezulu, while Luke Jacobson (7) broke from the openside of the scrum to take the next carry.
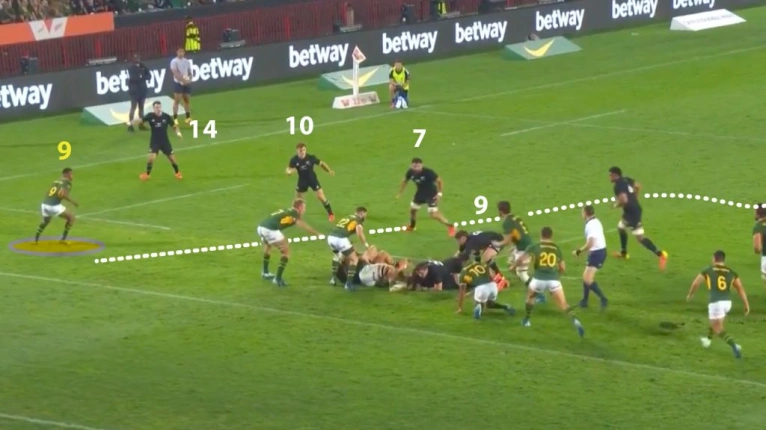
The All Blacks have the numbers advantage, and Roigard has all the options in the world to score here. You just can’t give this picture to Roigard; the Boks are already beat.
As a running No.9, he could have taken off and committed Du Toit himself, putting Jacobson, Love or Jordan over.
The Boks are already on the back foot, he offered a simple pass to Jacobson, who powered through both Williams and Du Toit to crash over.
Simple power rugby by the All Blacks.
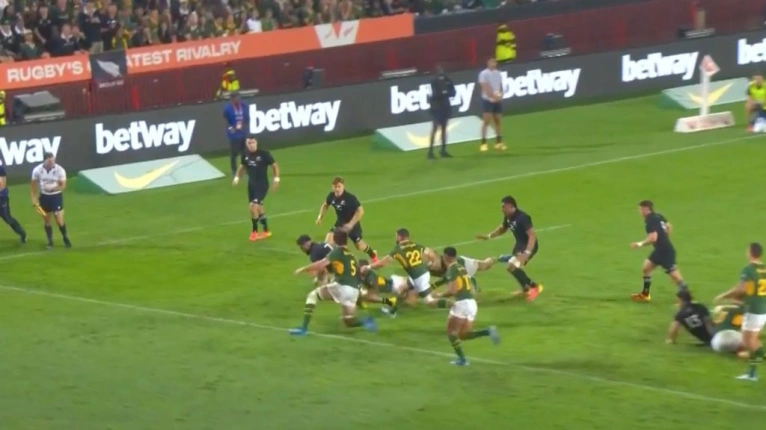
The last try to Will Jordan down Williams’ side from a similar scrum, with Savea breaking the same way and floating a pass over the top, was not his fault.
By this stage, with the Boks down two players, the halfback and the flank, he had no chance to stop the play. His only chance of winning the situation was an error from the All Blacks.
After Williams biting in on the first play, Savea ran a similar lane and floated the ball to the open man.
On the other side of the ball, a combination of Williams’ passing technique and the All Blacks ruck pressure had the No.9 out of sync.
The All Blacks contested for possession at nearly every South African ruck, and looked to strip in the tackle frequently, resulting in messy presentation and a lot of loose ball for Williams to deal with.
South Africa lost three possessions with ineffective cleans that left Williams fighting for possession with the poacher. The first was Jordie Barrett, and Fabian Holland and Will Jordan got two in the second half.
When it comes to the delivery Williams is more of an upright passer, with a release between the knees and the hips, sometimes extending to the midriff. A lot of the balls are high and have a slower lob as a result. A lot of time he’s throwing at the target, not out in front, leading the runner toward the line.
This led to a static attack that didn’t have timing. South Africa could rely on the power from the ball carriers to get gain line, but they didn’t have rhythm.
In addition, some of time he adds two steps to his pass as he departs the ruck, allowing the defence an extra second to assess. This can throw timing out with his own players. The dropped pass by Sacha Feinberg-Mngomezulu is the perfect example.
When Williams does threaten the ruck defence with his running, he is dangerous. He split the All Blacks defence a couple of times with a short pass to Wiese and another one to his No.10. That was a deliberate pet play used throughout the game, with a double pump and disguised runner.
He is South Africa’s preferred kicking scrumhalf it seems, often picked to deliver a box kicking game plan. For the most part his high kicks were placed very well, leading to many dropped balls and turnovers on the back end. The charge down was more of a great play by Holland, timed to perfection.
The bottom line with Williams is that they get the kicking game they want to implement, but the attack is a bit clunky.
Cobus Reinach has been their best No.9 when it comes to attack rhythm and the All Blacks would expect him to start in Cape Town, as he did in Wellington last year after Williams had the Eden Park Test.
The selection of Williams is becoming indicative of how the Boks want to play and for the second time in a row the All Blacks enjoyed having him on the field.
He will get a pre-planned spell in Cape Town you’d think as the Springboks can’t afford to have their defence picked apart like that in the second Test.

Your home for rugby. Download the RugbyPass app on the App Store (iOS) and Google Play (Android) now!
Follow your favourite teams, tournaments and players, and get personalised news and Match Centre notifications direct to your device.
From live rugby streams and upcoming fixtures to breaking news, in-depth analysis and live scores, RugbyPass has everything you need to stay connected to the game.

Win a VIP match experience at the Baltimore Test, plus travel & accommodation up to $2,500.
Springboks smashed the AB's 43-10 Wellington 2025…
Cam Roigard out injured and Kyle Preston weren't considered for selection…
The then AB's coaches chose Noah Hotham who only lasted 9 minutes with his back up Finlay Christie getting schooled by Cobus Reinach and that thankfully won't be the case in the Cape Town 2nd Test…
Cam Roigard is 110% back in action and will start with Kyle Preston for mine to be selected to back him up…
Go the AB's…Cape Town where the AB's will bury that Wellington thrashing…
They would’ve done the same even if KLA was on the field. All they needed was to be close enough at half time.
Pretty good analysis Ben. Will be interesting to see the SB 9 in 2nd test - who gets the start?
Join free and tell us what you really think!
Sign up for freeAre the world champion Springboks or new-look All Blacks in pole position to win their hugely anticipated first Test on Saturday?
The Springbok dynasty doesn't look like it is going to disappear any time soon and it could, in fact, get even stronger in future
Thinus Delport, Richard Bands and Ricky Januarie all achieved rugby immortality with career-defining tries against New Zealand.
As I said, they deployed a low-risk score board pressure strategy.
What did I say the ABs would go do the ABs?
They went for the second scrum (instead of going for points) and that backfired.
Yep…physics was never my strong suit!
Simple physics 101 - it’s called inertia
Pretty good analysis Ben. Will be interesting to see the SB 9 in 2nd test - who gets the start?
How long is Segner out for with his gout?


 Clear
Clear 


 Copy link
  Facebook
  X/Twitter
  WhatsApp
  Messenger