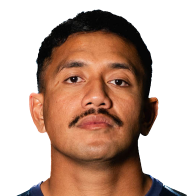
Luteru Laulala News

Hilux NPC
Jimmy Tupou is the last Steeler to win the Shield ahead of Ranfurly challenge
Super Rugby Pacific reveals 2027 fixtures as one scheduling move stands out
The three top performers from round seven of the Hilux NPC
Super Round locks in host city and five-match schedule for 2027 return
Latest
RWC-winning All Black's coaching career to start against Ian Foster
The three top performers from round six of the Hilux NPC
‘Making that kid proud’: Taha Kemara leaves Crusaders to chase Chiefs dream
The four top performers from round five of the Hilux NPC
Hilux NPC
Exclusive
Aussie presence in NPC grows as RA’s high-performance director weighs in
The three top performers from round four of the Hilux NPC
[{"competition":{"rid":"1002","oid":"421","name":"Japan Rugby League One","logo":"https:\/\/eu-cdn.rugbypass.com\/images\/competitions\/logos\/png\/japan-rugby-league-one.png?v=1762927429","logoCircle":"https:\/\/eu-cdn.rugbypass.com\/images\/competitions\/logos\/circle\/japan-rugby-league-one.png?v=1762927428","season":{"type":"opta","season":2026,"years":{"2025":2025,"2026":2026},"label":"2025\/2026","completed":1,"standings":1,"started":1,"months":0,"games":114},"stats":{"success":1,"stats":{"att_ruck_arrival_effectiveness":0.97,"av_gain":7.21,"av_post_contact_metres":3.4,"bad_passes":2,"balls_played_total":83,"balls_played_with_hands":71,"carries":56,"carries_crossed_gain_line":46,"carries_kick_return":15,"carries_kick_return_metres":176,"carries_not_made_gain_line":8,"carries_one_out_drive":8,"carries_one_out_drive_metres":29,"carries_support_metres":55,"carry_dominant":23,"carry_ineffective":2,"carry_neutral":22,"clean_breaks":4,"conversion_goals":2,"def_ruck_arrival_effectiveness":0.2,"defenders_beaten":16,"dominant_carry_percent":0.41,"dominant_tackles":2,"goal_kick_percentage":1,"handling_error":2,"kick_metres":481,"kicks_from_hand":12,"line_break_assists":2,"lineout_takes":1,"lineouts_to_own_player":1,"lineouts_won":1,"metres":404,"minutes_played_total":421,"missed_tackles":9,"offloads":3,"passes":27,"player_id":21818,"player_team_id":5207,"points":9,"post_contact_metres":190,"ruck_arrival":45,"ruck_arrival_attack":35,"ruck_arrival_defence":10,"ruck_arrivals_within_1st_3":41,"tackle_height_legs":19,"tackle_height_legs_percentage":1.9,"tackle_height_lower_torso":8,"tackle_height_lower_torso_percentage":0.8,"tackle_height_upper_torso":13,"tackle_height_upper_torso_percentage":1.3,"tackle_offload_allowed":7,"tackles":23,"tackles_success":0.58,"tackles_total_attempted":40,"tackles_try_conceded":1,"total_games":9,"total_tackles":40,"touches":86,"tries":1,"try_assist":2,"turnovers_conceded":4,"turnovers_won":1},"topPlayerStats":{"att_ruck_arrival_effectiveness":{"id":27395,"value":1},"av_gain":{"id":20432,"value":10.48},"av_post_contact_metres":{"id":20432,"value":6.89},"bad_passes":{"id":23599,"value":34},"balls_played_total":{"id":23599,"value":462},"balls_played_with_hands":{"id":38312,"value":370},"carries":{"id":25514,"value":231},"carries_crossed_gain_line":{"id":23599,"value":153},"carries_kick_return":{"id":38312,"value":72},"carries_kick_return_metres":{"id":25514,"value":663},"carries_not_made_gain_line":{"id":25514,"value":71},"carries_one_out_drive":{"id":25514,"value":40},"carries_one_out_drive_metres":{"id":23599,"value":209},"carries_support_metres":{"id":38476,"value":234},"carry_dominant":{"id":25514,"value":61},"carry_ineffective":{"id":25514,"value":20},"carry_neutral":{"id":23599,"value":95},"clean_breaks":{"id":23599,"value":23},"defenders_beaten":{"id":25514,"value":90},"dominant_carry_percent":{"id":30974,"value":0.71},"handling_error":{"id":38312,"value":23},"kick_metres":{"id":23599,"value":3715},"kicks_from_hand":{"id":23599,"value":121},"line_break_assists":{"id":23599,"value":25},"lineout_takes":{"id":21961,"value":5},"lineouts_to_own_player":{"id":23599,"value":7},"lineouts_won":{"id":23599,"value":7},"metres":{"id":23599,"value":1566},"minutes_played_total":{"id":38312,"value":1508},"missed_tackles":{"id":30956,"value":46},"offloads":{"id":23599,"value":53},"passes":{"id":23599,"value":269},"player_id":{"id":61875,"value":61875},"player_team_id":{"id":20070,"value":19702},"points":{"id":38476,"value":112},"post_contact_metres":{"id":23599,"value":727},"retained_kicks_percentage":{"id":20432,"value":0.5},"ruck_arrival":{"id":25514,"value":142},"ruck_arrival_attack":{"id":25514,"value":119},"ruck_arrival_defence":{"id":30956,"value":37},"ruck_arrivals_within_1st_3":{"id":25514,"value":132},"tackle_height_legs":{"id":38476,"value":73},"tackle_height_legs_percentage":{"id":37882,"value":4},"tackle_height_lower_torso":{"id":30956,"value":65},"tackle_height_lower_torso_percentage":{"id":30974,"value":2},"tackle_height_upper_torso":{"id":30956,"value":65},"tackle_height_upper_torso_percentage":{"id":23599,"value":1.86},"tackle_turnover":{"id":20432,"value":4},"tackles":{"id":30956,"value":123},"tackles_success":{"id":37882,"value":1},"tackles_total_attempted":{"id":30956,"value":180},"total_games":{"id":23599,"value":20},"total_tackles":{"id":30956,"value":180},"touches":{"id":23599,"value":478},"try_assist":{"id":23599,"value":16},"turnovers_conceded":{"id":38312,"value":41},"turnovers_won":{"id":30956,"value":8},"pen_defs":{"id":30956,"value":6},"penalties_conceded":{"id":61875,"value":10},"def_ruck_arrival_effectiveness":{"id":23667,"value":0.5},"tackle_height_no_contact":{"id":30956,"value":15},"tackle_height_no_contact_percentage":{"id":23421,"value":0.73},"tackle_offload_allowed":{"id":23421,"value":13},"tries":{"id":30956,"value":13},"collection_attacking_catch":{"id":20432,"value":16},"dominant_tackles":{"id":30956,"value":8},"pen_offs":{"id":61875,"value":5},"tackles_try_conceded":{"id":21961,"value":7},"conversion_goals":{"id":38476,"value":36},"goal_kick_percentage":{"id":61875,"value":1},"tackle_penalty_conceded":{"id":61875,"value":1},"tackle_try_saver":{"id":61875,"value":1},"yellow_cards":{"id":21961,"value":2},"carries_pick_and_go":{"id":25514,"value":5},"carries_pick_and_go_metres":{"id":25514,"value":17},"throws_lost":{"id":25514,"value":1},"missed_conversion_goals":{"id":38476,"value":16},"penalty_goals":{"id":38476,"value":5},"missed_penalty_goals":{"id":23599,"value":2}}}},"main":{"totalMinsPlayed":421,"main":[{"value":16,"title":"Defenders Beaten"},{"value":12,"title":"Kicks in Play"},{"value":0.58,"title":"Tackles Completed"},{"value":4,"title":"Line Breaks"},{"value":56,"title":"Carries"},{"value":1,"title":"Tries"},{"value":2,"title":"Try Assists"}],"profile":[{"value":"18%","title":"Defenders Beaten","type":1,"key":"defenders_beaten","raw":16,"top":90,"color":"#da6937"},{"value":"10%","title":"Kicks in Play","type":1,"key":"kicks_from_hand","raw":12,"top":121,"color":"#d55438"},{"value":"58%","title":"Tackles Completed","type":1,"key":"tackles_success","raw":0.58,"top":1,"color":"#d7c343"},{"value":"17%","title":"Line Breaks","type":1,"key":"clean_breaks","raw":4,"top":23,"color":"#d96636"},{"value":"24%","title":"Carries","type":1,"key":"carries","raw":56,"top":231,"color":"#de7a37"},{"value":"8%","title":"Tries","type":1,"key":"tries","raw":1,"top":13,"color":"#d34e38"},{"value":"13%","title":"Try Assists","type":1,"key":"try_assist","raw":2,"top":16,"color":"#d75c37"}]},"group":{"groups":[{"title":"Attack","stats":[{"title":"Points","value":{"value":9,"title":"Points"},"overall":{"value":"8%","title":"Points","type":1,"key":"points","raw":9,"top":112,"color":"#d34e38"}},{"title":"Tries","value":{"value":1,"title":"Tries"},"overall":{"value":"8%","title":"Tries","type":1,"key":"tries","raw":1,"top":13,"color":"#d34e38"}},{"title":"Line Breaks","value":{"value":4,"title":"Line Breaks"},"overall":{"value":"17%","title":"Line Breaks","type":1,"key":"clean_breaks","raw":4,"top":23,"color":"#d96636"}},{"title":"Carries","value":{"value":56,"title":"Carries"},"overall":{"value":"24%","title":"Carries","type":1,"key":"carries","raw":56,"top":231,"color":"#de7a37"}},{"title":"Carries Per Minute","value":{"value":0.13,"title":"Carries Per Minute"},"overall":{"value":"2%","title":"Carries Per Minute","type":1,"key":"carries","raw":0,"top":231,"color":"#cf403a"}},{"title":"Metres Carried","value":{"value":404,"title":"Metres Carried"},"overall":{"value":"26%","title":"Metres Carried","type":1,"key":"metres","raw":404,"top":1566,"color":"#e18038"}},{"title":"Defenders Beaten","value":{"value":16,"title":"Defenders Beaten"},"overall":{"value":"18%","title":"Defenders Beaten","type":1,"key":"defenders_beaten","raw":16,"top":90,"color":"#da6937"}},{"title":"Turnovers Won","value":{"value":1,"title":"Turnovers Won"},"overall":{"value":"13%","title":"Turnovers Won","type":1,"key":"turnovers_won","raw":1,"top":8,"color":"#d75c37"}},{"title":"Defenders Beaten","value":{"value":16,"title":"Defenders Beaten"},"overall":{"value":"18%","title":"Defenders Beaten","type":1,"key":"defenders_beaten","raw":16,"top":90,"color":"#da6937"}},{"title":"Touches","value":{"value":86,"title":"Touches"},"overall":{"value":"18%","title":"Touches","type":1,"key":"touches","raw":86,"top":478,"color":"#da6937"}},{"title":"Post Contact Metres","value":{"value":190,"title":"Post Contact Metres"},"overall":{"value":"26%","title":"Post Contact Metres","type":1,"key":"post_contact_metres","raw":190,"top":727,"color":"#e18038"}}]},{"title":"Defence","stats":[{"title":"Tackles Made","value":{"value":23,"title":"Tackles Made"},"overall":{"value":"19%","title":"Tackles Made","type":1,"key":"tackles","raw":23,"top":123,"color":"#dc6c37"}},{"title":"Tackles Completed","value":{"value":0.58,"title":"Tackles Completed"},"overall":{"value":"58%","title":"Tackles Completed","type":1,"key":"tackles_success","raw":0.58,"top":1,"color":"#d7c343"}},{"title":"Dominant Tackles","value":{"value":2,"title":"Dominant Tackles"},"overall":{"value":"25%","title":"Dominant Tackles","type":1,"key":"dominant_tackles","raw":2,"top":8,"color":"#e07d37"}},{"title":"Tackles Per Minute","value":{"value":0.05,"title":"Tackles Per Minute"},"overall":{"value":"2%","title":"Tackles Per Minute","type":1,"key":"tackles","raw":0,"top":123,"color":"#cf403a"}},{"title":"Turnovers Won","value":{"value":1,"title":"Turnovers Won"},"overall":{"value":"13%","title":"Turnovers Won","type":1,"key":"turnovers_won","raw":1,"top":8,"color":"#d75c37"}},{"title":"Ruck Arrival Effectiveness","value":{"value":0.2,"title":"Ruck Arrival Effectiveness"},"overall":{"value":"40%","title":"Ruck Arrival Effectiveness","type":1,"key":"def_ruck_arrival_effectiveness","raw":0.2,"top":0.5,"color":"#eca93d"}}]},{"title":"Passing","stats":[{"title":"Try Assists","value":{"value":2,"title":"Try Assists"},"overall":{"value":"13%","title":"Try Assists","type":1,"key":"try_assist","raw":2,"top":16,"color":"#d75c37"}},{"title":"Successful Passes","value":{"value":27,"title":"Successful Passes"},"overall":{"value":"10%","title":"Successful Passes","type":1,"key":"passes","raw":27,"top":269,"color":"#d55438"}},{"title":"Bad Passes","value":{"value":2,"title":"Bad Passes"},"overall":{"value":"6%","title":"Bad Passes","type":1,"key":"bad_passes","raw":2,"top":34,"color":"#d14939"}},{"title":"Pass Accuracy","value":{"value":"93%","title":"Pass Accuracy"},"overall":{"value":"100%","title":"Pass Accuracy","type":1,"key":"pass_accuracy","raw":"93%","top":0,"color":"#479d6c"}}]},{"title":"Kicking","stats":[{"title":"Successful Penalties","value":{"value":0,"title":"Successful Penalties"},"overall":{"value":"2%","title":"Successful Penalties","type":1,"key":"penalty_goals","raw":0,"top":5,"color":"#cf403a"}},{"title":"Successful Conversions","value":{"value":2,"title":"Successful Conversions"},"overall":{"value":"6%","title":"Successful Conversions","type":1,"key":"conversion_goals","raw":2,"top":36,"color":"#d14939"}},{"title":"Kicks in Play","value":{"value":12,"title":"Kicks in Play"},"overall":{"value":"10%","title":"Kicks in Play","type":1,"key":"kicks_from_hand","raw":12,"top":121,"color":"#d55438"}},{"title":"Drop Goals","value":{"value":0,"title":"Drop Goals"},"overall":{"value":"2%","title":"Drop Goals","type":1,"key":"drop_goals_converted","raw":0,"top":0,"color":"#ce3d3b"}},{"title":"Goals Converted","value":{"value":2,"title":"Goals Converted"},"overall":{"value":"2%","title":"Goals Converted","type":1,"key":"goal_kicks","raw":0,"top":0,"color":"#ce3d3b"}}]},{"title":"Discipline","stats":[{"title":"Penalties Conceded","value":{"value":0,"title":"Penalties Conceded"},"overall":{"value":"2%","title":"Penalties Conceded","type":1,"key":"penalties_conceded","raw":0,"top":10,"color":"#cf403a"}},{"title":"Yellow Cards","value":{"value":0,"title":"Yellow Cards"},"overall":{"value":"2%","title":"Yellow Cards","type":1,"key":"yellow_cards","raw":0,"top":2,"color":"#cf403a"}},{"title":"Red Cards","value":{"value":0,"title":"Red Cards"},"overall":{"value":"2%","title":"Red Cards","type":1,"key":"red_cards","raw":0,"top":0,"color":"#ce3d3b"}}]}]}},{"competition":{"rid":"1002","oid":"421","name":"Japan Rugby League One","logo":"https:\/\/eu-cdn.rugbypass.com\/images\/competitions\/logos\/png\/japan-rugby-league-one.png?v=1762927429","logoCircle":"https:\/\/eu-cdn.rugbypass.com\/images\/competitions\/logos\/circle\/japan-rugby-league-one.png?v=1762927428","season":{"type":"opta","season":2025,"years":{"2024":2024,"2025":2025},"label":"2024\/2025","completed":1,"standings":1,"started":1,"months":0,"games":114},"stats":{"success":1,"stats":{"att_ruck_arrival_effectiveness":0.88,"av_gain":9.03,"av_post_contact_metres":4.54,"carries":19,"carries_crossed_gain_line":16,"carries_kick_return":6,"carries_kick_return_metres":80,"carries_not_made_gain_line":3,"carries_one_out_drive":1,"carries_one_out_drive_metres":0,"carries_pick_and_go":1,"carries_pick_and_go_metres":6,"carries_support_metres":54,"carry_dominant":9,"carry_neutral":9,"clean_breaks":1,"collection_attacking_catch":1,"conversion_goals":1,"defenders_beaten":5,"dominant_carry_percent":0.47,"goal_kick_percentage":0.5,"handling_error":1,"kick_metres":108,"kicks_from_hand":4,"line_break_assists":1,"metres":172,"minutes_played_total":176,"missed_conversion_goals":1,"missed_tackles":9,"offloads":1,"passes":12,"pen_offs":1,"penalties_conceded":1,"player_id":21818,"player_team_id":5207,"points":7,"post_contact_metres":86,"ruck_arrival":9,"ruck_arrival_attack":8,"ruck_arrival_defence":1,"tackle_offload_allowed":3,"tackles":16,"tackles_success":0.53,"total_games":3,"touches":34,"tries":1,"try_assist":1,"turnovers_conceded":3},"topPlayerStats":{"att_ruck_arrival_effectiveness":{"id":61565,"value":1},"av_gain":{"id":61565,"value":10.5},"av_post_contact_metres":{"id":61565,"value":8.65},"bad_passes":{"id":58096,"value":13},"carries":{"id":58096,"value":183},"carries_crossed_gain_line":{"id":58096,"value":139},"carries_kick_return":{"id":23421,"value":54},"carries_kick_return_metres":{"id":21791,"value":398},"carries_not_made_gain_line":{"id":58096,"value":32},"carries_one_out_drive":{"id":70089,"value":20},"carries_one_out_drive_metres":{"id":70089,"value":92},"carries_pick_and_go":{"id":70089,"value":9},"carries_pick_and_go_metres":{"id":70089,"value":46},"carries_support_metres":{"id":58096,"value":179},"carry_dominant":{"id":58096,"value":59},"carry_ineffective":{"id":58096,"value":14},"carry_neutral":{"id":58096,"value":79},"clean_breaks":{"id":70089,"value":21},"collection_attacking_catch":{"id":70089,"value":16},"def_ruck_arrival_effectiveness":{"id":38476,"value":0.57},"defenders_beaten":{"id":70089,"value":68},"dominant_carry_percent":{"id":43716,"value":0.54},"dominant_tackles":{"id":58096,"value":12},"handling_error":{"id":58096,"value":24},"kick_metres":{"id":21791,"value":2029},"kicks_from_hand":{"id":23421,"value":60},"line_break_assists":{"id":58096,"value":11},"lineout_takes":{"id":21961,"value":6},"lineouts_to_own_player":{"id":23422,"value":6},"lineouts_won":{"id":23422,"value":6},"metres":{"id":58096,"value":1256},"minutes_played_total":{"id":58096,"value":1593},"missed_tackles":{"id":58096,"value":37},"offloads":{"id":58096,"value":25},"passes":{"id":58096,"value":122},"pen_offs":{"id":23422,"value":5},"penalties_conceded":{"id":30956,"value":13},"player_id":{"id":70094,"value":70094},"player_team_id":{"id":24349,"value":19702},"points":{"id":30956,"value":80},"post_contact_metres":{"id":58096,"value":566},"ruck_arrival":{"id":70089,"value":160},"ruck_arrival_attack":{"id":58096,"value":132},"ruck_arrival_defence":{"id":70089,"value":49},"tackle_offload_allowed":{"id":58096,"value":23},"tackle_turnover":{"id":58096,"value":6},"tackles":{"id":70089,"value":100},"tackles_success":{"id":70094,"value":1},"total_games":{"id":58096,"value":20},"touches":{"id":58096,"value":294},"tries":{"id":58096,"value":11},"try_assist":{"id":58096,"value":6},"turnovers_conceded":{"id":58096,"value":38},"turnovers_won":{"id":58096,"value":7},"pen_defs":{"id":70089,"value":10},"retained_kicks_percentage":{"id":23415,"value":0.5},"tackle_penalty_conceded":{"id":70089,"value":4},"tackle_try_saver":{"id":70089,"value":2},"conversion_goals":{"id":30956,"value":8},"goal_kick_percentage":{"id":34135,"value":0.88},"missed_conversion_goals":{"id":30956,"value":4},"missed_penalty_goals":{"id":38660,"value":1},"yellow_cards":{"id":23421,"value":2},"lineout_won_steal":{"id":23415,"value":1},"penalty_goals":{"id":30956,"value":3}}}},"main":{"totalMinsPlayed":176,"main":[{"value":5,"title":"Defenders Beaten"},{"value":4,"title":"Kicks in Play"},{"value":0.53,"title":"Tackles Completed"},{"value":1,"title":"Line Breaks"},{"value":19,"title":"Carries"},{"value":1,"title":"Tries"},{"value":1,"title":"Try Assists"}],"profile":[{"value":"7%","title":"Defenders Beaten","type":1,"key":"defenders_beaten","raw":5,"top":68,"color":"#d24c39"},{"value":"7%","title":"Kicks in Play","type":1,"key":"kicks_from_hand","raw":4,"top":60,"color":"#d24c39"},{"value":"53%","title":"Tackles Completed","type":1,"key":"tackles_success","raw":0.53,"top":1,"color":"#eec845"},{"value":"5%","title":"Line Breaks","type":1,"key":"clean_breaks","raw":1,"top":21,"color":"#d14739"},{"value":"10%","title":"Carries","type":1,"key":"carries","raw":19,"top":183,"color":"#d55438"},{"value":"9%","title":"Tries","type":1,"key":"tries","raw":1,"top":11,"color":"#d35038"},{"value":"17%","title":"Try Assists","type":1,"key":"try_assist","raw":1,"top":6,"color":"#d96636"}]},"group":{"groups":[{"title":"Attack","stats":[{"title":"Points","value":{"value":7,"title":"Points"},"overall":{"value":"9%","title":"Points","type":1,"key":"points","raw":7,"top":80,"color":"#d35038"}},{"title":"Tries","value":{"value":1,"title":"Tries"},"overall":{"value":"9%","title":"Tries","type":1,"key":"tries","raw":1,"top":11,"color":"#d35038"}},{"title":"Line Breaks","value":{"value":1,"title":"Line Breaks"},"overall":{"value":"5%","title":"Line Breaks","type":1,"key":"clean_breaks","raw":1,"top":21,"color":"#d14739"}},{"title":"Carries","value":{"value":19,"title":"Carries"},"overall":{"value":"10%","title":"Carries","type":1,"key":"carries","raw":19,"top":183,"color":"#d55438"}},{"title":"Carries Per Minute","value":{"value":0.11,"title":"Carries Per Minute"},"overall":{"value":"2%","title":"Carries Per Minute","type":1,"key":"carries","raw":0,"top":183,"color":"#cf403a"}},{"title":"Metres Carried","value":{"value":172,"title":"Metres Carried"},"overall":{"value":"14%","title":"Metres Carried","type":1,"key":"metres","raw":172,"top":1256,"color":"#d75e37"}},{"title":"Defenders Beaten","value":{"value":5,"title":"Defenders Beaten"},"overall":{"value":"7%","title":"Defenders Beaten","type":1,"key":"defenders_beaten","raw":5,"top":68,"color":"#d24c39"}},{"title":"Turnovers Won","value":{"value":0,"title":"Turnovers Won"},"overall":{"value":"2%","title":"Turnovers Won","type":1,"key":"turnovers_won","raw":0,"top":7,"color":"#cf403a"}},{"title":"Defenders Beaten","value":{"value":5,"title":"Defenders Beaten"},"overall":{"value":"7%","title":"Defenders Beaten","type":1,"key":"defenders_beaten","raw":5,"top":68,"color":"#d24c39"}},{"title":"Touches","value":{"value":34,"title":"Touches"},"overall":{"value":"12%","title":"Touches","type":1,"key":"touches","raw":34,"top":294,"color":"#d65837"}},{"title":"Post Contact Metres","value":{"value":86,"title":"Post Contact Metres"},"overall":{"value":"15%","title":"Post Contact Metres","type":1,"key":"post_contact_metres","raw":86,"top":566,"color":"#d86137"}}]},{"title":"Defence","stats":[{"title":"Tackles Made","value":{"value":16,"title":"Tackles Made"},"overall":{"value":"16%","title":"Tackles Made","type":1,"key":"tackles","raw":16,"top":100,"color":"#d96437"}},{"title":"Tackles Completed","value":{"value":0.53,"title":"Tackles Completed"},"overall":{"value":"53%","title":"Tackles Completed","type":1,"key":"tackles_success","raw":0.53,"top":1,"color":"#eec845"}},{"title":"Dominant Tackles","value":{"value":0,"title":"Dominant Tackles"},"overall":{"value":"2%","title":"Dominant Tackles","type":1,"key":"dominant_tackles","raw":0,"top":12,"color":"#cf403a"}},{"title":"Tackles Per Minute","value":{"value":0.09,"title":"Tackles Per Minute"},"overall":{"value":"2%","title":"Tackles Per Minute","type":1,"key":"tackles","raw":0,"top":100,"color":"#cf403a"}},{"title":"Turnovers Won","value":{"value":0,"title":"Turnovers Won"},"overall":{"value":"2%","title":"Turnovers Won","type":1,"key":"turnovers_won","raw":0,"top":7,"color":"#cf403a"}},{"title":"Ruck Arrival Effectiveness","value":{"value":0,"title":"Ruck Arrival Effectiveness"},"overall":{"value":"2%","title":"Ruck Arrival Effectiveness","type":1,"key":"def_ruck_arrival_effectiveness","raw":0,"top":0.57,"color":"#cf403a"}}]},{"title":"Passing","stats":[{"title":"Try Assists","value":{"value":1,"title":"Try Assists"},"overall":{"value":"17%","title":"Try Assists","type":1,"key":"try_assist","raw":1,"top":6,"color":"#d96636"}},{"title":"Successful Passes","value":{"value":12,"title":"Successful Passes"},"overall":{"value":"10%","title":"Successful Passes","type":1,"key":"passes","raw":12,"top":122,"color":"#d55438"}},{"title":"Bad Passes","value":{"value":0,"title":"Bad Passes"},"overall":{"value":"2%","title":"Bad Passes","type":1,"key":"bad_passes","raw":0,"top":13,"color":"#cf403a"}},{"title":"Pass Accuracy","value":{"value":"0%","title":"Pass Accuracy"},"overall":{"value":"100%","title":"Pass Accuracy","type":1,"key":"pass_accuracy","raw":"0%","top":0,"color":"#479d6c"}}]},{"title":"Kicking","stats":[{"title":"Successful Penalties","value":{"value":0,"title":"Successful Penalties"},"overall":{"value":"2%","title":"Successful Penalties","type":1,"key":"penalty_goals","raw":0,"top":3,"color":"#cf403a"}},{"title":"Successful Conversions","value":{"value":1,"title":"Successful Conversions"},"overall":{"value":"13%","title":"Successful Conversions","type":1,"key":"conversion_goals","raw":1,"top":8,"color":"#d75c37"}},{"title":"Kicks in Play","value":{"value":4,"title":"Kicks in Play"},"overall":{"value":"7%","title":"Kicks in Play","type":1,"key":"kicks_from_hand","raw":4,"top":60,"color":"#d24c39"}},{"title":"Drop Goals","value":{"value":0,"title":"Drop Goals"},"overall":{"value":"2%","title":"Drop Goals","type":1,"key":"drop_goals_converted","raw":0,"top":0,"color":"#ce3d3b"}},{"title":"Goals Converted","value":{"value":1,"title":"Goals Converted"},"overall":{"value":"2%","title":"Goals Converted","type":1,"key":"goal_kicks","raw":0,"top":0,"color":"#ce3d3b"}}]},{"title":"Discipline","stats":[{"title":"Penalties Conceded","value":{"value":1,"title":"Penalties Conceded"},"overall":{"value":"8%","title":"Penalties Conceded","type":1,"key":"penalties_conceded","raw":1,"top":13,"color":"#d34e38"}},{"title":"Yellow Cards","value":{"value":0,"title":"Yellow Cards"},"overall":{"value":"2%","title":"Yellow Cards","type":1,"key":"yellow_cards","raw":0,"top":2,"color":"#cf403a"}},{"title":"Red Cards","value":{"value":0,"title":"Red Cards"},"overall":{"value":"2%","title":"Red Cards","type":1,"key":"red_cards","raw":0,"top":0,"color":"#ce3d3b"}}]}]}}]
[{"title":"Super Rugby Pacific","logo":"Super Rugby Pacific","id":"205","games":[{"title":"Sharks vs Chiefs","date":"19 May 2018","dateSmall":"19 May","time":1526760300,"compLogo":"https:\/\/eu-cdn.rugbypass.com\/webp-images\/images\/competitions\/logos\/circle\/super-rugby.png.webp?maxw=72&v=1762927429","compTitle":"Super Rugby Pacific","draw":false,"opposition":{"name":"Sharks","logo":"https:\/\/eu-cdn.rugbypass.com\/webp-images\/images\/team-images\/logos\/png\/412.png.webp?maxw=72&v=1787126516"},"win":false,"stats":{"mins":13,"tries":0,"yellow_cards":0,"red_cards":0,"conversions":0}}]},{"title":"Japan Rugby League One","logo":"Japan Rugby League One","id":"421","games":[{"title":"Mitsubishi Sagamihara Dynaboars vs Urayasu D-Rocks","date":"10 May 2026","dateSmall":"10 May","time":1778416200,"compLogo":"https:\/\/eu-cdn.rugbypass.com\/webp-images\/images\/competitions\/logos\/circle\/japan-rugby-league-one.png.webp?maxw=72&v=1762927428","compTitle":"Japan Rugby League One","draw":false,"opposition":{"name":"Mitsubishi Sagamihara Dynaboars","logo":"https:\/\/eu-cdn.rugbypass.com\/webp-images\/images\/team-images\/logos\/png\/594.png.webp?maxw=72&v=1762927735"},"win":true,"stats":{"mins":3,"tries":0,"yellow_cards":0,"red_cards":0,"conversions":0}},{"title":"Urayasu D-Rocks vs Saitama Wild Knights","date":"1 May 2026","dateSmall":"1 May","time":1777654800,"compLogo":"https:\/\/eu-cdn.rugbypass.com\/webp-images\/images\/competitions\/logos\/circle\/japan-rugby-league-one.png.webp?maxw=72&v=1762927428","compTitle":"Japan Rugby League One","draw":false,"opposition":{"name":"Saitama Wild Knights","logo":"https:\/\/eu-cdn.rugbypass.com\/webp-images\/images\/team-images\/logos\/png\/19567.png.webp?maxw=72&v=1762927734"},"win":true,"stats":{"mins":13,"tries":0,"yellow_cards":0,"red_cards":0,"conversions":0}},{"title":"Urayasu D-Rocks vs Shizuoka BlueRevs","date":"24 Apr 2026","dateSmall":"24 Apr","time":1777050000,"compLogo":"https:\/\/eu-cdn.rugbypass.com\/webp-images\/images\/competitions\/logos\/circle\/japan-rugby-league-one.png.webp?maxw=72&v=1762927428","compTitle":"Japan Rugby League One","draw":false,"opposition":{"name":"Shizuoka BlueRevs","logo":"https:\/\/eu-cdn.rugbypass.com\/webp-images\/images\/team-images\/logos\/png\/5212.png.webp?maxw=72&v=1762927735"},"win":false,"stats":{"mins":80,"tries":0,"yellow_cards":0,"red_cards":0,"conversions":2}},{"title":"Yokohama Canon Eagles vs Urayasu D-Rocks","date":"18 Apr 2026","dateSmall":"18 Apr","time":1776510300,"compLogo":"https:\/\/eu-cdn.rugbypass.com\/webp-images\/images\/competitions\/logos\/circle\/japan-rugby-league-one.png.webp?maxw=72&v=1762927428","compTitle":"Japan Rugby League One","draw":false,"opposition":{"name":"Urayasu D-Rocks","logo":"https:\/\/eu-cdn.rugbypass.com\/webp-images\/images\/team-images\/logos\/png\/10005207.png.webp?maxw=72&v=1762927733"},"win":true,"stats":{"mins":80,"tries":0,"yellow_cards":0,"red_cards":0,"conversions":0}},{"title":"Yokohama Canon Eagles vs Urayasu D-Rocks","date":"18 Apr 2026","dateSmall":"18 Apr","time":1776510300,"compLogo":"https:\/\/eu-cdn.rugbypass.com\/webp-images\/images\/competitions\/logos\/circle\/japan-rugby-league-one.png.webp?maxw=72&v=1762927428","compTitle":"Japan Rugby League One","draw":false,"opposition":{"name":"Yokohama Canon Eagles","logo":"https:\/\/eu-cdn.rugbypass.com\/webp-images\/images\/team-images\/logos\/png\/5200.png.webp?maxw=72&v=1762927735"},"win":false,"stats":{"mins":80,"tries":0,"yellow_cards":0,"red_cards":0,"conversions":0}},{"title":"Toshiba Brave Lupus Tokyo vs Urayasu D-Rocks","date":"5 Apr 2026","dateSmall":"5 Apr","time":1775386800,"compLogo":"https:\/\/eu-cdn.rugbypass.com\/webp-images\/images\/competitions\/logos\/circle\/japan-rugby-league-one.png.webp?maxw=72&v=1762927428","compTitle":"Japan Rugby League One","draw":false,"opposition":{"name":"Toshiba Brave Lupus Tokyo","logo":"https:\/\/eu-cdn.rugbypass.com\/webp-images\/images\/team-images\/logos\/png\/19702.png.webp?maxw=72&v=1762927734"},"win":false,"stats":{"mins":63,"tries":1,"yellow_cards":0,"red_cards":0,"conversions":0}},{"title":"Urayasu D-Rocks vs Kubota Spears","date":"21 Mar 2026","dateSmall":"21 Mar","time":1774096200,"compLogo":"https:\/\/eu-cdn.rugbypass.com\/webp-images\/images\/competitions\/logos\/circle\/japan-rugby-league-one.png.webp?maxw=72&v=1762927428","compTitle":"Japan Rugby League One","draw":false,"opposition":{"name":"Kubota Spears","logo":"https:\/\/eu-cdn.rugbypass.com\/webp-images\/images\/team-images\/logos\/png\/5204.png.webp?maxw=72&v=1762927735"},"win":false,"stats":{"mins":51,"tries":0,"yellow_cards":0,"red_cards":0,"conversions":0}},{"title":"Toyota Verblitz vs Urayasu D-Rocks","date":"15 Mar 2026","dateSmall":"15 Mar","time":1773576300,"compLogo":"https:\/\/eu-cdn.rugbypass.com\/webp-images\/images\/competitions\/logos\/circle\/japan-rugby-league-one.png.webp?maxw=72&v=1762927428","compTitle":"Japan Rugby League One","draw":false,"opposition":{"name":"Toyota Verblitz","logo":"https:\/\/eu-cdn.rugbypass.com\/webp-images\/images\/team-images\/logos\/png\/5211.png.webp?maxw=72&v=1762927735"},"win":false,"stats":{"mins":64,"tries":0,"yellow_cards":0,"red_cards":0,"conversions":0}},{"title":"Mie Honda Heat vs Urayasu D-Rocks","date":"24 Jan 2026","dateSmall":"24 Jan","time":1769256000,"compLogo":"https:\/\/eu-cdn.rugbypass.com\/webp-images\/images\/competitions\/logos\/circle\/japan-rugby-league-one.png.webp?maxw=72&v=1762927428","compTitle":"Japan Rugby League One","draw":false,"opposition":{"name":"Mie Honda Heat","logo":"https:\/\/eu-cdn.rugbypass.com\/webp-images\/images\/team-images\/logos\/png\/10005202.png.webp?maxw=72&v=1762927733"},"win":false,"stats":{"mins":60,"tries":0,"yellow_cards":0,"red_cards":0,"conversions":0}},{"title":"Urayasu D-Rocks vs Toshiba Brave Lupus Tokyo","date":"17 Jan 2026","dateSmall":"17 Jan","time":1768655100,"compLogo":"https:\/\/eu-cdn.rugbypass.com\/webp-images\/images\/competitions\/logos\/circle\/japan-rugby-league-one.png.webp?maxw=72&v=1762927428","compTitle":"Japan Rugby League One","draw":false,"opposition":{"name":"Toshiba Brave Lupus Tokyo","logo":"https:\/\/eu-cdn.rugbypass.com\/webp-images\/images\/team-images\/logos\/png\/19702.png.webp?maxw=72&v=1762927734"},"win":false,"stats":{"mins":7,"tries":0,"yellow_cards":0,"red_cards":0,"conversions":0}},{"title":"Urayasu D-Rocks vs Saitama Wild Knights","date":"29 Mar 2025","dateSmall":"29 Mar","time":1743242700,"compLogo":"https:\/\/eu-cdn.rugbypass.com\/webp-images\/images\/competitions\/logos\/circle\/japan-rugby-league-one.png.webp?maxw=72&v=1762927428","compTitle":"Japan Rugby League One","draw":false,"opposition":{"name":"Saitama Wild Knights","logo":"https:\/\/eu-cdn.rugbypass.com\/webp-images\/images\/team-images\/logos\/png\/19567.png.webp?maxw=72&v=1762927734"},"win":false,"stats":{"mins":41,"tries":0,"yellow_cards":0,"red_cards":0,"conversions":0}},{"title":"Tokyo Sungoliath vs Urayasu D-Rocks","date":"23 Feb 2025","dateSmall":"23 Feb","time":1740312300,"compLogo":"https:\/\/eu-cdn.rugbypass.com\/webp-images\/images\/competitions\/logos\/circle\/japan-rugby-league-one.png.webp?maxw=72&v=1762927428","compTitle":"Japan Rugby League One","draw":false,"opposition":{"name":"Tokyo Sungoliath","logo":"https:\/\/eu-cdn.rugbypass.com\/webp-images\/images\/team-images\/logos\/png\/5209.png.webp?maxw=72&v=1762927735"},"win":false,"stats":{"mins":72,"tries":1,"yellow_cards":0,"red_cards":0,"conversions":0}},{"title":"Urayasu D-Rocks vs Shizuoka BlueRevs","date":"28 Dec 2024","dateSmall":"28 Dec","time":1735387500,"compLogo":"https:\/\/eu-cdn.rugbypass.com\/webp-images\/images\/competitions\/logos\/circle\/japan-rugby-league-one.png.webp?maxw=72&v=1762927428","compTitle":"Japan Rugby League One","draw":false,"opposition":{"name":"Shizuoka BlueRevs","logo":"https:\/\/eu-cdn.rugbypass.com\/webp-images\/images\/team-images\/logos\/png\/5212.png.webp?maxw=72&v=1762927735"},"win":false,"stats":{"mins":63,"tries":0,"yellow_cards":0,"red_cards":0,"conversions":1}},{"title":"Yokohama Canon Eagles vs Tokyo Sungoliath","date":"19 May 2023","dateSmall":"19 May","time":1684515600,"compLogo":"https:\/\/eu-cdn.rugbypass.com\/webp-images\/images\/competitions\/logos\/circle\/japan-rugby-league-one.png.webp?maxw=72&v=1762927428","compTitle":"Japan Rugby League One","draw":false,"opposition":{"name":"Tokyo Sungoliath","logo":"https:\/\/eu-cdn.rugbypass.com\/webp-images\/images\/team-images\/logos\/png\/5209.png.webp?maxw=72&v=1762927735"},"win":true,"stats":{"mins":71,"tries":0,"yellow_cards":0,"red_cards":0,"conversions":0}}]},{"title":"Hilux NPC","logo":"Hilux NPC","id":"208","games":[{"title":"Counties Manukau vs Canterbury","date":"13 Oct 2018","dateSmall":"13 Oct","time":1539437700,"compLogo":"https:\/\/eu-cdn.rugbypass.com\/webp-images\/images\/competitions\/logos\/circle\/bunnings-npc.png.webp?maxw=72&v=1784199519","compTitle":"Hilux NPC","draw":false,"opposition":{"name":"Canterbury","logo":"https:\/\/eu-cdn.rugbypass.com\/webp-images\/images\/team-images\/logos\/png\/503.png.webp?maxw=72&v=1783073786"},"win":false,"stats":{"mins":80,"tries":0,"yellow_cards":0,"red_cards":0,"conversions":2}},{"title":"North Harbour vs Counties Manukau","date":"6 Oct 2018","dateSmall":"6 Oct","time":1538823900,"compLogo":"https:\/\/eu-cdn.rugbypass.com\/webp-images\/images\/competitions\/logos\/circle\/bunnings-npc.png.webp?maxw=72&v=1784199519","compTitle":"Hilux NPC","draw":false,"opposition":{"name":"North Harbour","logo":"https:\/\/eu-cdn.rugbypass.com\/webp-images\/images\/team-images\/logos\/png\/507.png.webp?maxw=72&v=1762927735"},"win":false,"stats":{"mins":19,"tries":0,"yellow_cards":0,"red_cards":0,"conversions":0}},{"title":"Counties Manukau vs Northland","date":"30 Sep 2018","dateSmall":"30 Sep","time":1538303700,"compLogo":"https:\/\/eu-cdn.rugbypass.com\/webp-images\/images\/competitions\/logos\/circle\/bunnings-npc.png.webp?maxw=72&v=1784199519","compTitle":"Hilux NPC","draw":false,"opposition":{"name":"Northland","logo":"https:\/\/eu-cdn.rugbypass.com\/webp-images\/images\/team-images\/logos\/png\/508.png.webp?maxw=72&v=1762927735"},"win":false,"stats":{"mins":65,"tries":0,"yellow_cards":0,"red_cards":0,"conversions":1}},{"title":"Tasman vs Counties Manukau","date":"23 Sep 2018","dateSmall":"23 Sep","time":1537693500,"compLogo":"https:\/\/eu-cdn.rugbypass.com\/webp-images\/images\/competitions\/logos\/circle\/bunnings-npc.png.webp?maxw=72&v=1784199519","compTitle":"Hilux NPC","draw":false,"opposition":{"name":"Tasman Mako","logo":"https:\/\/eu-cdn.rugbypass.com\/webp-images\/images\/team-images\/logos\/png\/512.png.webp?maxw=72&v=1762927735"},"win":false,"stats":{"mins":28,"tries":0,"yellow_cards":0,"red_cards":0,"conversions":2}},{"title":"Counties Manukau vs Wellington","date":"15 Sep 2018","dateSmall":"15 Sep","time":1537002300,"compLogo":"https:\/\/eu-cdn.rugbypass.com\/webp-images\/images\/competitions\/logos\/circle\/bunnings-npc.png.webp?maxw=72&v=1784199519","compTitle":"Hilux NPC","draw":false,"opposition":{"name":"Wellington","logo":"https:\/\/eu-cdn.rugbypass.com\/webp-images\/images\/team-images\/logos\/png\/514.png.webp?maxw=72&v=1762927735"},"win":false,"stats":{"mins":80,"tries":0,"yellow_cards":0,"red_cards":0,"conversions":0}},{"title":"Southland vs Counties Manukau","date":"8 Sep 2018","dateSmall":"8 Sep","time":1536397500,"compLogo":"https:\/\/eu-cdn.rugbypass.com\/webp-images\/images\/competitions\/logos\/circle\/bunnings-npc.png.webp?maxw=72&v=1784199519","compTitle":"Hilux NPC","draw":false,"opposition":{"name":"Southland Stags","logo":"https:\/\/eu-cdn.rugbypass.com\/webp-images\/images\/team-images\/logos\/png\/510.png.webp?maxw=72&v=1762927735"},"win":true,"stats":{"mins":80,"tries":1,"yellow_cards":0,"red_cards":0,"conversions":1}},{"title":"Hawkes Bay vs Counties Manukau","date":"2 Sep 2018","dateSmall":"2 Sep","time":1535879100,"compLogo":"https:\/\/eu-cdn.rugbypass.com\/webp-images\/images\/competitions\/logos\/circle\/bunnings-npc.png.webp?maxw=72&v=1784199519","compTitle":"Hilux NPC","draw":false,"opposition":{"name":"Hawkes Bay","logo":"https:\/\/eu-cdn.rugbypass.com\/webp-images\/images\/team-images\/logos\/png\/505.png.webp?maxw=72&v=1762927735"},"win":true,"stats":{"mins":80,"tries":0,"yellow_cards":0,"red_cards":0,"conversions":0}},{"title":"Counties Manukau vs Taranaki","date":"29 Aug 2018","dateSmall":"29 Aug","time":1535553300,"compLogo":"https:\/\/eu-cdn.rugbypass.com\/webp-images\/images\/competitions\/logos\/circle\/bunnings-npc.png.webp?maxw=72&v=1784199519","compTitle":"Hilux NPC","draw":false,"opposition":{"name":"Taranaki Bulls","logo":"https:\/\/eu-cdn.rugbypass.com\/webp-images\/images\/team-images\/logos\/png\/511.png.webp?maxw=72&v=1762927735"},"win":false,"stats":{"mins":80,"tries":0,"yellow_cards":0,"red_cards":0,"conversions":1}},{"title":"Counties Manukau vs Bay Of Plenty","date":"23 Aug 2018","dateSmall":"23 Aug","time":1535034900,"compLogo":"https:\/\/eu-cdn.rugbypass.com\/webp-images\/images\/competitions\/logos\/circle\/bunnings-npc.png.webp?maxw=72&v=1784199519","compTitle":"Hilux NPC","draw":false,"opposition":{"name":"Bay of Plenty","logo":"https:\/\/eu-cdn.rugbypass.com\/webp-images\/images\/team-images\/logos\/png\/502.png.webp?maxw=72&v=1762927735"},"win":false,"stats":{"mins":80,"tries":0,"yellow_cards":0,"red_cards":0,"conversions":0}},{"title":"Counties Manukau vs Tasman","date":"14 Oct 2017","dateSmall":"14 Oct","time":1507988100,"compLogo":"https:\/\/eu-cdn.rugbypass.com\/webp-images\/images\/competitions\/logos\/circle\/bunnings-npc.png.webp?maxw=72&v=1784199519","compTitle":"Hilux NPC","draw":false,"opposition":{"name":"Tasman Mako","logo":"https:\/\/eu-cdn.rugbypass.com\/webp-images\/images\/team-images\/logos\/png\/512.png.webp?maxw=72&v=1762927735"},"win":true,"stats":{"mins":80,"tries":0,"yellow_cards":0,"red_cards":0,"conversions":2}},{"title":"Manawatu vs Counties Manukau","date":"5 Oct 2017","dateSmall":"5 Oct","time":1507210500,"compLogo":"https:\/\/eu-cdn.rugbypass.com\/webp-images\/images\/competitions\/logos\/circle\/bunnings-npc.png.webp?maxw=72&v=1784199519","compTitle":"Hilux NPC","draw":false,"opposition":{"name":"Manawatu","logo":"https:\/\/eu-cdn.rugbypass.com\/webp-images\/images\/team-images\/logos\/png\/506.png.webp?maxw=72&v=1762927735"},"win":true,"stats":{"mins":80,"tries":0,"yellow_cards":0,"red_cards":0,"conversions":0}},{"title":"Counties Manukau vs Northland","date":"1 Oct 2017","dateSmall":"1 Oct","time":1506854100,"compLogo":"https:\/\/eu-cdn.rugbypass.com\/webp-images\/images\/competitions\/logos\/circle\/bunnings-npc.png.webp?maxw=72&v=1784199519","compTitle":"Hilux NPC","draw":false,"opposition":{"name":"Northland","logo":"https:\/\/eu-cdn.rugbypass.com\/webp-images\/images\/team-images\/logos\/png\/508.png.webp?maxw=72&v=1762927735"},"win":true,"stats":{"mins":30,"tries":0,"yellow_cards":0,"red_cards":0,"conversions":1}},{"title":"Bay Of Plenty vs Counties Manukau","date":"24 Sep 2017","dateSmall":"24 Sep","time":1506242100,"compLogo":"https:\/\/eu-cdn.rugbypass.com\/webp-images\/images\/competitions\/logos\/circle\/bunnings-npc.png.webp?maxw=72&v=1784199519","compTitle":"Hilux NPC","draw":true,"opposition":{"name":"Bay of Plenty","logo":"https:\/\/eu-cdn.rugbypass.com\/webp-images\/images\/team-images\/logos\/png\/502.png.webp?maxw=72&v=1762927735"},"win":false,"stats":{"mins":9,"tries":0,"yellow_cards":0,"red_cards":0,"conversions":1}},{"title":"Counties Manukau vs Hawkes Bay","date":"17 Sep 2017","dateSmall":"17 Sep","time":1505640900,"compLogo":"https:\/\/eu-cdn.rugbypass.com\/webp-images\/images\/competitions\/logos\/circle\/bunnings-npc.png.webp?maxw=72&v=1784199519","compTitle":"Hilux NPC","draw":false,"opposition":{"name":"Hawkes Bay","logo":"https:\/\/eu-cdn.rugbypass.com\/webp-images\/images\/team-images\/logos\/png\/505.png.webp?maxw=72&v=1762927735"},"win":true,"stats":{"mins":30,"tries":0,"yellow_cards":0,"red_cards":0,"conversions":1}},{"title":"Canterbury vs Counties Manukau","date":"13 Sep 2017","dateSmall":"13 Sep","time":1505313300,"compLogo":"https:\/\/eu-cdn.rugbypass.com\/webp-images\/images\/competitions\/logos\/circle\/bunnings-npc.png.webp?maxw=72&v=1784199519","compTitle":"Hilux NPC","draw":false,"opposition":{"name":"Canterbury","logo":"https:\/\/eu-cdn.rugbypass.com\/webp-images\/images\/team-images\/logos\/png\/503.png.webp?maxw=72&v=1783073786"},"win":false,"stats":{"mins":80,"tries":0,"yellow_cards":0,"red_cards":0,"conversions":0}},{"title":"Counties Manukau vs North Harbour","date":"7 Sep 2017","dateSmall":"7 Sep","time":1504794900,"compLogo":"https:\/\/eu-cdn.rugbypass.com\/webp-images\/images\/competitions\/logos\/circle\/bunnings-npc.png.webp?maxw=72&v=1784199519","compTitle":"Hilux NPC","draw":false,"opposition":{"name":"North Harbour","logo":"https:\/\/eu-cdn.rugbypass.com\/webp-images\/images\/team-images\/logos\/png\/507.png.webp?maxw=72&v=1762927735"},"win":false,"stats":{"mins":80,"tries":1,"yellow_cards":0,"red_cards":0,"conversions":1}},{"title":"Taranaki vs Counties Manukau","date":"2 Sep 2017","dateSmall":"2 Sep","time":1504362900,"compLogo":"https:\/\/eu-cdn.rugbypass.com\/webp-images\/images\/competitions\/logos\/circle\/bunnings-npc.png.webp?maxw=72&v=1784199519","compTitle":"Hilux NPC","draw":false,"opposition":{"name":"Taranaki Bulls","logo":"https:\/\/eu-cdn.rugbypass.com\/webp-images\/images\/team-images\/logos\/png\/511.png.webp?maxw=72&v=1762927735"},"win":false,"stats":{"mins":80,"tries":0,"yellow_cards":0,"red_cards":0,"conversions":0}},{"title":"Waikato vs Counties Manukau","date":"25 Aug 2017","dateSmall":"25 Aug","time":1503672300,"compLogo":"https:\/\/eu-cdn.rugbypass.com\/webp-images\/images\/competitions\/logos\/circle\/bunnings-npc.png.webp?maxw=72&v=1784199519","compTitle":"Hilux NPC","draw":false,"opposition":{"name":"Waikato","logo":"https:\/\/eu-cdn.rugbypass.com\/webp-images\/images\/team-images\/logos\/png\/513.png.webp?maxw=72&v=1762927735"},"win":false,"stats":{"mins":80,"tries":0,"yellow_cards":0,"red_cards":0,"conversions":0}},{"title":"Counties Manukau vs Auckland","date":"19 Aug 2017","dateSmall":"19 Aug","time":1503153300,"compLogo":"https:\/\/eu-cdn.rugbypass.com\/webp-images\/images\/competitions\/logos\/circle\/bunnings-npc.png.webp?maxw=72&v=1784199519","compTitle":"Hilux NPC","draw":false,"opposition":{"name":"Auckland","logo":"https:\/\/eu-cdn.rugbypass.com\/webp-images\/images\/team-images\/logos\/png\/501.png.webp?maxw=72&v=1762927735"},"win":true,"stats":{"mins":80,"tries":0,"yellow_cards":0,"red_cards":0,"conversions":0}},{"title":"Canterbury vs Counties Manukau","date":"23 Oct 2016","dateSmall":"23 Oct","time":1477209900,"compLogo":"https:\/\/eu-cdn.rugbypass.com\/webp-images\/images\/competitions\/logos\/circle\/bunnings-npc.png.webp?maxw=72&v=1784199519","compTitle":"Hilux NPC","draw":false,"opposition":{"name":"Canterbury","logo":"https:\/\/eu-cdn.rugbypass.com\/webp-images\/images\/team-images\/logos\/png\/503.png.webp?maxw=72&v=1783073786"},"win":false,"stats":{"mins":80,"tries":0,"yellow_cards":0,"red_cards":0,"conversions":1}},{"title":"Counties Manukau vs Canterbury","date":"15 Oct 2016","dateSmall":"15 Oct","time":1476520500,"compLogo":"https:\/\/eu-cdn.rugbypass.com\/webp-images\/images\/competitions\/logos\/circle\/bunnings-npc.png.webp?maxw=72&v=1784199519","compTitle":"Hilux NPC","draw":false,"opposition":{"name":"Canterbury","logo":"https:\/\/eu-cdn.rugbypass.com\/webp-images\/images\/team-images\/logos\/png\/503.png.webp?maxw=72&v=1783073786"},"win":true,"stats":{"mins":80,"tries":0,"yellow_cards":0,"red_cards":0,"conversions":3}},{"title":"Otago vs Counties Manukau","date":"8 Oct 2016","dateSmall":"8 Oct","time":1475926500,"compLogo":"https:\/\/eu-cdn.rugbypass.com\/webp-images\/images\/competitions\/logos\/circle\/bunnings-npc.png.webp?maxw=72&v=1784199519","compTitle":"Hilux NPC","draw":false,"opposition":{"name":"Otago","logo":"https:\/\/eu-cdn.rugbypass.com\/webp-images\/images\/team-images\/logos\/png\/509.png.webp?maxw=72&v=1788496666"},"win":true,"stats":{"mins":80,"tries":0,"yellow_cards":0,"red_cards":0,"conversions":0}},{"title":"Tasman vs Counties Manukau","date":"29 Sep 2016","dateSmall":"29 Sep","time":1475156100,"compLogo":"https:\/\/eu-cdn.rugbypass.com\/webp-images\/images\/competitions\/logos\/circle\/bunnings-npc.png.webp?maxw=72&v=1784199519","compTitle":"Hilux NPC","draw":false,"opposition":{"name":"Tasman Mako","logo":"https:\/\/eu-cdn.rugbypass.com\/webp-images\/images\/team-images\/logos\/png\/512.png.webp?maxw=72&v=1762927735"},"win":false,"stats":{"mins":80,"tries":0,"yellow_cards":0,"red_cards":0,"conversions":0}},{"title":"Counties Manukau vs Waikato","date":"23 Sep 2016","dateSmall":"23 Sep","time":1474641300,"compLogo":"https:\/\/eu-cdn.rugbypass.com\/webp-images\/images\/competitions\/logos\/circle\/bunnings-npc.png.webp?maxw=72&v=1784199519","compTitle":"Hilux NPC","draw":false,"opposition":{"name":"Waikato","logo":"https:\/\/eu-cdn.rugbypass.com\/webp-images\/images\/team-images\/logos\/png\/513.png.webp?maxw=72&v=1762927735"},"win":true,"stats":{"mins":80,"tries":0,"yellow_cards":0,"red_cards":0,"conversions":0}},{"title":"Auckland vs Counties Manukau","date":"18 Sep 2016","dateSmall":"18 Sep","time":1474191300,"compLogo":"https:\/\/eu-cdn.rugbypass.com\/webp-images\/images\/competitions\/logos\/circle\/bunnings-npc.png.webp?maxw=72&v=1784199519","compTitle":"Hilux NPC","draw":false,"opposition":{"name":"Auckland","logo":"https:\/\/eu-cdn.rugbypass.com\/webp-images\/images\/team-images\/logos\/png\/501.png.webp?maxw=72&v=1762927735"},"win":true,"stats":{"mins":80,"tries":0,"yellow_cards":0,"red_cards":0,"conversions":0}},{"title":"Counties Manukau vs Taranaki","date":"14 Sep 2016","dateSmall":"14 Sep","time":1473863700,"compLogo":"https:\/\/eu-cdn.rugbypass.com\/webp-images\/images\/competitions\/logos\/circle\/bunnings-npc.png.webp?maxw=72&v=1784199519","compTitle":"Hilux NPC","draw":false,"opposition":{"name":"Taranaki Bulls","logo":"https:\/\/eu-cdn.rugbypass.com\/webp-images\/images\/team-images\/logos\/png\/511.png.webp?maxw=72&v=1762927735"},"win":false,"stats":{"mins":80,"tries":0,"yellow_cards":0,"red_cards":0,"conversions":0}},{"title":"Counties Manukau vs Wellington","date":"9 Sep 2016","dateSmall":"9 Sep","time":1473432300,"compLogo":"https:\/\/eu-cdn.rugbypass.com\/webp-images\/images\/competitions\/logos\/circle\/bunnings-npc.png.webp?maxw=72&v=1784199519","compTitle":"Hilux NPC","draw":false,"opposition":{"name":"Wellington","logo":"https:\/\/eu-cdn.rugbypass.com\/webp-images\/images\/team-images\/logos\/png\/514.png.webp?maxw=72&v=1762927735"},"win":false,"stats":{"mins":80,"tries":2,"yellow_cards":0,"red_cards":0,"conversions":0}},{"title":"Hawkes Bay vs Counties Manukau","date":"1 Sep 2016","dateSmall":"1 Sep","time":1472740500,"compLogo":"https:\/\/eu-cdn.rugbypass.com\/webp-images\/images\/competitions\/logos\/circle\/bunnings-npc.png.webp?maxw=72&v=1784199519","compTitle":"Hilux NPC","draw":false,"opposition":{"name":"Hawkes Bay","logo":"https:\/\/eu-cdn.rugbypass.com\/webp-images\/images\/team-images\/logos\/png\/505.png.webp?maxw=72&v=1762927735"},"win":true,"stats":{"mins":80,"tries":1,"yellow_cards":0,"red_cards":0,"conversions":0}},{"title":"Counties Manukau vs Bay Of Plenty","date":"28 Aug 2016","dateSmall":"28 Aug","time":1472384100,"compLogo":"https:\/\/eu-cdn.rugbypass.com\/webp-images\/images\/competitions\/logos\/circle\/bunnings-npc.png.webp?maxw=72&v=1784199519","compTitle":"Hilux NPC","draw":false,"opposition":{"name":"Bay of Plenty","logo":"https:\/\/eu-cdn.rugbypass.com\/webp-images\/images\/team-images\/logos\/png\/502.png.webp?maxw=72&v=1762927735"},"win":true,"stats":{"mins":80,"tries":0,"yellow_cards":0,"red_cards":0,"conversions":0}},{"title":"North Harbour vs Counties Manukau","date":"18 Aug 2016","dateSmall":"18 Aug","time":1471530900,"compLogo":"https:\/\/eu-cdn.rugbypass.com\/webp-images\/images\/competitions\/logos\/circle\/bunnings-npc.png.webp?maxw=72&v=1784199519","compTitle":"Hilux NPC","draw":false,"opposition":{"name":"North Harbour","logo":"https:\/\/eu-cdn.rugbypass.com\/webp-images\/images\/team-images\/logos\/png\/507.png.webp?maxw=72&v=1762927735"},"win":false,"stats":{"mins":36,"tries":0,"yellow_cards":0,"red_cards":0,"conversions":0}}]}]
Luteru Laulala Stats
Stats compared to other Outside Backs
![]() {{selectedCompetition.competition.name}} {{selectedCompetition.competition.season.label}}
{{selectedCompetition.competition.name}} {{selectedCompetition.competition.season.label}} -
![]() {{item.competition.name}} {{item.competition.season.label}}
{{item.competition.name}} {{item.competition.season.label}}
{{graphStats[0].value}}
{{graphStats[0].title}}
{{graphStats[1].value}}
{{graphStats[1].title}}
{{graphStats[2].title}}
{{graphStats[2].value}}
{{graphStats[3].title}}
{{graphStats[3].value}}
{{graphStats[4].title}}
{{graphStats[4].value}}
{{graphStats[5].value}}
{{graphStats[5].title}}
Luteru Laulala Stats
Stats compared to other Outside Backs
{{item.title}}
{{item.value}}
Match Stats
![]() {{selectedMatchesComp}}
{{selectedMatchesComp}} - All
-
![]() {{item.title}}
{{item.title}}
10 May 2026
10 May
W
v

Mitsubishi Sagamihara Dynaboars
1 May 2026
1 May
W
v

Saitama Wild Knights
24 Apr 2026
24 Apr
L
v

Shizuoka BlueRevs
18 Apr 2026
18 Apr
W
v

Urayasu D-Rocks
18 Apr 2026
18 Apr
L
v

Yokohama Canon Eagles
5 Apr 2026
5 Apr
L
v

Toshiba Brave Lupus Tokyo
21 Mar 2026
21 Mar
L
v

Kubota Spears
15 Mar 2026
15 Mar
L
v

Toyota Verblitz
24 Jan 2026
24 Jan
L
v

Mie Honda Heat
17 Jan 2026
17 Jan
L
v
Toshiba Brave Lupus Tokyo
{{game.date}}
{{game.dateSmall}}
W L
v
![]()
{{game.stats.mins}}
{{game.stats.tries}}
{{game.stats.conversions}}
{{game.stats.yellow_cards}}
{{game.stats.red_cards}}
Luteru Laulala Performance Analysis
Japan Rugby League One 2025/2026
Luteru Laulala featured in 8 matches during the 2025/2026 Japan Rugby League One, representing Urayasu D-Rocks. Results included 2 wins and 6 losses.
Luteru Laulala represented Urayasu D-Rocks in the 2025/2026 Japan Rugby League One season, who finished 5th in the regular season table.
Luteru Laulala played 421 minutes across the Japan Rugby League One 2025/2026. In attack he made 404m with ball in hand, beating 16 defenders and scoring 1 try. Defensively he completed 23 tackles at a rate of 2.88 per game.
In the Japan Rugby League One 2025/2026, Luteru Laulala completed 27 passes at an accuracy of 93%, contributing 2 try assists and making 86 touches.