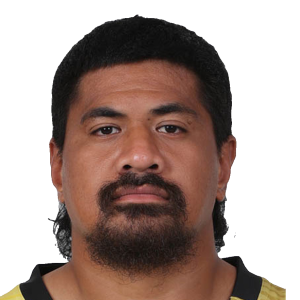
Tamati Ioane News

International
‘Everything felt new’: Rieko Ioane on a fresh All Blacks start after Leinster stint
'Grit and guts': Rieko Ioane on scratchy All Blacks victory over Lions
Rieko Ioane opens up on questioning whether his All Blacks career was over
Why Rieko Ioane needed Leinster stint after finding himself in a 'rut'
Latest
Ioane Moananu secures Super Rugby return to New Zealand on two-year deal
Rieko Ioane called back into All Blacks squad
Ex-Munster coach enjoys wild night in Japan, former Italy boss bested
Lions pair return as Leinster move Rieko Ioane for visit of Sale Sharks
Why Rieko Ioane is struggling to match Barrett's X-factor impact for Leinster
Everyone has the same fear about Rieko Ioane after latest Leinster showing
[]
[{"title":"Super Rugby Pacific","logo":"Super Rugby Pacific","id":"1020","games":[{"title":"Highlanders vs Melbourne Rebels","date":"19 May 2023","dateSmall":"19 May","time":1684557300,"compLogo":"https:\/\/eu-cdn.rugbypass.com\/webp-images\/images\/competitions\/logos\/circle\/super-rugby.png.webp?maxw=72&v=1762927429","compTitle":"Super Rugby Pacific","draw":false,"win":false,"opposition":{"name":"Highlanders","id":"3384","logo":"https:\/\/eu-cdn.rugbypass.com\/webp-images\/images\/team-images\/logos\/png\/406.png.webp?maxw=72&v=1762927734"},"stats":{"mins":5,"tries":0,"yellow_cards":0,"red_cards":0,"conversions":0}},{"title":"NSW Waratahs vs Melbourne Rebels","date":"13 May 2023","dateSmall":"13 May","time":1683971100,"compLogo":"https:\/\/eu-cdn.rugbypass.com\/webp-images\/images\/competitions\/logos\/circle\/super-rugby.png.webp?maxw=72&v=1762927429","compTitle":"Super Rugby Pacific","draw":false,"win":false,"opposition":{"name":"Waratahs","id":"1546","logo":"https:\/\/eu-cdn.rugbypass.com\/webp-images\/images\/team-images\/logos\/png\/415.png.webp?maxw=72&v=1762927735"},"stats":{"mins":20,"tries":0,"yellow_cards":0,"red_cards":0,"conversions":0}},{"title":"Moana Pasifika vs Melbourne Rebels","date":"28 Apr 2023","dateSmall":"28 Apr","time":1682742900,"compLogo":"https:\/\/eu-cdn.rugbypass.com\/webp-images\/images\/competitions\/logos\/circle\/super-rugby.png.webp?maxw=72&v=1762927429","compTitle":"Super Rugby Pacific","draw":false,"win":true,"opposition":{"name":"Moana Pasifika","id":"6501","logo":"https:\/\/eu-cdn.rugbypass.com\/webp-images\/images\/team-images\/logos\/png\/967.png.webp?maxw=72&v=1762927736"},"stats":{"mins":23,"tries":0,"yellow_cards":0,"red_cards":0,"conversions":0}},{"title":"Western Force vs Melbourne Rebels","date":"25 Feb 2023","dateSmall":"25 Feb","time":1677322800,"compLogo":"https:\/\/eu-cdn.rugbypass.com\/webp-images\/images\/competitions\/logos\/circle\/super-rugby.png.webp?maxw=72&v=1762927429","compTitle":"Super Rugby Pacific","draw":false,"win":false,"opposition":{"name":"Force","id":"5856","logo":"https:\/\/eu-cdn.rugbypass.com\/webp-images\/images\/team-images\/logos\/png\/703.png.webp?maxw=72&v=1762927735"},"stats":{"mins":29,"tries":0,"yellow_cards":0,"red_cards":0,"conversions":0}},{"title":"Hurricanes vs Melbourne Rebels","date":"21 May 2022","dateSmall":"21 May","time":1653116700,"compLogo":"https:\/\/eu-cdn.rugbypass.com\/webp-images\/images\/competitions\/logos\/circle\/super-rugby.png.webp?maxw=72&v=1762927429","compTitle":"Super Rugby Pacific","draw":false,"win":false,"opposition":{"name":"Hurricanes","id":"4125","logo":"https:\/\/eu-cdn.rugbypass.com\/webp-images\/images\/team-images\/logos\/png\/407.png.webp?maxw=72&v=1762927734"},"stats":{"mins":40,"tries":0,"yellow_cards":0,"red_cards":0,"conversions":0}},{"title":"Blues vs Melbourne Rebels","date":"6 May 2022","dateSmall":"6 May","time":1651820700,"compLogo":"https:\/\/eu-cdn.rugbypass.com\/webp-images\/images\/competitions\/logos\/circle\/super-rugby.png.webp?maxw=72&v=1762927429","compTitle":"Super Rugby Pacific","draw":false,"win":false,"opposition":{"name":"Blues","id":"2907","logo":"https:\/\/eu-cdn.rugbypass.com\/webp-images\/images\/team-images\/logos\/png\/401.png.webp?maxw=72&v=1762927734"},"stats":{"mins":30,"tries":0,"yellow_cards":0,"red_cards":0,"conversions":0}},{"title":"Melbourne Rebels vs Moana Pasifika","date":"30 Apr 2022","dateSmall":"30 Apr","time":1651311900,"compLogo":"https:\/\/eu-cdn.rugbypass.com\/webp-images\/images\/competitions\/logos\/circle\/super-rugby.png.webp?maxw=72&v=1762927429","compTitle":"Super Rugby Pacific","draw":false,"win":true,"opposition":{"name":"Moana Pasifika","id":"6501","logo":"https:\/\/eu-cdn.rugbypass.com\/webp-images\/images\/team-images\/logos\/png\/967.png.webp?maxw=72&v=1762927736"},"stats":{"mins":30,"tries":0,"yellow_cards":0,"red_cards":0,"conversions":0}},{"title":"Crusaders vs Melbourne Rebels","date":"23 Apr 2022","dateSmall":"23 Apr","time":1650781800,"compLogo":"https:\/\/eu-cdn.rugbypass.com\/webp-images\/images\/competitions\/logos\/circle\/super-rugby.png.webp?maxw=72&v=1762927429","compTitle":"Super Rugby Pacific","draw":false,"win":false,"opposition":{"name":"Crusaders","id":"2982","logo":"https:\/\/eu-cdn.rugbypass.com\/webp-images\/images\/team-images\/logos\/png\/405.png.webp?maxw=72&v=1762927734"},"stats":{"mins":35,"tries":0,"yellow_cards":0,"red_cards":0,"conversions":0}},{"title":"Melbourne Rebels vs Queensland Reds","date":"15 Apr 2022","dateSmall":"15 Apr","time":1650015900,"compLogo":"https:\/\/eu-cdn.rugbypass.com\/webp-images\/images\/competitions\/logos\/circle\/super-rugby.png.webp?maxw=72&v=1762927429","compTitle":"Super Rugby Pacific","draw":false,"win":false,"opposition":{"name":"Reds","id":"1056","logo":"https:\/\/eu-cdn.rugbypass.com\/webp-images\/images\/team-images\/logos\/png\/411.png.webp?maxw=72&v=1762927734"},"stats":{"mins":51,"tries":0,"yellow_cards":0,"red_cards":0,"conversions":0}},{"title":"NSW Waratahs vs Melbourne Rebels","date":"19 Mar 2022","dateSmall":"19 Mar","time":1647679500,"compLogo":"https:\/\/eu-cdn.rugbypass.com\/webp-images\/images\/competitions\/logos\/circle\/super-rugby.png.webp?maxw=72&v=1762927429","compTitle":"Super Rugby Pacific","draw":false,"win":false,"opposition":{"name":"Waratahs","id":"1546","logo":"https:\/\/eu-cdn.rugbypass.com\/webp-images\/images\/team-images\/logos\/png\/415.png.webp?maxw=72&v=1762927735"},"stats":{"mins":58,"tries":0,"yellow_cards":0,"red_cards":0,"conversions":0}},{"title":"Melbourne Rebels vs ACT Brumbies","date":"11 Mar 2022","dateSmall":"11 Mar","time":1646988300,"compLogo":"https:\/\/eu-cdn.rugbypass.com\/webp-images\/images\/competitions\/logos\/circle\/super-rugby.png.webp?maxw=72&v=1762927429","compTitle":"Super Rugby Pacific","draw":false,"win":false,"opposition":{"name":"Brumbies","id":"5748","logo":"https:\/\/eu-cdn.rugbypass.com\/webp-images\/images\/team-images\/logos\/png\/402.png.webp?maxw=72&v=1762927734"},"stats":{"mins":80,"tries":0,"yellow_cards":0,"red_cards":0,"conversions":0}},{"title":"Fijian Drua vs Melbourne Rebels","date":"4 Mar 2022","dateSmall":"4 Mar","time":1646383500,"compLogo":"https:\/\/eu-cdn.rugbypass.com\/webp-images\/images\/competitions\/logos\/circle\/super-rugby.png.webp?maxw=72&v=1762927429","compTitle":"Super Rugby Pacific","draw":false,"win":false,"opposition":{"name":"Fijian Drua","id":"3122","logo":"https:\/\/eu-cdn.rugbypass.com\/webp-images\/images\/team-images\/logos\/png\/705.png.webp?maxw=72&v=1762927735"},"stats":{"mins":80,"tries":0,"yellow_cards":0,"red_cards":0,"conversions":0}},{"title":"Melbourne Rebels vs Western Force","date":"26 Feb 2022","dateSmall":"26 Feb","time":1645865100,"compLogo":"https:\/\/eu-cdn.rugbypass.com\/webp-images\/images\/competitions\/logos\/circle\/super-rugby.png.webp?maxw=72&v=1762927429","compTitle":"Super Rugby Pacific","draw":false,"win":false,"opposition":{"name":"Force","id":"5856","logo":"https:\/\/eu-cdn.rugbypass.com\/webp-images\/images\/team-images\/logos\/png\/703.png.webp?maxw=72&v=1762927735"},"stats":{"mins":28,"tries":0,"yellow_cards":0,"red_cards":0,"conversions":0}},{"title":"Queensland Reds vs Melbourne Rebels","date":"19 Feb 2022","dateSmall":"19 Feb","time":1645260300,"compLogo":"https:\/\/eu-cdn.rugbypass.com\/webp-images\/images\/competitions\/logos\/circle\/super-rugby.png.webp?maxw=72&v=1762927429","compTitle":"Super Rugby Pacific","draw":false,"win":false,"opposition":{"name":"Reds","id":"1056","logo":"https:\/\/eu-cdn.rugbypass.com\/webp-images\/images\/team-images\/logos\/png\/411.png.webp?maxw=72&v=1762927734"},"stats":{"mins":27,"tries":0,"yellow_cards":0,"red_cards":0,"conversions":0}}]},{"title":"Japan Rugby League One","logo":"Japan Rugby League One","id":"2074","games":[{"title":"Mitsubishi DynaBoars vs Urayasu D-Rocks","date":"9 May 2026","dateSmall":"9 May","time":1778391000,"compLogo":"https:\/\/eu-cdn.rugbypass.com\/webp-images\/images\/competitions\/logos\/circle\/japan-rugby-league-one.png.webp?maxw=72&v=1762927428","compTitle":"Japan Rugby League One","draw":false,"win":true,"opposition":{"name":"Mitsubishi Sagamihara Dynaboars","id":"1652","logo":"https:\/\/eu-cdn.rugbypass.com\/webp-images\/images\/team-images\/logos\/png\/594.png.webp?maxw=72&v=1762927735"},"stats":{"mins":57,"tries":0,"yellow_cards":0,"red_cards":0,"conversions":0}},{"title":"Urayasu D-Rocks vs Saitama Wild Knights","date":"1 May 2026","dateSmall":"1 May","time":1777629600,"compLogo":"https:\/\/eu-cdn.rugbypass.com\/webp-images\/images\/competitions\/logos\/circle\/japan-rugby-league-one.png.webp?maxw=72&v=1762927428","compTitle":"Japan Rugby League One","draw":false,"win":true,"opposition":{"name":"Saitama Wild Knights","id":"3459","logo":"https:\/\/eu-cdn.rugbypass.com\/webp-images\/images\/team-images\/logos\/png\/19567.png.webp?maxw=72&v=1762927734"},"stats":{"mins":67,"tries":2,"yellow_cards":0,"red_cards":0,"conversions":0}},{"title":"Urayasu D-Rocks vs Shizuoka Blue Revs","date":"24 Apr 2026","dateSmall":"24 Apr","time":1777024800,"compLogo":"https:\/\/eu-cdn.rugbypass.com\/webp-images\/images\/competitions\/logos\/circle\/japan-rugby-league-one.png.webp?maxw=72&v=1762927428","compTitle":"Japan Rugby League One","draw":false,"win":false,"opposition":{"name":"Shizuoka BlueRevs","id":"4749","logo":"https:\/\/eu-cdn.rugbypass.com\/webp-images\/images\/team-images\/logos\/png\/5212.png.webp?maxw=72&v=1762927735"},"stats":{"mins":47,"tries":2,"yellow_cards":0,"red_cards":0,"conversions":0}},{"title":"Yokohama Canon Eagles vs Urayasu D-Rocks","date":"17 Apr 2026","dateSmall":"17 Apr","time":1776485100,"compLogo":"https:\/\/eu-cdn.rugbypass.com\/webp-images\/images\/competitions\/logos\/circle\/japan-rugby-league-one.png.webp?maxw=72&v=1762927428","compTitle":"Japan Rugby League One","draw":false,"win":false,"opposition":{"name":"Yokohama Canon Eagles","id":"2008","logo":"https:\/\/eu-cdn.rugbypass.com\/webp-images\/images\/team-images\/logos\/png\/5200.png.webp?maxw=72&v=1762927735"},"stats":{"mins":20,"tries":0,"yellow_cards":0,"red_cards":0,"conversions":0}},{"title":"Toshiba Brave Lupus vs Urayasu D-Rocks","date":"4 Apr 2026","dateSmall":"4 Apr","time":1775361600,"compLogo":"https:\/\/eu-cdn.rugbypass.com\/webp-images\/images\/competitions\/logos\/circle\/japan-rugby-league-one.png.webp?maxw=72&v=1762927428","compTitle":"Japan Rugby League One","draw":false,"win":false,"opposition":{"name":"Toshiba Brave Lupus Tokyo","id":"3342","logo":"https:\/\/eu-cdn.rugbypass.com\/webp-images\/images\/team-images\/logos\/png\/19702.png.webp?maxw=72&v=1762927734"},"stats":{"mins":33,"tries":0,"yellow_cards":1,"red_cards":0,"conversions":0}},{"title":"Urayasu D-Rocks vs Honda Heat","date":"28 Mar 2026","dateSmall":"28 Mar","time":1774762200,"compLogo":"https:\/\/eu-cdn.rugbypass.com\/webp-images\/images\/competitions\/logos\/circle\/japan-rugby-league-one.png.webp?maxw=72&v=1762927428","compTitle":"Japan Rugby League One","draw":false,"win":false,"opposition":{"name":"Mie Honda Heat","id":"6343","logo":"https:\/\/eu-cdn.rugbypass.com\/webp-images\/images\/team-images\/logos\/png\/10005202.png.webp?maxw=72&v=1762927733"},"stats":{"mins":27,"tries":0,"yellow_cards":0,"red_cards":0,"conversions":0}},{"title":"Urayasu D-Rocks vs Kubota Spears","date":"20 Mar 2026","dateSmall":"20 Mar","time":1774071000,"compLogo":"https:\/\/eu-cdn.rugbypass.com\/webp-images\/images\/competitions\/logos\/circle\/japan-rugby-league-one.png.webp?maxw=72&v=1762927428","compTitle":"Japan Rugby League One","draw":false,"win":false,"opposition":{"name":"Kubota Spears","id":"1525","logo":"https:\/\/eu-cdn.rugbypass.com\/webp-images\/images\/team-images\/logos\/png\/5204.png.webp?maxw=72&v=1762927735"},"stats":{"mins":60,"tries":1,"yellow_cards":0,"red_cards":0,"conversions":0}},{"title":"Toyota Verblitz vs Urayasu D-Rocks","date":"14 Mar 2026","dateSmall":"14 Mar","time":1773551100,"compLogo":"https:\/\/eu-cdn.rugbypass.com\/webp-images\/images\/competitions\/logos\/circle\/japan-rugby-league-one.png.webp?maxw=72&v=1762927428","compTitle":"Japan Rugby League One","draw":false,"win":false,"opposition":{"name":"Toyota Verblitz","id":"1886","logo":"https:\/\/eu-cdn.rugbypass.com\/webp-images\/images\/team-images\/logos\/png\/5211.png.webp?maxw=72&v=1762927735"},"stats":{"mins":49,"tries":0,"yellow_cards":0,"red_cards":0,"conversions":0}},{"title":"Urayasu D-Rocks vs Kobe Kobelco Steelers","date":"27 Feb 2026","dateSmall":"27 Feb","time":1772251200,"compLogo":"https:\/\/eu-cdn.rugbypass.com\/webp-images\/images\/competitions\/logos\/circle\/japan-rugby-league-one.png.webp?maxw=72&v=1762927428","compTitle":"Japan Rugby League One","draw":false,"win":false,"opposition":{"name":"Kobelco Kobe Steelers","id":"1314","logo":"https:\/\/eu-cdn.rugbypass.com\/webp-images\/images\/team-images\/logos\/png\/5203.png.webp?maxw=72&v=1762927735"},"stats":{"mins":55,"tries":0,"yellow_cards":0,"red_cards":0,"conversions":0}},{"title":"Black Rams Tokyo vs Urayasu D-Rocks","date":"20 Feb 2026","dateSmall":"20 Feb","time":1771646400,"compLogo":"https:\/\/eu-cdn.rugbypass.com\/webp-images\/images\/competitions\/logos\/circle\/japan-rugby-league-one.png.webp?maxw=72&v=1762927428","compTitle":"Japan Rugby League One","draw":false,"win":false,"opposition":{"name":"BlackRams Tokyo","id":"1154","logo":"https:\/\/eu-cdn.rugbypass.com\/webp-images\/images\/team-images\/logos\/png\/5208.png.webp?maxw=72&v=1762927735"},"stats":{"mins":62,"tries":1,"yellow_cards":0,"red_cards":0,"conversions":0}},{"title":"Urayasu D-Rocks vs Tokyo Sungoliath","date":"13 Feb 2026","dateSmall":"13 Feb","time":1771047300,"compLogo":"https:\/\/eu-cdn.rugbypass.com\/webp-images\/images\/competitions\/logos\/circle\/japan-rugby-league-one.png.webp?maxw=72&v=1762927428","compTitle":"Japan Rugby League One","draw":false,"win":false,"opposition":{"name":"Tokyo Sungoliath","id":"3908","logo":"https:\/\/eu-cdn.rugbypass.com\/webp-images\/images\/team-images\/logos\/png\/5209.png.webp?maxw=72&v=1762927735"},"stats":{"mins":20,"tries":0,"yellow_cards":0,"red_cards":0,"conversions":0}},{"title":"Kubota Spears vs Urayasu D-Rocks","date":"6 Feb 2026","dateSmall":"6 Feb","time":1770442200,"compLogo":"https:\/\/eu-cdn.rugbypass.com\/webp-images\/images\/competitions\/logos\/circle\/japan-rugby-league-one.png.webp?maxw=72&v=1762927428","compTitle":"Japan Rugby League One","draw":false,"win":false,"opposition":{"name":"Kubota Spears","id":"1525","logo":"https:\/\/eu-cdn.rugbypass.com\/webp-images\/images\/team-images\/logos\/png\/5204.png.webp?maxw=72&v=1762927735"},"stats":{"mins":24,"tries":0,"yellow_cards":0,"red_cards":0,"conversions":0}},{"title":"Honda Heat vs Urayasu D-Rocks","date":"23 Jan 2026","dateSmall":"23 Jan","time":1769227200,"compLogo":"https:\/\/eu-cdn.rugbypass.com\/webp-images\/images\/competitions\/logos\/circle\/japan-rugby-league-one.png.webp?maxw=72&v=1762927428","compTitle":"Japan Rugby League One","draw":false,"win":false,"opposition":{"name":"Mie Honda Heat","id":"6343","logo":"https:\/\/eu-cdn.rugbypass.com\/webp-images\/images\/team-images\/logos\/png\/10005202.png.webp?maxw=72&v=1762927733"},"stats":{"mins":28,"tries":0,"yellow_cards":0,"red_cards":0,"conversions":0}},{"title":"Urayasu D-Rocks vs Toshiba Brave Lupus","date":"16 Jan 2026","dateSmall":"16 Jan","time":1768626300,"compLogo":"https:\/\/eu-cdn.rugbypass.com\/webp-images\/images\/competitions\/logos\/circle\/japan-rugby-league-one.png.webp?maxw=72&v=1762927428","compTitle":"Japan Rugby League One","draw":false,"win":false,"opposition":{"name":"Toshiba Brave Lupus Tokyo","id":"3342","logo":"https:\/\/eu-cdn.rugbypass.com\/webp-images\/images\/team-images\/logos\/png\/19702.png.webp?maxw=72&v=1762927734"},"stats":{"mins":57,"tries":1,"yellow_cards":0,"red_cards":0,"conversions":0}},{"title":"Urayasu D-Rocks vs Yokohama Canon Eagles","date":"9 Jan 2026","dateSmall":"9 Jan","time":1768014000,"compLogo":"https:\/\/eu-cdn.rugbypass.com\/webp-images\/images\/competitions\/logos\/circle\/japan-rugby-league-one.png.webp?maxw=72&v=1762927428","compTitle":"Japan Rugby League One","draw":false,"win":true,"opposition":{"name":"Yokohama Canon Eagles","id":"2008","logo":"https:\/\/eu-cdn.rugbypass.com\/webp-images\/images\/team-images\/logos\/png\/5200.png.webp?maxw=72&v=1762927735"},"stats":{"mins":18,"tries":0,"yellow_cards":0,"red_cards":0,"conversions":0}},{"title":"Shizuoka Blue Revs vs Urayasu D-Rocks","date":"27 Dec 2025","dateSmall":"27 Dec","time":1766898000,"compLogo":"https:\/\/eu-cdn.rugbypass.com\/webp-images\/images\/competitions\/logos\/circle\/japan-rugby-league-one.png.webp?maxw=72&v=1762927428","compTitle":"Japan Rugby League One","draw":false,"win":true,"opposition":{"name":"Shizuoka BlueRevs","id":"4749","logo":"https:\/\/eu-cdn.rugbypass.com\/webp-images\/images\/team-images\/logos\/png\/5212.png.webp?maxw=72&v=1762927735"},"stats":{"mins":15,"tries":0,"yellow_cards":0,"red_cards":0,"conversions":0}},{"title":"Saitama Wild Knights vs Urayasu D-Rocks","date":"20 Dec 2025","dateSmall":"20 Dec","time":1766295000,"compLogo":"https:\/\/eu-cdn.rugbypass.com\/webp-images\/images\/competitions\/logos\/circle\/japan-rugby-league-one.png.webp?maxw=72&v=1762927428","compTitle":"Japan Rugby League One","draw":false,"win":false,"opposition":{"name":"Saitama Wild Knights","id":"3459","logo":"https:\/\/eu-cdn.rugbypass.com\/webp-images\/images\/team-images\/logos\/png\/19567.png.webp?maxw=72&v=1762927734"},"stats":{"mins":47,"tries":1,"yellow_cards":0,"red_cards":0,"conversions":0}},{"title":"Urayasu D-Rocks vs Mitsubishi DynaBoars","date":"12 Dec 2025","dateSmall":"12 Dec","time":1765602300,"compLogo":"https:\/\/eu-cdn.rugbypass.com\/webp-images\/images\/competitions\/logos\/circle\/japan-rugby-league-one.png.webp?maxw=72&v=1762927428","compTitle":"Japan Rugby League One","draw":false,"win":true,"opposition":{"name":"Mitsubishi Sagamihara Dynaboars","id":"1652","logo":"https:\/\/eu-cdn.rugbypass.com\/webp-images\/images\/team-images\/logos\/png\/594.png.webp?maxw=72&v=1762927735"},"stats":{"mins":34,"tries":0,"yellow_cards":0,"red_cards":0,"conversions":0}},{"title":"Kubota Spears vs Tokyo Sungoliath","date":"17 May 2025","dateSmall":"17 May","time":1747546200,"compLogo":"https:\/\/eu-cdn.rugbypass.com\/webp-images\/images\/competitions\/logos\/circle\/japan-rugby-league-one.png.webp?maxw=72&v=1762927428","compTitle":"Japan Rugby League One","draw":false,"win":false,"opposition":{"name":"Kubota Spears","id":"1525","logo":"https:\/\/eu-cdn.rugbypass.com\/webp-images\/images\/team-images\/logos\/png\/5204.png.webp?maxw=72&v=1762927735"},"stats":{"mins":16,"tries":0,"yellow_cards":0,"red_cards":0,"conversions":0}},{"title":"Saitama Wild Knights vs Tokyo Sungoliath","date":"9 May 2025","dateSmall":"9 May","time":1746855000,"compLogo":"https:\/\/eu-cdn.rugbypass.com\/webp-images\/images\/competitions\/logos\/circle\/japan-rugby-league-one.png.webp?maxw=72&v=1762927428","compTitle":"Japan Rugby League One","draw":false,"win":false,"opposition":{"name":"Saitama Wild Knights","id":"3459","logo":"https:\/\/eu-cdn.rugbypass.com\/webp-images\/images\/team-images\/logos\/png\/19567.png.webp?maxw=72&v=1762927734"},"stats":{"mins":40,"tries":0,"yellow_cards":0,"red_cards":0,"conversions":0}},{"title":"Tokyo Sungoliath vs Black Rams Tokyo","date":"2 May 2025","dateSmall":"2 May","time":1746244800,"compLogo":"https:\/\/eu-cdn.rugbypass.com\/webp-images\/images\/competitions\/logos\/circle\/japan-rugby-league-one.png.webp?maxw=72&v=1762927428","compTitle":"Japan Rugby League One","draw":false,"win":true,"opposition":{"name":"BlackRams Tokyo","id":"1154","logo":"https:\/\/eu-cdn.rugbypass.com\/webp-images\/images\/team-images\/logos\/png\/5208.png.webp?maxw=72&v=1762927735"},"stats":{"mins":21,"tries":1,"yellow_cards":0,"red_cards":0,"conversions":0}},{"title":"Toyota Verblitz vs Tokyo Sungoliath","date":"26 Apr 2025","dateSmall":"26 Apr","time":1745731800,"compLogo":"https:\/\/eu-cdn.rugbypass.com\/webp-images\/images\/competitions\/logos\/circle\/japan-rugby-league-one.png.webp?maxw=72&v=1762927428","compTitle":"Japan Rugby League One","draw":false,"win":true,"opposition":{"name":"Toyota Verblitz","id":"1886","logo":"https:\/\/eu-cdn.rugbypass.com\/webp-images\/images\/team-images\/logos\/png\/5211.png.webp?maxw=72&v=1762927735"},"stats":{"mins":32,"tries":1,"yellow_cards":0,"red_cards":0,"conversions":0}},{"title":"Kobe Kobelco Steelers vs Tokyo Sungoliath","date":"7 Feb 2025","dateSmall":"7 Feb","time":1738983600,"compLogo":"https:\/\/eu-cdn.rugbypass.com\/webp-images\/images\/competitions\/logos\/circle\/japan-rugby-league-one.png.webp?maxw=72&v=1762927428","compTitle":"Japan Rugby League One","draw":false,"win":true,"opposition":{"name":"Kobelco Kobe Steelers","id":"1314","logo":"https:\/\/eu-cdn.rugbypass.com\/webp-images\/images\/team-images\/logos\/png\/5203.png.webp?maxw=72&v=1762927735"},"stats":{"mins":54,"tries":0,"yellow_cards":0,"red_cards":0,"conversions":0}},{"title":"Shizuoka Blue Revs vs Tokyo Sungoliath","date":"31 Jan 2025","dateSmall":"31 Jan","time":1738386000,"compLogo":"https:\/\/eu-cdn.rugbypass.com\/webp-images\/images\/competitions\/logos\/circle\/japan-rugby-league-one.png.webp?maxw=72&v=1762927428","compTitle":"Japan Rugby League One","draw":false,"win":true,"opposition":{"name":"Shizuoka BlueRevs","id":"4749","logo":"https:\/\/eu-cdn.rugbypass.com\/webp-images\/images\/team-images\/logos\/png\/5212.png.webp?maxw=72&v=1762927735"},"stats":{"mins":60,"tries":1,"yellow_cards":0,"red_cards":0,"conversions":0}},{"title":"Tokyo Sungoliath vs Kubota Spears","date":"11 Jan 2025","dateSmall":"11 Jan","time":1736658300,"compLogo":"https:\/\/eu-cdn.rugbypass.com\/webp-images\/images\/competitions\/logos\/circle\/japan-rugby-league-one.png.webp?maxw=72&v=1762927428","compTitle":"Japan Rugby League One","draw":true,"win":false,"opposition":{"name":"Kubota Spears","id":"1525","logo":"https:\/\/eu-cdn.rugbypass.com\/webp-images\/images\/team-images\/logos\/png\/5204.png.webp?maxw=72&v=1762927735"},"stats":{"mins":23,"tries":0,"yellow_cards":0,"red_cards":0,"conversions":0}},{"title":"Tokyo Sungoliath vs Toyota Verblitz","date":"3 Jan 2025","dateSmall":"3 Jan","time":1735968600,"compLogo":"https:\/\/eu-cdn.rugbypass.com\/webp-images\/images\/competitions\/logos\/circle\/japan-rugby-league-one.png.webp?maxw=72&v=1762927428","compTitle":"Japan Rugby League One","draw":true,"win":false,"opposition":{"name":"Toyota Verblitz","id":"1886","logo":"https:\/\/eu-cdn.rugbypass.com\/webp-images\/images\/team-images\/logos\/png\/5211.png.webp?maxw=72&v=1762927735"},"stats":{"mins":34,"tries":0,"yellow_cards":0,"red_cards":0,"conversions":0}},{"title":"Black Rams Tokyo vs Tokyo Sungoliath","date":"27 Dec 2024","dateSmall":"27 Dec","time":1735358400,"compLogo":"https:\/\/eu-cdn.rugbypass.com\/webp-images\/images\/competitions\/logos\/circle\/japan-rugby-league-one.png.webp?maxw=72&v=1762927428","compTitle":"Japan Rugby League One","draw":false,"win":false,"opposition":{"name":"BlackRams Tokyo","id":"1154","logo":"https:\/\/eu-cdn.rugbypass.com\/webp-images\/images\/team-images\/logos\/png\/5208.png.webp?maxw=72&v=1762927735"},"stats":{"mins":19,"tries":0,"yellow_cards":0,"red_cards":0,"conversions":0}},{"title":"Yokohama Canon Eagles vs Tokyo Sungoliath","date":"24 May 2024","dateSmall":"24 May","time":1716606300,"compLogo":"https:\/\/eu-cdn.rugbypass.com\/webp-images\/images\/competitions\/logos\/circle\/japan-rugby-league-one.png.webp?maxw=72&v=1762927428","compTitle":"Japan Rugby League One","draw":false,"win":true,"opposition":{"name":"Yokohama Canon Eagles","id":"2008","logo":"https:\/\/eu-cdn.rugbypass.com\/webp-images\/images\/team-images\/logos\/png\/5200.png.webp?maxw=72&v=1762927735"},"stats":{"mins":36,"tries":2,"yellow_cards":0,"red_cards":0,"conversions":0}},{"title":"Toshiba Brave Lupus vs Tokyo Sungoliath","date":"18 May 2024","dateSmall":"18 May","time":1716095100,"compLogo":"https:\/\/eu-cdn.rugbypass.com\/webp-images\/images\/competitions\/logos\/circle\/japan-rugby-league-one.png.webp?maxw=72&v=1762927428","compTitle":"Japan Rugby League One","draw":false,"win":false,"opposition":{"name":"Toshiba Brave Lupus Tokyo","id":"3342","logo":"https:\/\/eu-cdn.rugbypass.com\/webp-images\/images\/team-images\/logos\/png\/19702.png.webp?maxw=72&v=1762927734"},"stats":{"mins":21,"tries":0,"yellow_cards":0,"red_cards":0,"conversions":0}},{"title":"Tokyo Sungoliath vs Kubota Spears","date":"3 May 2024","dateSmall":"3 May","time":1714800600,"compLogo":"https:\/\/eu-cdn.rugbypass.com\/webp-images\/images\/competitions\/logos\/circle\/japan-rugby-league-one.png.webp?maxw=72&v=1762927428","compTitle":"Japan Rugby League One","draw":false,"win":false,"opposition":{"name":"Kubota Spears","id":"1525","logo":"https:\/\/eu-cdn.rugbypass.com\/webp-images\/images\/team-images\/logos\/png\/5204.png.webp?maxw=72&v=1762927735"},"stats":{"mins":40,"tries":0,"yellow_cards":0,"red_cards":0,"conversions":0}},{"title":"Toshiba Brave Lupus vs Tokyo Sungoliath","date":"26 Apr 2024","dateSmall":"26 Apr","time":1714187100,"compLogo":"https:\/\/eu-cdn.rugbypass.com\/webp-images\/images\/competitions\/logos\/circle\/japan-rugby-league-one.png.webp?maxw=72&v=1762927428","compTitle":"Japan Rugby League One","draw":false,"win":false,"opposition":{"name":"Toshiba Brave Lupus Tokyo","id":"3342","logo":"https:\/\/eu-cdn.rugbypass.com\/webp-images\/images\/team-images\/logos\/png\/19702.png.webp?maxw=72&v=1762927734"},"stats":{"mins":46,"tries":0,"yellow_cards":0,"red_cards":0,"conversions":0}},{"title":"Tokyo Sungoliath vs Shizuoka Blue Revs","date":"19 Apr 2024","dateSmall":"19 Apr","time":1713520800,"compLogo":"https:\/\/eu-cdn.rugbypass.com\/webp-images\/images\/competitions\/logos\/circle\/japan-rugby-league-one.png.webp?maxw=72&v=1762927428","compTitle":"Japan Rugby League One","draw":true,"win":false,"opposition":{"name":"Shizuoka BlueRevs","id":"4749","logo":"https:\/\/eu-cdn.rugbypass.com\/webp-images\/images\/team-images\/logos\/png\/5212.png.webp?maxw=72&v=1762927735"},"stats":{"mins":69,"tries":1,"yellow_cards":1,"red_cards":0,"conversions":0}},{"title":"Tokyo Sungoliath vs Honda Heat","date":"12 Apr 2024","dateSmall":"12 Apr","time":1712986200,"compLogo":"https:\/\/eu-cdn.rugbypass.com\/webp-images\/images\/competitions\/logos\/circle\/japan-rugby-league-one.png.webp?maxw=72&v=1762927428","compTitle":"Japan Rugby League One","draw":false,"win":true,"opposition":{"name":"Mie Honda Heat","id":"6343","logo":"https:\/\/eu-cdn.rugbypass.com\/webp-images\/images\/team-images\/logos\/png\/10005202.png.webp?maxw=72&v=1762927733"},"stats":{"mins":61,"tries":2,"yellow_cards":0,"red_cards":0,"conversions":0}},{"title":"Mitsubishi DynaBoars vs Tokyo Sungoliath","date":"19 Jan 2024","dateSmall":"19 Jan","time":1705726800,"compLogo":"https:\/\/eu-cdn.rugbypass.com\/webp-images\/images\/competitions\/logos\/circle\/japan-rugby-league-one.png.webp?maxw=72&v=1762927428","compTitle":"Japan Rugby League One","draw":false,"win":true,"opposition":{"name":"Mitsubishi Sagamihara Dynaboars","id":"1652","logo":"https:\/\/eu-cdn.rugbypass.com\/webp-images\/images\/team-images\/logos\/png\/594.png.webp?maxw=72&v=1762927735"},"stats":{"mins":6,"tries":0,"yellow_cards":0,"red_cards":0,"conversions":0}},{"title":"Tokyo Sungoliath vs Kobe Kobelco Steelers","date":"5 Jan 2024","dateSmall":"5 Jan","time":1704519300,"compLogo":"https:\/\/eu-cdn.rugbypass.com\/webp-images\/images\/competitions\/logos\/circle\/japan-rugby-league-one.png.webp?maxw=72&v=1762927428","compTitle":"Japan Rugby League One","draw":false,"win":true,"opposition":{"name":"Kobelco Kobe Steelers","id":"1314","logo":"https:\/\/eu-cdn.rugbypass.com\/webp-images\/images\/team-images\/logos\/png\/5203.png.webp?maxw=72&v=1762927735"},"stats":{"mins":11,"tries":0,"yellow_cards":0,"red_cards":0,"conversions":0}},{"title":"Kubota Spears vs Tokyo Sungoliath","date":"9 Dec 2023","dateSmall":"9 Dec","time":1702186200,"compLogo":"https:\/\/eu-cdn.rugbypass.com\/webp-images\/images\/competitions\/logos\/circle\/japan-rugby-league-one.png.webp?maxw=72&v=1762927428","compTitle":"Japan Rugby League One","draw":false,"win":true,"opposition":{"name":"Kubota Spears","id":"1525","logo":"https:\/\/eu-cdn.rugbypass.com\/webp-images\/images\/team-images\/logos\/png\/5204.png.webp?maxw=72&v=1762927735"},"stats":{"mins":24,"tries":0,"yellow_cards":0,"red_cards":0,"conversions":0}}]}]
Tamati Ioane Stats
Stats compared to other Back Rows
![]() {{selectedCompetition.competition.name}} {{selectedCompetition.competition.season.label}}
-
![]() {{item.competition.name}} {{item.competition.season.label}}
{{graphStats[0].value}}
{{graphStats[0].title}}
{{graphStats[1].value}}
{{graphStats[1].title}}
{{graphStats[2].title}}
{{graphStats[2].value}}
{{graphStats[3].title}}
{{graphStats[3].value}}
{{graphStats[4].title}}
{{graphStats[4].value}}
{{graphStats[5].value}}
{{graphStats[5].title}}
Tamati Ioane Stats
Stats compared to other Back Rows
{{item.title}}
{{item.value}}
Match Stats
![]() {{selectedMatchesComp}}
- All
-
![]() {{item.title}}
9 May 2026
9 May
W
v

Mitsubishi Sagamihara Dynaboars
1 May 2026
1 May
W
v

Saitama Wild Knights
24 Apr 2026
24 Apr
L
v

Shizuoka BlueRevs
17 Apr 2026
17 Apr
L
v

Yokohama Canon Eagles
4 Apr 2026
4 Apr
L
v

Toshiba Brave Lupus Tokyo
28 Mar 2026
28 Mar
L
v

Mie Honda Heat
20 Mar 2026
20 Mar
L
v

Kubota Spears
14 Mar 2026
14 Mar
L
v

Toyota Verblitz
27 Feb 2026
27 Feb
L
v

Kobelco Kobe Steelers
20 Feb 2026
20 Feb
L
v

BlackRams Tokyo
{{game.date}}
{{game.dateSmall}}
W L
v
![]()
{{game.stats.mins}}
{{game.stats.tries}}
{{game.stats.conversions}}
{{game.stats.yellow_cards}}
{{game.stats.red_cards}}
Tamati Ioane Performance Analysis
Japan Rugby League One 2025/2026
Tamati Ioane featured in 15 matches during the 2025/2026 Japan Rugby League One, representing Urayasu D-Rocks. Results included 4 wins and 11 losses.
Tamati Ioane represented Urayasu D-Rocks in the 2025/2026 Japan Rugby League One season, who finished 5th in the regular season table.
Tamati Ioane played 721 minutes across the Japan Rugby League One 2025/2026. In attack he made 597m with ball in hand, beating 50 defenders and scoring 8 tries. Defensively he completed 150 tackles at a rate of 10 per game.
In the Japan Rugby League One 2025/2026, Tamati Ioane completed 29 passes at an accuracy of 85%, contributing 1 try assist and making 151 touches.
He ranked in the top 5% of Number 8's for defenders beaten in the Japan Rugby League One.