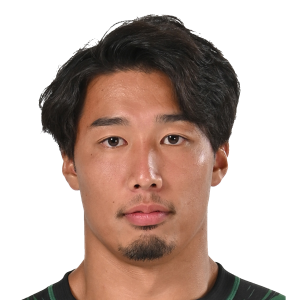
Nozomi Nara News

International
89-cap All Black TJ Perenara among a clutch of stars set to play for Barbarians
All Blacks Aaron Smith and TJ Perenara are set to renew their rivalry
Damian McKenzie back for Chiefs as TJ Perenara's nephew named for debut
All Black winger Emoni Narawa re-signs with NZR and Chiefs
Latest
Ex-All Black TJ Perenara is on the verge of making history
Emoni Narawa shares extent of Eden Park injury that ended his All Blacks season
Emoni Narawa: 'Monday was probably one of the best days of my life'
Emoni Narawa and the best of wingers in Super Rugby final history
Perenara faces the defining week of his post-All Blacks career so far
Mo'unga and Perenara shine in high-scoring Japan League One weekend
[{"competition":{"rid":"1002","oid":"421","name":"Japan Rugby League One","logo":"https:\/\/eu-cdn.rugbypass.com\/images\/competitions\/logos\/png\/japan-rugby-league-one.png?v=1762927429","logoCircle":"https:\/\/eu-cdn.rugbypass.com\/images\/competitions\/logos\/circle\/japan-rugby-league-one.png?v=1762927428","season":{"type":"opta","season":2024,"years":{"2023":2023,"2024":2024},"label":"2023\/2024","completed":1,"standings":1,"started":1,"months":0,"games":100},"stats":{"success":1,"stats":{"att_ruck_arrival_effectiveness":0.6,"av_gain":5.9,"av_post_contact_metres":4.23,"bad_passes":1,"carries":3,"carries_crossed_gain_line":2,"carries_not_made_gain_line":1,"carries_support_metres":7,"carry_dominant":3,"clean_breaks":1,"collection_attacking_catch":1,"dominant_carry_percent":1,"handling_error":2,"kick_metres":36,"kicks_from_hand":1,"metres":18,"minutes_played_total":72,"passes":3,"player_id":36555,"player_team_id":594,"points":0,"post_contact_metres":13,"ruck_arrival":5,"ruck_arrival_attack":5,"tackle_offload_allowed":1,"tackles":4,"tackles_success":0.8,"total_games":1,"touches":8,"turnovers_conceded":2},"topPlayerStats":{"att_ruck_arrival_effectiveness":{"id":22413,"value":1},"av_gain":{"id":61540,"value":15.7},"av_post_contact_metres":{"id":61540,"value":9.85},"bad_passes":{"id":32522,"value":21},"carries":{"id":20037,"value":165},"carries_crossed_gain_line":{"id":30973,"value":109},"carries_kick_return":{"id":43563,"value":29},"carries_kick_return_metres":{"id":43563,"value":206},"carries_not_made_gain_line":{"id":27129,"value":49},"carries_one_out_drive":{"id":27129,"value":69},"carries_one_out_drive_metres":{"id":32978,"value":228},"carries_support_metres":{"id":37887,"value":288},"carry_dominant":{"id":20037,"value":80},"carry_ineffective":{"id":31059,"value":10},"carry_neutral":{"id":32978,"value":60},"clean_breaks":{"id":27652,"value":20},"def_ruck_arrival_effectiveness":{"id":25611,"value":0.56},"defenders_beaten":{"id":30973,"value":67},"dominant_carry_percent":{"id":36555,"value":1},"dominant_tackles":{"id":30973,"value":13},"handling_error":{"id":20037,"value":18},"kick_metres":{"id":19937,"value":1697},"kicks_from_hand":{"id":19937,"value":66},"line_break_assists":{"id":32522,"value":18},"lineout_takes":{"id":23409,"value":3},"metres":{"id":43563,"value":908},"minutes_played_total":{"id":30973,"value":1280},"missed_tackles":{"id":19937,"value":36},"offloads":{"id":27129,"value":24},"passes":{"id":19937,"value":218},"pen_defs":{"id":58208,"value":10},"pen_offs":{"id":21411,"value":4},"penalties_conceded":{"id":58208,"value":11},"player_id":{"id":62261,"value":62261},"player_team_id":{"id":20070,"value":19702},"points":{"id":27652,"value":70},"post_contact_metres":{"id":20037,"value":592},"ruck_arrival":{"id":32978,"value":169},"ruck_arrival_attack":{"id":30973,"value":144},"ruck_arrival_defence":{"id":20037,"value":65},"tackle_offload_allowed":{"id":30973,"value":23},"tackles":{"id":19937,"value":123},"tackles_success":{"id":19905,"value":0.82},"total_games":{"id":31059,"value":18},"touches":{"id":19937,"value":345},"tries":{"id":27652,"value":14},"try_assist":{"id":32522,"value":8},"turnovers_conceded":{"id":20037,"value":20},"carries_pick_and_go":{"id":20143,"value":16},"carries_pick_and_go_metres":{"id":20143,"value":67},"collection_attacking_catch":{"id":43563,"value":6},"retained_kicks_percentage":{"id":31059,"value":0.56},"tackle_penalty_conceded":{"id":34873,"value":4},"tackle_turnover":{"id":27652,"value":7},"turnovers_won":{"id":20143,"value":11},"yellow_cards":{"id":19905,"value":1},"conversion_goals":{"id":38419,"value":4},"goal_kick_percentage":{"id":38419,"value":1},"missed_conversion_goals":{"id":20037,"value":4},"penalty_goals":{"id":20037,"value":1},"lineouts_to_own_player":{"id":31059,"value":2},"lineouts_won":{"id":31059,"value":2},"tackle_try_saver":{"id":21074,"value":2}}}},"main":{"totalMinsPlayed":72,"main":[{"value":0,"title":"Defenders Beaten"},{"value":3,"title":"Successful Passes"},{"value":0.8,"title":"Tackles Completed"},{"value":1,"title":"Line Breaks"},{"value":3,"title":"Carries"},{"value":0,"title":"Tries"},{"value":0,"title":"Try Assists"}],"profile":[{"value":"2%","title":"Defenders Beaten","type":1,"key":"defenders_beaten","raw":0,"top":67,"color":"#cf403a"},{"value":"2%","title":"Successful Passes","type":1,"key":"passes","raw":3,"top":218,"color":"#cf403a"},{"value":"98%","title":"Tackles Completed","type":1,"key":"tackles_success","raw":0.8,"top":0.82,"color":"#499e68"},{"value":"5%","title":"Line Breaks","type":1,"key":"clean_breaks","raw":1,"top":20,"color":"#d14739"},{"value":"2%","title":"Carries","type":1,"key":"carries","raw":3,"top":165,"color":"#cf403a"},{"value":"2%","title":"Tries","type":1,"key":"tries","raw":0,"top":14,"color":"#cf403a"},{"value":"2%","title":"Try Assists","type":1,"key":"try_assist","raw":0,"top":8,"color":"#cf403a"}]},"group":{"groups":[{"title":"Attack","stats":[{"title":"Points","value":{"value":0,"title":"Points"},"overall":{"value":"2%","title":"Points","type":1,"key":"points","raw":0,"top":70,"color":"#cf403a"}},{"title":"Tries","value":{"value":0,"title":"Tries"},"overall":{"value":"2%","title":"Tries","type":1,"key":"tries","raw":0,"top":14,"color":"#cf403a"}},{"title":"Line Breaks","value":{"value":1,"title":"Line Breaks"},"overall":{"value":"5%","title":"Line Breaks","type":1,"key":"clean_breaks","raw":1,"top":20,"color":"#d14739"}},{"title":"Carries","value":{"value":3,"title":"Carries"},"overall":{"value":"2%","title":"Carries","type":1,"key":"carries","raw":3,"top":165,"color":"#cf403a"}},{"title":"Carries Per Minute","value":{"value":0.04,"title":"Carries Per Minute"},"overall":{"value":"2%","title":"Carries Per Minute","type":1,"key":"carries","raw":0,"top":165,"color":"#cf403a"}},{"title":"Metres Carried","value":{"value":18,"title":"Metres Carried"},"overall":{"value":"2%","title":"Metres Carried","type":1,"key":"metres","raw":18,"top":908,"color":"#cf403a"}},{"title":"Defenders Beaten","value":{"value":0,"title":"Defenders Beaten"},"overall":{"value":"2%","title":"Defenders Beaten","type":1,"key":"defenders_beaten","raw":0,"top":67,"color":"#cf403a"}},{"title":"Turnovers Won","value":{"value":0,"title":"Turnovers Won"},"overall":{"value":"2%","title":"Turnovers Won","type":1,"key":"turnovers_won","raw":0,"top":11,"color":"#cf403a"}},{"title":"Defenders Beaten","value":{"value":0,"title":"Defenders Beaten"},"overall":{"value":"2%","title":"Defenders Beaten","type":1,"key":"defenders_beaten","raw":0,"top":67,"color":"#cf403a"}},{"title":"Touches","value":{"value":8,"title":"Touches"},"overall":{"value":"2%","title":"Touches","type":1,"key":"touches","raw":8,"top":345,"color":"#cf403a"}},{"title":"Post Contact Metres","value":{"value":13,"title":"Post Contact Metres"},"overall":{"value":"2%","title":"Post Contact Metres","type":1,"key":"post_contact_metres","raw":13,"top":592,"color":"#cf403a"}}]},{"title":"Defence","stats":[{"title":"Tackles Made","value":{"value":4,"title":"Tackles Made"},"overall":{"value":"3%","title":"Tackles Made","type":1,"key":"tackles","raw":4,"top":123,"color":"#d0433a"}},{"title":"Tackles Completed","value":{"value":0.8,"title":"Tackles Completed"},"overall":{"value":"98%","title":"Tackles Completed","type":1,"key":"tackles_success","raw":0.8,"top":0.82,"color":"#499e68"}},{"title":"Dominant Tackles","value":{"value":0,"title":"Dominant Tackles"},"overall":{"value":"2%","title":"Dominant Tackles","type":1,"key":"dominant_tackles","raw":0,"top":13,"color":"#cf403a"}},{"title":"Tackles Per Minute","value":{"value":0.06,"title":"Tackles Per Minute"},"overall":{"value":"2%","title":"Tackles Per Minute","type":1,"key":"tackles","raw":0,"top":123,"color":"#cf403a"}},{"title":"Turnovers Won","value":{"value":0,"title":"Turnovers Won"},"overall":{"value":"2%","title":"Turnovers Won","type":1,"key":"turnovers_won","raw":0,"top":11,"color":"#cf403a"}},{"title":"Ruck Arrival Effectiveness","value":{"value":0,"title":"Ruck Arrival Effectiveness"},"overall":{"value":"2%","title":"Ruck Arrival Effectiveness","type":1,"key":"def_ruck_arrival_effectiveness","raw":0,"top":0.56,"color":"#cf403a"}}]},{"title":"Passing","stats":[{"title":"Try Assists","value":{"value":0,"title":"Try Assists"},"overall":{"value":"2%","title":"Try Assists","type":1,"key":"try_assist","raw":0,"top":8,"color":"#cf403a"}},{"title":"Successful Passes","value":{"value":3,"title":"Successful Passes"},"overall":{"value":"2%","title":"Successful Passes","type":1,"key":"passes","raw":3,"top":218,"color":"#cf403a"}},{"title":"Bad Passes","value":{"value":1,"title":"Bad Passes"},"overall":{"value":"5%","title":"Bad Passes","type":1,"key":"bad_passes","raw":1,"top":21,"color":"#d14739"}},{"title":"Pass Accuracy","value":{"value":"75%","title":"Pass Accuracy"},"overall":{"value":"100%","title":"Pass Accuracy","type":1,"key":"pass_accuracy","raw":"67%","top":0,"color":"#479d6c"}}]},{"title":"Kicking","stats":[{"title":"Successful Penalties","value":{"value":0,"title":"Successful Penalties"},"overall":{"value":"2%","title":"Successful Penalties","type":1,"key":"penalty_goals","raw":0,"top":1,"color":"#cf403a"}},{"title":"Successful Conversions","value":{"value":0,"title":"Successful Conversions"},"overall":{"value":"2%","title":"Successful Conversions","type":1,"key":"conversion_goals","raw":0,"top":4,"color":"#cf403a"}},{"title":"Kicks in Play","value":{"value":1,"title":"Kicks in Play"},"overall":{"value":"2%","title":"Kicks in Play","type":1,"key":"kicks_from_hand","raw":1,"top":66,"color":"#cf403a"}},{"title":"Drop Goals","value":{"value":0,"title":"Drop Goals"},"overall":{"value":"2%","title":"Drop Goals","type":1,"key":"drop_goals_converted","raw":0,"top":0,"color":"#ce3d3b"}},{"title":"Goals Converted","value":{"value":0,"title":"Goals Converted"},"overall":{"value":"2%","title":"Goals Converted","type":1,"key":"goal_kicks","raw":0,"top":0,"color":"#ce3d3b"}}]},{"title":"Discipline","stats":[{"title":"Penalties Conceded","value":{"value":0,"title":"Penalties Conceded"},"overall":{"value":"2%","title":"Penalties Conceded","type":1,"key":"penalties_conceded","raw":0,"top":11,"color":"#cf403a"}},{"title":"Yellow Cards","value":{"value":0,"title":"Yellow Cards"},"overall":{"value":"2%","title":"Yellow Cards","type":1,"key":"yellow_cards","raw":0,"top":1,"color":"#cf403a"}},{"title":"Red Cards","value":{"value":0,"title":"Red Cards"},"overall":{"value":"2%","title":"Red Cards","type":1,"key":"red_cards","raw":0,"top":0,"color":"#ce3d3b"}}]}]}}]
[{"title":"Japan Rugby League One","logo":"Japan Rugby League One","id":"421","games":[{"title":"Mitsubishi Sagamihara Dynaboars vs Hanazono Kintetsu Liners","date":"9 Dec 2023","dateSmall":"9 Dec","time":1702123200,"compLogo":"https:\/\/eu-cdn.rugbypass.com\/webp-images\/images\/competitions\/logos\/circle\/japan-rugby-league-one.png.webp?maxw=72&v=1762927428","compTitle":"Japan Rugby League One","draw":false,"opposition":{"name":"Hanazono Kintetsu Liners","logo":"https:\/\/eu-cdn.rugbypass.com\/webp-images\/images\/team-images\/logos\/png\/19568.png.webp?maxw=72&v=1762927734"},"win":true,"stats":{"mins":72,"tries":0,"yellow_cards":0,"red_cards":0,"conversions":0}},{"title":"Mitsubishi Sagamihara Dynaboars vs BlackRams Tokyo","date":"22 Apr 2023","dateSmall":"22 Apr","time":1682164800,"compLogo":"https:\/\/eu-cdn.rugbypass.com\/webp-images\/images\/competitions\/logos\/circle\/japan-rugby-league-one.png.webp?maxw=72&v=1762927428","compTitle":"Japan Rugby League One","draw":false,"opposition":{"name":"BlackRams Tokyo","logo":"https:\/\/eu-cdn.rugbypass.com\/webp-images\/images\/team-images\/logos\/png\/5208.png.webp?maxw=72&v=1762927735"},"win":false,"stats":{"mins":80,"tries":0,"yellow_cards":0,"red_cards":0,"conversions":0}},{"title":"Toshiba Brave Lupus Tokyo vs Mitsubishi Sagamihara Dynaboars","date":"14 Apr 2023","dateSmall":"14 Apr","time":1681491600,"compLogo":"https:\/\/eu-cdn.rugbypass.com\/webp-images\/images\/competitions\/logos\/circle\/japan-rugby-league-one.png.webp?maxw=72&v=1762927428","compTitle":"Japan Rugby League One","draw":false,"opposition":{"name":"Toshiba Brave Lupus Tokyo","logo":"https:\/\/eu-cdn.rugbypass.com\/webp-images\/images\/team-images\/logos\/png\/19702.png.webp?maxw=72&v=1762927734"},"win":false,"stats":{"mins":32,"tries":0,"yellow_cards":0,"red_cards":0,"conversions":0}},{"title":"Toyota Verblitz vs Mitsubishi Sagamihara Dynaboars","date":"8 Apr 2023","dateSmall":"8 Apr","time":1680957600,"compLogo":"https:\/\/eu-cdn.rugbypass.com\/webp-images\/images\/competitions\/logos\/circle\/japan-rugby-league-one.png.webp?maxw=72&v=1762927428","compTitle":"Japan Rugby League One","draw":false,"opposition":{"name":"Toyota Verblitz","logo":"https:\/\/eu-cdn.rugbypass.com\/webp-images\/images\/team-images\/logos\/png\/5211.png.webp?maxw=72&v=1762927735"},"win":false,"stats":{"mins":80,"tries":0,"yellow_cards":0,"red_cards":0,"conversions":0}},{"title":"Shizuoka BlueRevs vs Mitsubishi Sagamihara Dynaboars","date":"26 Mar 2023","dateSmall":"26 Mar","time":1679832000,"compLogo":"https:\/\/eu-cdn.rugbypass.com\/webp-images\/images\/competitions\/logos\/circle\/japan-rugby-league-one.png.webp?maxw=72&v=1762927428","compTitle":"Japan Rugby League One","draw":false,"opposition":{"name":"Shizuoka BlueRevs","logo":"https:\/\/eu-cdn.rugbypass.com\/webp-images\/images\/team-images\/logos\/png\/5212.png.webp?maxw=72&v=1762927735"},"win":false,"stats":{"mins":41,"tries":0,"yellow_cards":0,"red_cards":0,"conversions":0}},{"title":"Mitsubishi Sagamihara Dynaboars vs Saitama Wild Knights","date":"19 Mar 2023","dateSmall":"19 Mar","time":1679229000,"compLogo":"https:\/\/eu-cdn.rugbypass.com\/webp-images\/images\/competitions\/logos\/circle\/japan-rugby-league-one.png.webp?maxw=72&v=1762927428","compTitle":"Japan Rugby League One","draw":false,"opposition":{"name":"Saitama Wild Knights","logo":"https:\/\/eu-cdn.rugbypass.com\/webp-images\/images\/team-images\/logos\/png\/19567.png.webp?maxw=72&v=1762927734"},"win":false,"stats":{"mins":80,"tries":1,"yellow_cards":0,"red_cards":0,"conversions":0}},{"title":"Mitsubishi Sagamihara Dynaboars vs Yokohama Canon Eagles","date":"12 Mar 2023","dateSmall":"12 Mar","time":1678624200,"compLogo":"https:\/\/eu-cdn.rugbypass.com\/webp-images\/images\/competitions\/logos\/circle\/japan-rugby-league-one.png.webp?maxw=72&v=1762927428","compTitle":"Japan Rugby League One","draw":false,"opposition":{"name":"Yokohama Canon Eagles","logo":"https:\/\/eu-cdn.rugbypass.com\/webp-images\/images\/team-images\/logos\/png\/5200.png.webp?maxw=72&v=1762927735"},"win":false,"stats":{"mins":80,"tries":0,"yellow_cards":0,"red_cards":0,"conversions":0}},{"title":"Hanazono Kintetsu Liners vs Mitsubishi Sagamihara Dynaboars","date":"5 Mar 2023","dateSmall":"5 Mar","time":1678014000,"compLogo":"https:\/\/eu-cdn.rugbypass.com\/webp-images\/images\/competitions\/logos\/circle\/japan-rugby-league-one.png.webp?maxw=72&v=1762927428","compTitle":"Japan Rugby League One","draw":false,"opposition":{"name":"Hanazono Kintetsu Liners","logo":"https:\/\/eu-cdn.rugbypass.com\/webp-images\/images\/team-images\/logos\/png\/19568.png.webp?maxw=72&v=1762927734"},"win":true,"stats":{"mins":46,"tries":0,"yellow_cards":0,"red_cards":0,"conversions":0}},{"title":"Mitsubishi Sagamihara Dynaboars vs Green Rockets Tokatsu","date":"26 Feb 2023","dateSmall":"26 Feb","time":1677409200,"compLogo":"https:\/\/eu-cdn.rugbypass.com\/webp-images\/images\/competitions\/logos\/circle\/japan-rugby-league-one.png.webp?maxw=72&v=1762927428","compTitle":"Japan Rugby League One","draw":false,"opposition":{"name":"Green Rockets Tokatsu","logo":"https:\/\/eu-cdn.rugbypass.com\/webp-images\/images\/team-images\/logos\/generic-shield.png.webp?maxw=72"},"win":false,"stats":{"mins":80,"tries":0,"yellow_cards":0,"red_cards":0,"conversions":0}},{"title":"Kubota Spears vs Mitsubishi Sagamihara Dynaboars","date":"19 Feb 2023","dateSmall":"19 Feb","time":1676813400,"compLogo":"https:\/\/eu-cdn.rugbypass.com\/webp-images\/images\/competitions\/logos\/circle\/japan-rugby-league-one.png.webp?maxw=72&v=1762927428","compTitle":"Japan Rugby League One","draw":false,"opposition":{"name":"Kubota Spears","logo":"https:\/\/eu-cdn.rugbypass.com\/webp-images\/images\/team-images\/logos\/png\/5204.png.webp?maxw=72&v=1762927735"},"win":false,"stats":{"mins":80,"tries":1,"yellow_cards":0,"red_cards":0,"conversions":0}},{"title":"Tokyo Sungoliath vs Mitsubishi Sagamihara Dynaboars","date":"29 Jan 2023","dateSmall":"29 Jan","time":1674999000,"compLogo":"https:\/\/eu-cdn.rugbypass.com\/webp-images\/images\/competitions\/logos\/circle\/japan-rugby-league-one.png.webp?maxw=72&v=1762927428","compTitle":"Japan Rugby League One","draw":false,"opposition":{"name":"Tokyo Sungoliath","logo":"https:\/\/eu-cdn.rugbypass.com\/webp-images\/images\/team-images\/logos\/png\/5209.png.webp?maxw=72&v=1762927735"},"win":false,"stats":{"mins":45,"tries":0,"yellow_cards":0,"red_cards":0,"conversions":0}}]}]
Nozomi Nara Stats
Stats compared to other Centers
![]() {{selectedCompetition.competition.name}} {{selectedCompetition.competition.season.label}}
{{selectedCompetition.competition.name}} {{selectedCompetition.competition.season.label}} -
![]() {{item.competition.name}} {{item.competition.season.label}}
{{item.competition.name}} {{item.competition.season.label}}
{{graphStats[0].value}}
{{graphStats[0].title}}
{{graphStats[1].value}}
{{graphStats[1].title}}
{{graphStats[2].title}}
{{graphStats[2].value}}
{{graphStats[3].title}}
{{graphStats[3].value}}
{{graphStats[4].title}}
{{graphStats[4].value}}
{{graphStats[5].value}}
{{graphStats[5].title}}
Nozomi Nara Stats
Stats compared to other Centers
{{item.title}}
{{item.value}}
Match Stats
![]() {{selectedMatchesComp}}
{{selectedMatchesComp}} - All
-
![]() {{item.title}}
{{item.title}}
9 Dec 2023
9 Dec
W
v

Hanazono Kintetsu Liners
22 Apr 2023
22 Apr
L
v

BlackRams Tokyo
14 Apr 2023
14 Apr
L
v

Toshiba Brave Lupus Tokyo
8 Apr 2023
8 Apr
L
v

Toyota Verblitz
26 Mar 2023
26 Mar
L
v

Shizuoka BlueRevs
19 Mar 2023
19 Mar
L
v

Saitama Wild Knights
12 Mar 2023
12 Mar
L
v

Yokohama Canon Eagles
5 Mar 2023
5 Mar
W
v
Hanazono Kintetsu Liners
26 Feb 2023
26 Feb
L
v

Green Rockets Tokatsu
19 Feb 2023
19 Feb
L
v

Kubota Spears
{{game.date}}
{{game.dateSmall}}
W L
v
![]()
{{game.stats.mins}}
{{game.stats.tries}}
{{game.stats.conversions}}
{{game.stats.yellow_cards}}
{{game.stats.red_cards}}
Nozomi Nara Performance Analysis