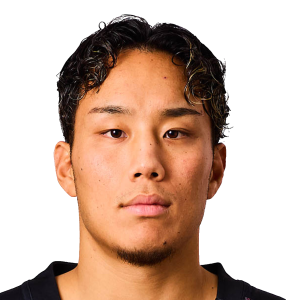
Yuta Kurihara News

Japan Rugby League One
RWC-winning All Black's coaching career to start against Ian Foster
The domestic league supplying 13 of Rugby's Greatest Rivalry Test players
Discarded Chiefs player secures move to Japan's Rugby League One
The Boks and All Blacks prove it's time we think differently about JRLO
Latest
JRLO XV team of the season: All Blacks dominate Springboks five to two
The major All Blacks subplot as Japan Rugby League One final played out
Bernard Foley eyes final bow as Super Rugby return rumours spread
Two titans of All Blacks rugby set to break new ground
Springboks star dominates Japan Rugby League One season stats
Former Wallabies loose-forward on track for second title in Japan
[{"competition":{"rid":"1002","oid":"421","name":"Japan Rugby League One","logo":"https:\/\/eu-cdn.rugbypass.com\/images\/competitions\/logos\/png\/japan-rugby-league-one.png?v=1762927429","logoCircle":"https:\/\/eu-cdn.rugbypass.com\/images\/competitions\/logos\/circle\/japan-rugby-league-one.png?v=1762927428","season":{"type":"opta","season":2026,"years":{"2025":2025,"2026":2026},"label":"2025\/2026","completed":1,"standings":1,"started":1,"months":0,"games":114},"stats":{"success":1,"stats":{"att_ruck_arrival_effectiveness":0.81,"av_gain":4.08,"av_post_contact_metres":2.38,"bad_passes":3,"balls_played_total":16,"balls_played_with_hands":15,"carries":5,"carries_crossed_gain_line":3,"carries_not_made_gain_line":2,"carries_one_out_drive":2,"carries_one_out_drive_metres":7,"carries_support_metres":11,"carry_dominant":3,"carry_neutral":2,"def_ruck_arrival_effectiveness":0.25,"dominant_carry_percent":0.6,"handling_error":2,"kick_metres":20,"kicks_from_hand":1,"metres":20,"minutes_played_total":116,"missed_tackles":3,"passes":11,"pen_defs":2,"penalties_conceded":2,"player_id":37808,"player_team_id":5208,"points":0,"post_contact_metres":12,"ruck_arrival":31,"ruck_arrival_attack":27,"ruck_arrival_defence":4,"ruck_arrivals_within_1st_3":26,"tackle_height_legs":3,"tackle_height_legs_percentage":0.92,"tackle_height_lower_torso":9,"tackle_height_lower_torso_percentage":2.77,"tackle_height_no_contact":1,"tackle_height_no_contact_percentage":0.31,"tackle_penalty_conceded":1,"tackles":9,"tackles_success":0.69,"tackles_total_attempted":13,"total_games":5,"total_tackles":13,"touches":17,"turnovers_conceded":2,"yellow_cards":1},"topPlayerStats":{"att_ruck_arrival_effectiveness":{"id":36544,"value":1},"av_gain":{"id":61680,"value":9.12},"av_post_contact_metres":{"id":36495,"value":5.87},"bad_passes":{"id":20143,"value":22},"balls_played_total":{"id":21463,"value":354},"balls_played_with_hands":{"id":21463,"value":335},"carries":{"id":19909,"value":210},"carries_crossed_gain_line":{"id":21463,"value":134},"carries_kick_return":{"id":43563,"value":25},"carries_kick_return_metres":{"id":28681,"value":221},"carries_not_made_gain_line":{"id":19909,"value":65},"carries_one_out_drive":{"id":21463,"value":64},"carries_one_out_drive_metres":{"id":30973,"value":244},"carries_pick_and_go":{"id":19909,"value":17},"carries_pick_and_go_metres":{"id":19909,"value":129},"carries_support_metres":{"id":30945,"value":281},"carry_dominant":{"id":19909,"value":103},"carry_ineffective":{"id":37809,"value":12},"carry_neutral":{"id":21463,"value":94},"clean_breaks":{"id":43563,"value":22},"collection_attacking_catch":{"id":22419,"value":15},"def_ruck_arrival_effectiveness":{"id":35889,"value":0.33},"defenders_beaten":{"id":19909,"value":98},"dominant_carry_percent":{"id":19937,"value":0.75},"dominant_tackles":{"id":34873,"value":14},"handling_error":{"id":28681,"value":19},"kick_metres":{"id":17091,"value":1913},"kicks_from_hand":{"id":17091,"value":51},"line_break_assists":{"id":21463,"value":15},"metres":{"id":19909,"value":1156},"minutes_played_total":{"id":30945,"value":1611},"missed_tackles":{"id":30973,"value":50},"offloads":{"id":28681,"value":52},"passes":{"id":21463,"value":178},"pen_defs":{"id":21463,"value":8},"pen_offs":{"id":61614,"value":8},"penalties_conceded":{"id":61614,"value":14},"player_id":{"id":70090,"value":70090},"player_team_id":{"id":21074,"value":19702},"points":{"id":22419,"value":106},"post_contact_metres":{"id":19909,"value":1010},"retained_kicks_percentage":{"id":58208,"value":1},"ruck_arrival":{"id":18971,"value":227},"ruck_arrival_attack":{"id":36750,"value":180},"ruck_arrival_defence":{"id":30945,"value":81},"ruck_arrivals_within_1st_3":{"id":18971,"value":207},"tackle_height_legs":{"id":62200,"value":76},"tackle_height_legs_percentage":{"id":36544,"value":2.86},"tackle_height_lower_torso":{"id":30945,"value":99},"tackle_height_lower_torso_percentage":{"id":26479,"value":4},"tackle_height_no_contact":{"id":30973,"value":21},"tackle_height_no_contact_percentage":{"id":43628,"value":2},"tackle_height_upper_torso":{"id":21463,"value":82},"tackle_height_upper_torso_percentage":{"id":20143,"value":2.02},"tackle_offload_allowed":{"id":34873,"value":35},"tackle_penalty_conceded":{"id":21463,"value":3},"tackles":{"id":22419,"value":169},"tackles_success":{"id":21463,"value":0.8},"tackles_total_attempted":{"id":30945,"value":225},"total_games":{"id":43570,"value":21},"total_tackles":{"id":30945,"value":225},"touches":{"id":21463,"value":354},"tries":{"id":22419,"value":15},"try_assist":{"id":21463,"value":10},"turnovers_conceded":{"id":32520,"value":23},"turnovers_won":{"id":18971,"value":12},"tackle_turnover":{"id":61614,"value":6},"lineout_takes":{"id":62200,"value":5},"tackle_try_saver":{"id":18971,"value":2},"tackles_try_conceded":{"id":22419,"value":11},"yellow_cards":{"id":32522,"value":3},"lineouts_to_own_player":{"id":61680,"value":2},"lineouts_won":{"id":61680,"value":2},"conversion_goals":{"id":34873,"value":12},"goal_kick_percentage":{"id":22419,"value":0.74},"missed_conversion_goals":{"id":34873,"value":8},"red_cards":{"id":20668,"value":1},"penalty_goals":{"id":22419,"value":3},"missed_penalty_goals":{"id":34873,"value":1}}}},"main":{"totalMinsPlayed":116,"main":[{"value":0,"title":"Defenders Beaten"},{"value":11,"title":"Successful Passes"},{"value":0.69,"title":"Tackles Completed"},{"value":0,"title":"Line Breaks"},{"value":5,"title":"Carries"},{"value":0,"title":"Tries"},{"value":0,"title":"Try Assists"}],"profile":[{"value":"2%","title":"Defenders Beaten","type":1,"key":"defenders_beaten","raw":0,"top":98,"color":"#cf403a"},{"value":"6%","title":"Successful Passes","type":1,"key":"passes","raw":11,"top":178,"color":"#d14939"},{"value":"86%","title":"Tackles Completed","type":1,"key":"tackles_success","raw":0.69,"top":0.8,"color":"#65a857"},{"value":"2%","title":"Line Breaks","type":1,"key":"clean_breaks","raw":0,"top":22,"color":"#cf403a"},{"value":"2%","title":"Carries","type":1,"key":"carries","raw":5,"top":210,"color":"#cf403a"},{"value":"2%","title":"Tries","type":1,"key":"tries","raw":0,"top":15,"color":"#cf403a"},{"value":"2%","title":"Try Assists","type":1,"key":"try_assist","raw":0,"top":10,"color":"#cf403a"}]},"group":{"groups":[{"title":"Attack","stats":[{"title":"Points","value":{"value":0,"title":"Points"},"overall":{"value":"2%","title":"Points","type":1,"key":"points","raw":0,"top":106,"color":"#cf403a"}},{"title":"Tries","value":{"value":0,"title":"Tries"},"overall":{"value":"2%","title":"Tries","type":1,"key":"tries","raw":0,"top":15,"color":"#cf403a"}},{"title":"Line Breaks","value":{"value":0,"title":"Line Breaks"},"overall":{"value":"2%","title":"Line Breaks","type":1,"key":"clean_breaks","raw":0,"top":22,"color":"#cf403a"}},{"title":"Carries","value":{"value":5,"title":"Carries"},"overall":{"value":"2%","title":"Carries","type":1,"key":"carries","raw":5,"top":210,"color":"#cf403a"}},{"title":"Carries Per Minute","value":{"value":0.04,"title":"Carries Per Minute"},"overall":{"value":"2%","title":"Carries Per Minute","type":1,"key":"carries","raw":0,"top":210,"color":"#cf403a"}},{"title":"Metres Carried","value":{"value":20,"title":"Metres Carried"},"overall":{"value":"2%","title":"Metres Carried","type":1,"key":"metres","raw":20,"top":1156,"color":"#cf403a"}},{"title":"Defenders Beaten","value":{"value":0,"title":"Defenders Beaten"},"overall":{"value":"2%","title":"Defenders Beaten","type":1,"key":"defenders_beaten","raw":0,"top":98,"color":"#cf403a"}},{"title":"Turnovers Won","value":{"value":0,"title":"Turnovers Won"},"overall":{"value":"2%","title":"Turnovers Won","type":1,"key":"turnovers_won","raw":0,"top":12,"color":"#cf403a"}},{"title":"Defenders Beaten","value":{"value":0,"title":"Defenders Beaten"},"overall":{"value":"2%","title":"Defenders Beaten","type":1,"key":"defenders_beaten","raw":0,"top":98,"color":"#cf403a"}},{"title":"Touches","value":{"value":17,"title":"Touches"},"overall":{"value":"5%","title":"Touches","type":1,"key":"touches","raw":17,"top":354,"color":"#d14739"}},{"title":"Post Contact Metres","value":{"value":12,"title":"Post Contact Metres"},"overall":{"value":"2%","title":"Post Contact Metres","type":1,"key":"post_contact_metres","raw":12,"top":1010,"color":"#cf403a"}}]},{"title":"Defence","stats":[{"title":"Tackles Made","value":{"value":9,"title":"Tackles Made"},"overall":{"value":"5%","title":"Tackles Made","type":1,"key":"tackles","raw":9,"top":169,"color":"#d14739"}},{"title":"Tackles Completed","value":{"value":0.69,"title":"Tackles Completed"},"overall":{"value":"86%","title":"Tackles Completed","type":1,"key":"tackles_success","raw":0.69,"top":0.8,"color":"#65a857"}},{"title":"Dominant Tackles","value":{"value":0,"title":"Dominant Tackles"},"overall":{"value":"2%","title":"Dominant Tackles","type":1,"key":"dominant_tackles","raw":0,"top":14,"color":"#cf403a"}},{"title":"Tackles Per Minute","value":{"value":0.08,"title":"Tackles Per Minute"},"overall":{"value":"2%","title":"Tackles Per Minute","type":1,"key":"tackles","raw":0,"top":169,"color":"#cf403a"}},{"title":"Turnovers Won","value":{"value":0,"title":"Turnovers Won"},"overall":{"value":"2%","title":"Turnovers Won","type":1,"key":"turnovers_won","raw":0,"top":12,"color":"#cf403a"}},{"title":"Ruck Arrival Effectiveness","value":{"value":0.25,"title":"Ruck Arrival Effectiveness"},"overall":{"value":"76%","title":"Ruck Arrival Effectiveness","type":1,"key":"def_ruck_arrival_effectiveness","raw":0.25,"top":0.33,"color":"#8ab24b"}}]},{"title":"Passing","stats":[{"title":"Try Assists","value":{"value":0,"title":"Try Assists"},"overall":{"value":"2%","title":"Try Assists","type":1,"key":"try_assist","raw":0,"top":10,"color":"#cf403a"}},{"title":"Successful Passes","value":{"value":11,"title":"Successful Passes"},"overall":{"value":"6%","title":"Successful Passes","type":1,"key":"passes","raw":11,"top":178,"color":"#d14939"}},{"title":"Bad Passes","value":{"value":3,"title":"Bad Passes"},"overall":{"value":"14%","title":"Bad Passes","type":1,"key":"bad_passes","raw":3,"top":22,"color":"#d75e37"}},{"title":"Pass Accuracy","value":{"value":"79%","title":"Pass Accuracy"},"overall":{"value":"100%","title":"Pass Accuracy","type":1,"key":"pass_accuracy","raw":"73%","top":0,"color":"#479d6c"}}]},{"title":"Kicking","stats":[{"title":"Successful Penalties","value":{"value":0,"title":"Successful Penalties"},"overall":{"value":"2%","title":"Successful Penalties","type":1,"key":"penalty_goals","raw":0,"top":3,"color":"#cf403a"}},{"title":"Successful Conversions","value":{"value":0,"title":"Successful Conversions"},"overall":{"value":"2%","title":"Successful Conversions","type":1,"key":"conversion_goals","raw":0,"top":12,"color":"#cf403a"}},{"title":"Kicks in Play","value":{"value":1,"title":"Kicks in Play"},"overall":{"value":"2%","title":"Kicks in Play","type":1,"key":"kicks_from_hand","raw":1,"top":51,"color":"#cf403a"}},{"title":"Drop Goals","value":{"value":0,"title":"Drop Goals"},"overall":{"value":"2%","title":"Drop Goals","type":1,"key":"drop_goals_converted","raw":0,"top":0,"color":"#ce3d3b"}},{"title":"Goals Converted","value":{"value":0,"title":"Goals Converted"},"overall":{"value":"2%","title":"Goals Converted","type":1,"key":"goal_kicks","raw":0,"top":0,"color":"#ce3d3b"}}]},{"title":"Discipline","stats":[{"title":"Penalties Conceded","value":{"value":2,"title":"Penalties Conceded"},"overall":{"value":"14%","title":"Penalties Conceded","type":1,"key":"penalties_conceded","raw":2,"top":14,"color":"#d75e37"}},{"title":"Yellow Cards","value":{"value":1,"title":"Yellow Cards"},"overall":{"value":"33%","title":"Yellow Cards","type":1,"key":"yellow_cards","raw":1,"top":3,"color":"#e6943a"}},{"title":"Red Cards","value":{"value":0,"title":"Red Cards"},"overall":{"value":"2%","title":"Red Cards","type":1,"key":"red_cards","raw":0,"top":1,"color":"#cf403a"}}]}]}},{"competition":{"rid":"1002","oid":"421","name":"Japan Rugby League One","logo":"https:\/\/eu-cdn.rugbypass.com\/images\/competitions\/logos\/png\/japan-rugby-league-one.png?v=1762927429","logoCircle":"https:\/\/eu-cdn.rugbypass.com\/images\/competitions\/logos\/circle\/japan-rugby-league-one.png?v=1762927428","season":{"type":"opta","season":2024,"years":{"2023":2023,"2024":2024},"label":"2023\/2024","completed":1,"standings":1,"started":1,"months":0,"games":100},"stats":{"success":1,"stats":{"att_ruck_arrival_effectiveness":0.8,"av_gain":3.82,"av_post_contact_metres":1.83,"bad_passes":6,"carries":56,"carries_crossed_gain_line":29,"carries_kick_return":7,"carries_kick_return_metres":63,"carries_not_made_gain_line":20,"carries_one_out_drive":11,"carries_one_out_drive_metres":11,"carries_support_metres":59,"carry_dominant":14,"carry_ineffective":4,"carry_neutral":26,"clean_breaks":2,"def_ruck_arrival_effectiveness":0.23,"defenders_beaten":10,"dominant_carry_percent":0.25,"dominant_tackles":5,"handling_error":3,"kick_metres":233,"kicks_from_hand":9,"line_break_assists":3,"lineouts_to_own_player":1,"lineouts_won":1,"metres":214,"minutes_played_total":755,"missed_tackles":21,"offloads":2,"passes":50,"pen_offs":1,"penalties_conceded":1,"player_id":37808,"player_team_id":5208,"points":0,"post_contact_metres":103,"ruck_arrival":114,"ruck_arrival_attack":84,"ruck_arrival_defence":30,"tackle_offload_allowed":12,"tackle_turnover":4,"tackles":97,"tackles_success":0.73,"total_games":14,"touches":104,"try_assist":1,"turnovers_conceded":6,"turnovers_won":5},"topPlayerStats":{"att_ruck_arrival_effectiveness":{"id":22413,"value":1},"av_gain":{"id":61540,"value":15.7},"av_post_contact_metres":{"id":61540,"value":9.85},"bad_passes":{"id":32522,"value":21},"carries":{"id":20037,"value":165},"carries_crossed_gain_line":{"id":30973,"value":109},"carries_kick_return":{"id":43563,"value":29},"carries_kick_return_metres":{"id":43563,"value":206},"carries_not_made_gain_line":{"id":27129,"value":49},"carries_one_out_drive":{"id":27129,"value":69},"carries_one_out_drive_metres":{"id":32978,"value":228},"carries_support_metres":{"id":37887,"value":288},"carry_dominant":{"id":20037,"value":80},"carry_ineffective":{"id":31059,"value":10},"carry_neutral":{"id":32978,"value":60},"clean_breaks":{"id":27652,"value":20},"def_ruck_arrival_effectiveness":{"id":25611,"value":0.56},"defenders_beaten":{"id":30973,"value":67},"dominant_carry_percent":{"id":36555,"value":1},"dominant_tackles":{"id":30973,"value":13},"handling_error":{"id":20037,"value":18},"kick_metres":{"id":19937,"value":1697},"kicks_from_hand":{"id":19937,"value":66},"line_break_assists":{"id":32522,"value":18},"lineout_takes":{"id":23409,"value":3},"metres":{"id":43563,"value":908},"minutes_played_total":{"id":30973,"value":1280},"missed_tackles":{"id":19937,"value":36},"offloads":{"id":27129,"value":24},"passes":{"id":19937,"value":218},"pen_defs":{"id":58208,"value":10},"pen_offs":{"id":21411,"value":4},"penalties_conceded":{"id":58208,"value":11},"player_id":{"id":62261,"value":62261},"player_team_id":{"id":20070,"value":19702},"points":{"id":27652,"value":70},"post_contact_metres":{"id":20037,"value":592},"ruck_arrival":{"id":32978,"value":169},"ruck_arrival_attack":{"id":30973,"value":144},"ruck_arrival_defence":{"id":20037,"value":65},"tackle_offload_allowed":{"id":30973,"value":23},"tackles":{"id":19937,"value":123},"tackles_success":{"id":19905,"value":0.82},"total_games":{"id":31059,"value":18},"touches":{"id":19937,"value":345},"tries":{"id":27652,"value":14},"try_assist":{"id":32522,"value":8},"turnovers_conceded":{"id":20037,"value":20},"carries_pick_and_go":{"id":20143,"value":16},"carries_pick_and_go_metres":{"id":20143,"value":67},"collection_attacking_catch":{"id":43563,"value":6},"retained_kicks_percentage":{"id":31059,"value":0.56},"tackle_penalty_conceded":{"id":34873,"value":4},"tackle_turnover":{"id":27652,"value":7},"turnovers_won":{"id":20143,"value":11},"yellow_cards":{"id":19905,"value":1},"conversion_goals":{"id":38419,"value":4},"goal_kick_percentage":{"id":38419,"value":1},"missed_conversion_goals":{"id":20037,"value":4},"penalty_goals":{"id":20037,"value":1},"lineouts_to_own_player":{"id":31059,"value":2},"lineouts_won":{"id":31059,"value":2},"tackle_try_saver":{"id":21074,"value":2}}}},"main":{"totalMinsPlayed":755,"main":[{"value":10,"title":"Defenders Beaten"},{"value":50,"title":"Successful Passes"},{"value":0.73,"title":"Tackles Completed"},{"value":2,"title":"Line Breaks"},{"value":56,"title":"Carries"},{"value":0,"title":"Tries"},{"value":1,"title":"Try Assists"}],"profile":[{"value":"15%","title":"Defenders Beaten","type":1,"key":"defenders_beaten","raw":10,"top":67,"color":"#d86137"},{"value":"23%","title":"Successful Passes","type":1,"key":"passes","raw":50,"top":218,"color":"#de7637"},{"value":"89%","title":"Tackles Completed","type":1,"key":"tackles_success","raw":0.73,"top":0.82,"color":"#5ca65b"},{"value":"10%","title":"Line Breaks","type":1,"key":"clean_breaks","raw":2,"top":20,"color":"#d55438"},{"value":"34%","title":"Carries","type":1,"key":"carries","raw":56,"top":165,"color":"#e7983b"},{"value":"2%","title":"Tries","type":1,"key":"tries","raw":0,"top":14,"color":"#cf403a"},{"value":"13%","title":"Try Assists","type":1,"key":"try_assist","raw":1,"top":8,"color":"#d75c37"}]},"group":{"groups":[{"title":"Attack","stats":[{"title":"Points","value":{"value":0,"title":"Points"},"overall":{"value":"2%","title":"Points","type":1,"key":"points","raw":0,"top":70,"color":"#cf403a"}},{"title":"Tries","value":{"value":0,"title":"Tries"},"overall":{"value":"2%","title":"Tries","type":1,"key":"tries","raw":0,"top":14,"color":"#cf403a"}},{"title":"Line Breaks","value":{"value":2,"title":"Line Breaks"},"overall":{"value":"10%","title":"Line Breaks","type":1,"key":"clean_breaks","raw":2,"top":20,"color":"#d55438"}},{"title":"Carries","value":{"value":56,"title":"Carries"},"overall":{"value":"34%","title":"Carries","type":1,"key":"carries","raw":56,"top":165,"color":"#e7983b"}},{"title":"Carries Per Minute","value":{"value":0.07,"title":"Carries Per Minute"},"overall":{"value":"2%","title":"Carries Per Minute","type":1,"key":"carries","raw":0,"top":165,"color":"#cf403a"}},{"title":"Metres Carried","value":{"value":214,"title":"Metres Carried"},"overall":{"value":"24%","title":"Metres Carried","type":1,"key":"metres","raw":214,"top":908,"color":"#de7a37"}},{"title":"Defenders Beaten","value":{"value":10,"title":"Defenders Beaten"},"overall":{"value":"15%","title":"Defenders Beaten","type":1,"key":"defenders_beaten","raw":10,"top":67,"color":"#d86137"}},{"title":"Turnovers Won","value":{"value":5,"title":"Turnovers Won"},"overall":{"value":"45%","title":"Turnovers Won","type":1,"key":"turnovers_won","raw":5,"top":11,"color":"#f1b841"}},{"title":"Defenders Beaten","value":{"value":10,"title":"Defenders Beaten"},"overall":{"value":"15%","title":"Defenders Beaten","type":1,"key":"defenders_beaten","raw":10,"top":67,"color":"#d86137"}},{"title":"Touches","value":{"value":104,"title":"Touches"},"overall":{"value":"30%","title":"Touches","type":1,"key":"touches","raw":104,"top":345,"color":"#e48b39"}},{"title":"Post Contact Metres","value":{"value":103,"title":"Post Contact Metres"},"overall":{"value":"17%","title":"Post Contact Metres","type":1,"key":"post_contact_metres","raw":103,"top":592,"color":"#d96636"}}]},{"title":"Defence","stats":[{"title":"Tackles Made","value":{"value":97,"title":"Tackles Made"},"overall":{"value":"79%","title":"Tackles Made","type":1,"key":"tackles","raw":97,"top":123,"color":"#7eae4e"}},{"title":"Tackles Completed","value":{"value":0.73,"title":"Tackles Completed"},"overall":{"value":"89%","title":"Tackles Completed","type":1,"key":"tackles_success","raw":0.73,"top":0.82,"color":"#5ca65b"}},{"title":"Dominant Tackles","value":{"value":5,"title":"Dominant Tackles"},"overall":{"value":"38%","title":"Dominant Tackles","type":1,"key":"dominant_tackles","raw":5,"top":13,"color":"#eaa33c"}},{"title":"Tackles Per Minute","value":{"value":0.13,"title":"Tackles Per Minute"},"overall":{"value":"2%","title":"Tackles Per Minute","type":1,"key":"tackles","raw":0,"top":123,"color":"#cf403a"}},{"title":"Turnovers Won","value":{"value":5,"title":"Turnovers Won"},"overall":{"value":"45%","title":"Turnovers Won","type":1,"key":"turnovers_won","raw":5,"top":11,"color":"#f1b841"}},{"title":"Ruck Arrival Effectiveness","value":{"value":0.23,"title":"Ruck Arrival Effectiveness"},"overall":{"value":"41%","title":"Ruck Arrival Effectiveness","type":1,"key":"def_ruck_arrival_effectiveness","raw":0.23,"top":0.56,"color":"#edac3e"}}]},{"title":"Passing","stats":[{"title":"Try Assists","value":{"value":1,"title":"Try Assists"},"overall":{"value":"13%","title":"Try Assists","type":1,"key":"try_assist","raw":1,"top":8,"color":"#d75c37"}},{"title":"Successful Passes","value":{"value":50,"title":"Successful Passes"},"overall":{"value":"23%","title":"Successful Passes","type":1,"key":"passes","raw":50,"top":218,"color":"#de7637"}},{"title":"Bad Passes","value":{"value":6,"title":"Bad Passes"},"overall":{"value":"29%","title":"Bad Passes","type":1,"key":"bad_passes","raw":6,"top":21,"color":"#e28938"}},{"title":"Pass Accuracy","value":{"value":"89%","title":"Pass Accuracy"},"overall":{"value":"100%","title":"Pass Accuracy","type":1,"key":"pass_accuracy","raw":"88%","top":0,"color":"#479d6c"}}]},{"title":"Kicking","stats":[{"title":"Successful Penalties","value":{"value":0,"title":"Successful Penalties"},"overall":{"value":"2%","title":"Successful Penalties","type":1,"key":"penalty_goals","raw":0,"top":1,"color":"#cf403a"}},{"title":"Successful Conversions","value":{"value":0,"title":"Successful Conversions"},"overall":{"value":"2%","title":"Successful Conversions","type":1,"key":"conversion_goals","raw":0,"top":4,"color":"#cf403a"}},{"title":"Kicks in Play","value":{"value":9,"title":"Kicks in Play"},"overall":{"value":"14%","title":"Kicks in Play","type":1,"key":"kicks_from_hand","raw":9,"top":66,"color":"#d75e37"}},{"title":"Drop Goals","value":{"value":0,"title":"Drop Goals"},"overall":{"value":"2%","title":"Drop Goals","type":1,"key":"drop_goals_converted","raw":0,"top":0,"color":"#ce3d3b"}},{"title":"Goals Converted","value":{"value":0,"title":"Goals Converted"},"overall":{"value":"2%","title":"Goals Converted","type":1,"key":"goal_kicks","raw":0,"top":0,"color":"#ce3d3b"}}]},{"title":"Discipline","stats":[{"title":"Penalties Conceded","value":{"value":1,"title":"Penalties Conceded"},"overall":{"value":"9%","title":"Penalties Conceded","type":1,"key":"penalties_conceded","raw":1,"top":11,"color":"#d35038"}},{"title":"Yellow Cards","value":{"value":0,"title":"Yellow Cards"},"overall":{"value":"2%","title":"Yellow Cards","type":1,"key":"yellow_cards","raw":0,"top":1,"color":"#cf403a"}},{"title":"Red Cards","value":{"value":0,"title":"Red Cards"},"overall":{"value":"2%","title":"Red Cards","type":1,"key":"red_cards","raw":0,"top":0,"color":"#ce3d3b"}}]}]}}]
[{"title":"Japan Rugby League One","logo":"Japan Rugby League One","id":"421","games":[{"title":"Tokyo Sungoliath vs BlackRams Tokyo","date":"10 May 2026","dateSmall":"10 May","time":1778416200,"compLogo":"https:\/\/eu-cdn.rugbypass.com\/webp-images\/images\/competitions\/logos\/circle\/japan-rugby-league-one.png.webp?maxw=72&v=1762927428","compTitle":"Japan Rugby League One","draw":false,"opposition":{"name":"Tokyo Sungoliath","logo":"https:\/\/eu-cdn.rugbypass.com\/webp-images\/images\/team-images\/logos\/png\/5209.png.webp?maxw=72&v=1762927735"},"win":false,"stats":{"mins":17,"tries":0,"yellow_cards":0,"red_cards":0,"conversions":0}},{"title":"BlackRams Tokyo vs Kubota Spears","date":"3 May 2026","dateSmall":"3 May","time":1777806000,"compLogo":"https:\/\/eu-cdn.rugbypass.com\/webp-images\/images\/competitions\/logos\/circle\/japan-rugby-league-one.png.webp?maxw=72&v=1762927428","compTitle":"Japan Rugby League One","draw":false,"opposition":{"name":"Kubota Spears","logo":"https:\/\/eu-cdn.rugbypass.com\/webp-images\/images\/team-images\/logos\/png\/5204.png.webp?maxw=72&v=1762927735"},"win":false,"stats":{"mins":40,"tries":0,"yellow_cards":0,"red_cards":0,"conversions":0}},{"title":"BlackRams Tokyo vs Toyota Verblitz","date":"26 Apr 2026","dateSmall":"26 Apr","time":1777206600,"compLogo":"https:\/\/eu-cdn.rugbypass.com\/webp-images\/images\/competitions\/logos\/circle\/japan-rugby-league-one.png.webp?maxw=72&v=1762927428","compTitle":"Japan Rugby League One","draw":false,"opposition":{"name":"Toyota Verblitz","logo":"https:\/\/eu-cdn.rugbypass.com\/webp-images\/images\/team-images\/logos\/png\/5211.png.webp?maxw=72&v=1762927735"},"win":false,"stats":{"mins":39,"tries":0,"yellow_cards":1,"red_cards":0,"conversions":0}},{"title":"Saitama Wild Knights vs BlackRams Tokyo","date":"21 Mar 2026","dateSmall":"21 Mar","time":1774096200,"compLogo":"https:\/\/eu-cdn.rugbypass.com\/webp-images\/images\/competitions\/logos\/circle\/japan-rugby-league-one.png.webp?maxw=72&v=1762927428","compTitle":"Japan Rugby League One","draw":false,"opposition":{"name":"Saitama Wild Knights","logo":"https:\/\/eu-cdn.rugbypass.com\/webp-images\/images\/team-images\/logos\/png\/19567.png.webp?maxw=72&v=1762927734"},"win":false,"stats":{"mins":17,"tries":0,"yellow_cards":0,"red_cards":0,"conversions":0}},{"title":"Toshiba Brave Lupus Tokyo vs BlackRams Tokyo","date":"28 Feb 2026","dateSmall":"28 Feb","time":1772276400,"compLogo":"https:\/\/eu-cdn.rugbypass.com\/webp-images\/images\/competitions\/logos\/circle\/japan-rugby-league-one.png.webp?maxw=72&v=1762927428","compTitle":"Japan Rugby League One","draw":false,"opposition":{"name":"Toshiba Brave Lupus Tokyo","logo":"https:\/\/eu-cdn.rugbypass.com\/webp-images\/images\/team-images\/logos\/png\/19702.png.webp?maxw=72&v=1762927734"},"win":true,"stats":{"mins":3,"tries":0,"yellow_cards":0,"red_cards":0,"conversions":0}},{"title":"BlackRams Tokyo vs Toyota Verblitz","date":"5 May 2024","dateSmall":"5 May","time":1714912500,"compLogo":"https:\/\/eu-cdn.rugbypass.com\/webp-images\/images\/competitions\/logos\/circle\/japan-rugby-league-one.png.webp?maxw=72&v=1762927428","compTitle":"Japan Rugby League One","draw":false,"opposition":{"name":"Toyota Verblitz","logo":"https:\/\/eu-cdn.rugbypass.com\/webp-images\/images\/team-images\/logos\/png\/5211.png.webp?maxw=72&v=1762927735"},"win":false,"stats":{"mins":80,"tries":0,"yellow_cards":0,"red_cards":0,"conversions":0}},{"title":"Mitsubishi Sagamihara Dynaboars vs BlackRams Tokyo","date":"27 Apr 2024","dateSmall":"27 Apr","time":1714212000,"compLogo":"https:\/\/eu-cdn.rugbypass.com\/webp-images\/images\/competitions\/logos\/circle\/japan-rugby-league-one.png.webp?maxw=72&v=1762927428","compTitle":"Japan Rugby League One","draw":false,"opposition":{"name":"Mitsubishi Sagamihara Dynaboars","logo":"https:\/\/eu-cdn.rugbypass.com\/webp-images\/images\/team-images\/logos\/png\/594.png.webp?maxw=72&v=1762927735"},"win":true,"stats":{"mins":80,"tries":0,"yellow_cards":0,"red_cards":0,"conversions":0}},{"title":"BlackRams Tokyo vs Yokohama Canon Eagles","date":"6 Apr 2024","dateSmall":"6 Apr","time":1712401200,"compLogo":"https:\/\/eu-cdn.rugbypass.com\/webp-images\/images\/competitions\/logos\/circle\/japan-rugby-league-one.png.webp?maxw=72&v=1762927428","compTitle":"Japan Rugby League One","draw":false,"opposition":{"name":"Yokohama Canon Eagles","logo":"https:\/\/eu-cdn.rugbypass.com\/webp-images\/images\/team-images\/logos\/png\/5200.png.webp?maxw=72&v=1762927735"},"win":false,"stats":{"mins":54,"tries":0,"yellow_cards":0,"red_cards":0,"conversions":0}},{"title":"Toshiba Brave Lupus Tokyo vs BlackRams Tokyo","date":"24 Mar 2024","dateSmall":"24 Mar","time":1711283400,"compLogo":"https:\/\/eu-cdn.rugbypass.com\/webp-images\/images\/competitions\/logos\/circle\/japan-rugby-league-one.png.webp?maxw=72&v=1762927428","compTitle":"Japan Rugby League One","draw":false,"opposition":{"name":"Toshiba Brave Lupus Tokyo","logo":"https:\/\/eu-cdn.rugbypass.com\/webp-images\/images\/team-images\/logos\/png\/19702.png.webp?maxw=72&v=1762927734"},"win":false,"stats":{"mins":3,"tries":0,"yellow_cards":0,"red_cards":0,"conversions":0}},{"title":"BlackRams Tokyo vs Shizuoka BlueRevs","date":"16 Mar 2024","dateSmall":"16 Mar","time":1710586800,"compLogo":"https:\/\/eu-cdn.rugbypass.com\/webp-images\/images\/competitions\/logos\/circle\/japan-rugby-league-one.png.webp?maxw=72&v=1762927428","compTitle":"Japan Rugby League One","draw":false,"opposition":{"name":"Shizuoka BlueRevs","logo":"https:\/\/eu-cdn.rugbypass.com\/webp-images\/images\/team-images\/logos\/png\/5212.png.webp?maxw=72&v=1762927735"},"win":false,"stats":{"mins":21,"tries":0,"yellow_cards":0,"red_cards":0,"conversions":0}},{"title":"Mie Honda Heat vs BlackRams Tokyo","date":"10 Mar 2024","dateSmall":"10 Mar","time":1710064800,"compLogo":"https:\/\/eu-cdn.rugbypass.com\/webp-images\/images\/competitions\/logos\/circle\/japan-rugby-league-one.png.webp?maxw=72&v=1762927428","compTitle":"Japan Rugby League One","draw":false,"opposition":{"name":"Mie Honda Heat","logo":"https:\/\/eu-cdn.rugbypass.com\/webp-images\/images\/team-images\/logos\/png\/10005202.png.webp?maxw=72&v=1762927733"},"win":true,"stats":{"mins":15,"tries":0,"yellow_cards":0,"red_cards":0,"conversions":0}},{"title":"Tokyo Sungoliath vs BlackRams Tokyo","date":"2 Mar 2024","dateSmall":"2 Mar","time":1709384700,"compLogo":"https:\/\/eu-cdn.rugbypass.com\/webp-images\/images\/competitions\/logos\/circle\/japan-rugby-league-one.png.webp?maxw=72&v=1762927428","compTitle":"Japan Rugby League One","draw":false,"opposition":{"name":"Tokyo Sungoliath","logo":"https:\/\/eu-cdn.rugbypass.com\/webp-images\/images\/team-images\/logos\/png\/5209.png.webp?maxw=72&v=1762927735"},"win":false,"stats":{"mins":80,"tries":0,"yellow_cards":0,"red_cards":0,"conversions":0}},{"title":"BlackRams Tokyo vs Kobelco Kobe Steelers","date":"25 Feb 2024","dateSmall":"25 Feb","time":1708862400,"compLogo":"https:\/\/eu-cdn.rugbypass.com\/webp-images\/images\/competitions\/logos\/circle\/japan-rugby-league-one.png.webp?maxw=72&v=1762927428","compTitle":"Japan Rugby League One","draw":false,"opposition":{"name":"Kobelco Kobe Steelers","logo":"https:\/\/eu-cdn.rugbypass.com\/webp-images\/images\/team-images\/logos\/png\/5203.png.webp?maxw=72&v=1762927735"},"win":false,"stats":{"mins":12,"tries":0,"yellow_cards":0,"red_cards":0,"conversions":0}},{"title":"BlackRams Tokyo vs Kubota Spears","date":"27 Jan 2024","dateSmall":"27 Jan","time":1706356800,"compLogo":"https:\/\/eu-cdn.rugbypass.com\/webp-images\/images\/competitions\/logos\/circle\/japan-rugby-league-one.png.webp?maxw=72&v=1762927428","compTitle":"Japan Rugby League One","draw":false,"opposition":{"name":"Kubota Spears","logo":"https:\/\/eu-cdn.rugbypass.com\/webp-images\/images\/team-images\/logos\/png\/5204.png.webp?maxw=72&v=1762927735"},"win":false,"stats":{"mins":10,"tries":0,"yellow_cards":0,"red_cards":0,"conversions":0}},{"title":"Yokohama Canon Eagles vs BlackRams Tokyo","date":"13 Jan 2024","dateSmall":"13 Jan","time":1705151400,"compLogo":"https:\/\/eu-cdn.rugbypass.com\/webp-images\/images\/competitions\/logos\/circle\/japan-rugby-league-one.png.webp?maxw=72&v=1762927428","compTitle":"Japan Rugby League One","draw":false,"opposition":{"name":"Yokohama Canon Eagles","logo":"https:\/\/eu-cdn.rugbypass.com\/webp-images\/images\/team-images\/logos\/png\/5200.png.webp?maxw=72&v=1762927735"},"win":false,"stats":{"mins":80,"tries":0,"yellow_cards":0,"red_cards":0,"conversions":0}},{"title":"BlackRams Tokyo vs Hanazono Kintetsu Liners","date":"6 Jan 2024","dateSmall":"6 Jan","time":1704547800,"compLogo":"https:\/\/eu-cdn.rugbypass.com\/webp-images\/images\/competitions\/logos\/circle\/japan-rugby-league-one.png.webp?maxw=72&v=1762927428","compTitle":"Japan Rugby League One","draw":false,"opposition":{"name":"Hanazono Kintetsu Liners","logo":"https:\/\/eu-cdn.rugbypass.com\/webp-images\/images\/team-images\/logos\/png\/19568.png.webp?maxw=72&v=1762927734"},"win":true,"stats":{"mins":80,"tries":0,"yellow_cards":0,"red_cards":0,"conversions":0}},{"title":"Saitama Wild Knights vs BlackRams Tokyo","date":"23 Dec 2023","dateSmall":"23 Dec","time":1703329200,"compLogo":"https:\/\/eu-cdn.rugbypass.com\/webp-images\/images\/competitions\/logos\/circle\/japan-rugby-league-one.png.webp?maxw=72&v=1762927428","compTitle":"Japan Rugby League One","draw":false,"opposition":{"name":"Saitama Wild Knights","logo":"https:\/\/eu-cdn.rugbypass.com\/webp-images\/images\/team-images\/logos\/png\/19567.png.webp?maxw=72&v=1762927734"},"win":false,"stats":{"mins":80,"tries":0,"yellow_cards":0,"red_cards":0,"conversions":0}},{"title":"BlackRams Tokyo vs Mitsubishi Sagamihara Dynaboars","date":"16 Dec 2023","dateSmall":"16 Dec","time":1702728000,"compLogo":"https:\/\/eu-cdn.rugbypass.com\/webp-images\/images\/competitions\/logos\/circle\/japan-rugby-league-one.png.webp?maxw=72&v=1762927428","compTitle":"Japan Rugby League One","draw":false,"opposition":{"name":"Mitsubishi Sagamihara Dynaboars","logo":"https:\/\/eu-cdn.rugbypass.com\/webp-images\/images\/team-images\/logos\/png\/594.png.webp?maxw=72&v=1762927735"},"win":false,"stats":{"mins":80,"tries":0,"yellow_cards":0,"red_cards":0,"conversions":0}},{"title":"Toyota Verblitz vs BlackRams Tokyo","date":"9 Dec 2023","dateSmall":"9 Dec","time":1702128600,"compLogo":"https:\/\/eu-cdn.rugbypass.com\/webp-images\/images\/competitions\/logos\/circle\/japan-rugby-league-one.png.webp?maxw=72&v=1762927428","compTitle":"Japan Rugby League One","draw":false,"opposition":{"name":"Toyota Verblitz","logo":"https:\/\/eu-cdn.rugbypass.com\/webp-images\/images\/team-images\/logos\/png\/5211.png.webp?maxw=72&v=1762927735"},"win":false,"stats":{"mins":80,"tries":0,"yellow_cards":0,"red_cards":0,"conversions":0}},{"title":"Mitsubishi Sagamihara Dynaboars vs BlackRams Tokyo","date":"22 Apr 2023","dateSmall":"22 Apr","time":1682164800,"compLogo":"https:\/\/eu-cdn.rugbypass.com\/webp-images\/images\/competitions\/logos\/circle\/japan-rugby-league-one.png.webp?maxw=72&v=1762927428","compTitle":"Japan Rugby League One","draw":false,"opposition":{"name":"Mitsubishi Sagamihara Dynaboars","logo":"https:\/\/eu-cdn.rugbypass.com\/webp-images\/images\/team-images\/logos\/png\/594.png.webp?maxw=72&v=1762927735"},"win":true,"stats":{"mins":80,"tries":0,"yellow_cards":0,"red_cards":0,"conversions":0}},{"title":"BlackRams Tokyo vs Toyota Verblitz","date":"16 Apr 2023","dateSmall":"16 Apr","time":1681646400,"compLogo":"https:\/\/eu-cdn.rugbypass.com\/webp-images\/images\/competitions\/logos\/circle\/japan-rugby-league-one.png.webp?maxw=72&v=1762927428","compTitle":"Japan Rugby League One","draw":false,"opposition":{"name":"Toyota Verblitz","logo":"https:\/\/eu-cdn.rugbypass.com\/webp-images\/images\/team-images\/logos\/png\/5211.png.webp?maxw=72&v=1762927735"},"win":false,"stats":{"mins":80,"tries":0,"yellow_cards":0,"red_cards":0,"conversions":0}},{"title":"Saitama Wild Knights vs BlackRams Tokyo","date":"8 Apr 2023","dateSmall":"8 Apr","time":1680966000,"compLogo":"https:\/\/eu-cdn.rugbypass.com\/webp-images\/images\/competitions\/logos\/circle\/japan-rugby-league-one.png.webp?maxw=72&v=1762927428","compTitle":"Japan Rugby League One","draw":false,"opposition":{"name":"Saitama Wild Knights","logo":"https:\/\/eu-cdn.rugbypass.com\/webp-images\/images\/team-images\/logos\/png\/19567.png.webp?maxw=72&v=1762927734"},"win":false,"stats":{"mins":80,"tries":1,"yellow_cards":0,"red_cards":0,"conversions":0}},{"title":"BlackRams Tokyo vs Toshiba Brave Lupus Tokyo","date":"24 Mar 2023","dateSmall":"24 Mar","time":1679677200,"compLogo":"https:\/\/eu-cdn.rugbypass.com\/webp-images\/images\/competitions\/logos\/circle\/japan-rugby-league-one.png.webp?maxw=72&v=1762927428","compTitle":"Japan Rugby League One","draw":false,"opposition":{"name":"Toshiba Brave Lupus Tokyo","logo":"https:\/\/eu-cdn.rugbypass.com\/webp-images\/images\/team-images\/logos\/png\/19702.png.webp?maxw=72&v=1762927734"},"win":false,"stats":{"mins":68,"tries":0,"yellow_cards":1,"red_cards":0,"conversions":0}},{"title":"BlackRams Tokyo vs Shizuoka BlueRevs","date":"18 Mar 2023","dateSmall":"18 Mar","time":1679142600,"compLogo":"https:\/\/eu-cdn.rugbypass.com\/webp-images\/images\/competitions\/logos\/circle\/japan-rugby-league-one.png.webp?maxw=72&v=1762927428","compTitle":"Japan Rugby League One","draw":false,"opposition":{"name":"Shizuoka BlueRevs","logo":"https:\/\/eu-cdn.rugbypass.com\/webp-images\/images\/team-images\/logos\/png\/5212.png.webp?maxw=72&v=1762927735"},"win":false,"stats":{"mins":80,"tries":0,"yellow_cards":0,"red_cards":0,"conversions":0}},{"title":"BlackRams Tokyo vs Kobelco Kobe Steelers","date":"10 Mar 2023","dateSmall":"10 Mar","time":1678471200,"compLogo":"https:\/\/eu-cdn.rugbypass.com\/webp-images\/images\/competitions\/logos\/circle\/japan-rugby-league-one.png.webp?maxw=72&v=1762927428","compTitle":"Japan Rugby League One","draw":false,"opposition":{"name":"Kobelco Kobe Steelers","logo":"https:\/\/eu-cdn.rugbypass.com\/webp-images\/images\/team-images\/logos\/png\/5203.png.webp?maxw=72&v=1762927735"},"win":true,"stats":{"mins":70,"tries":1,"yellow_cards":0,"red_cards":0,"conversions":0}},{"title":"BlackRams Tokyo vs Tokyo Sungoliath","date":"18 Feb 2023","dateSmall":"18 Feb","time":1676721600,"compLogo":"https:\/\/eu-cdn.rugbypass.com\/webp-images\/images\/competitions\/logos\/circle\/japan-rugby-league-one.png.webp?maxw=72&v=1762927428","compTitle":"Japan Rugby League One","draw":false,"opposition":{"name":"Tokyo Sungoliath","logo":"https:\/\/eu-cdn.rugbypass.com\/webp-images\/images\/team-images\/logos\/png\/5209.png.webp?maxw=72&v=1762927735"},"win":false,"stats":{"mins":7,"tries":0,"yellow_cards":0,"red_cards":0,"conversions":0}},{"title":"Yokohama Canon Eagles vs BlackRams Tokyo","date":"4 Feb 2023","dateSmall":"4 Feb","time":1675517400,"compLogo":"https:\/\/eu-cdn.rugbypass.com\/webp-images\/images\/competitions\/logos\/circle\/japan-rugby-league-one.png.webp?maxw=72&v=1762927428","compTitle":"Japan Rugby League One","draw":false,"opposition":{"name":"Yokohama Canon Eagles","logo":"https:\/\/eu-cdn.rugbypass.com\/webp-images\/images\/team-images\/logos\/png\/5200.png.webp?maxw=72&v=1762927735"},"win":false,"stats":{"mins":9,"tries":0,"yellow_cards":0,"red_cards":0,"conversions":0}},{"title":"Toyota Verblitz vs BlackRams Tokyo","date":"5 Feb 2022","dateSmall":"5 Feb","time":1644067800,"compLogo":"https:\/\/eu-cdn.rugbypass.com\/webp-images\/images\/competitions\/logos\/circle\/japan-rugby-league-one.png.webp?maxw=72&v=1762927428","compTitle":"Japan Rugby League One","draw":false,"opposition":{"name":"Toyota Verblitz","logo":"https:\/\/eu-cdn.rugbypass.com\/webp-images\/images\/team-images\/logos\/png\/5211.png.webp?maxw=72&v=1762927735"},"win":false,"stats":{"mins":80,"tries":1,"yellow_cards":0,"red_cards":0,"conversions":0}}]}]
Yuta Kurihara Stats
Stats compared to other Centers
![]() {{selectedCompetition.competition.name}} {{selectedCompetition.competition.season.label}}
{{selectedCompetition.competition.name}} {{selectedCompetition.competition.season.label}} -
![]() {{item.competition.name}} {{item.competition.season.label}}
{{item.competition.name}} {{item.competition.season.label}}
{{graphStats[0].value}}
{{graphStats[0].title}}
{{graphStats[1].value}}
{{graphStats[1].title}}
{{graphStats[2].title}}
{{graphStats[2].value}}
{{graphStats[3].title}}
{{graphStats[3].value}}
{{graphStats[4].title}}
{{graphStats[4].value}}
{{graphStats[5].value}}
{{graphStats[5].title}}
Yuta Kurihara Stats
Stats compared to other Centers
{{item.title}}
{{item.value}}
Match Stats
![]() {{selectedMatchesComp}}
{{selectedMatchesComp}} - All
-
![]() {{item.title}}
{{item.title}}
10 May 2026
10 May
L
v

3 May 2026
3 May
L
v

26 Apr 2026
26 Apr
L
v

21 Mar 2026
21 Mar
L
v

28 Feb 2026
28 Feb
W
v

5 May 2024
5 May
L
v
27 Apr 2024
27 Apr
W
v

6 Apr 2024
6 Apr
L
v

24 Mar 2024
24 Mar
L
v
16 Mar 2024
16 Mar
L
v

{{game.date}}
{{game.dateSmall}}
W L
v
![]()
{{game.stats.mins}}
{{game.stats.tries}}
{{game.stats.conversions}}
{{game.stats.yellow_cards}}
{{game.stats.red_cards}}
Yuta Kurihara Performance Analysis
Japan Rugby League One 2025/2026
Yuta Kurihara featured in 5 matches during the 2025/2026 Japan Rugby League One, representing BlackRams Tokyo. Results included 1 win and 4 losses.
Yuta Kurihara represented BlackRams Tokyo in the 2025/2026 Japan Rugby League One season, who finished 4th in the regular season table.
Yuta Kurihara played 116 minutes across the Japan Rugby League One 2025/2026. In attack he made 20m with ball in hand, beating 0 defenders and scoring 0 tries. Defensively he completed 9 tackles at a rate of 1.8 per game.
In the Japan Rugby League One 2025/2026, Yuta Kurihara completed 11 passes at an accuracy of 79%, contributing 0 try assists and making 17 touches.