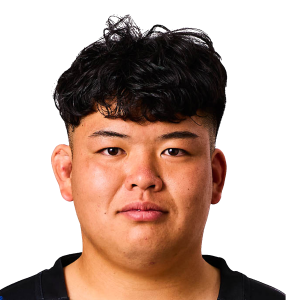
Taishi Tsumura News

Nations Championship
Eddie Jones goes rogue in fly-half picks for Nations Championship
Fiji off to winning start under World Cup-winning coach Jake White
Tracking the Eagles’ opponents one year out from the Rugby World Cup
SVNS star set to start as Jake White names first team as Fiji coach
Latest
Nations Championship referees confirmed with finals weekend appointments TBC
'Outstanding leader' to drive Rugby World Cup 2031 in the United States
Nations Championship: November rugby returns to RugbyPass TV
Fiji name first squad of Jake White era ahead of Japan Centennial Test
World Rugby announce new crackdown on two dangerous tackles
'Rugby needs to be demystified to attract new fans and fresh investment'
[{"competition":{"rid":"1002","oid":"421","ovid":"2074","name":"Japan Rugby League One","logo":"https:\/\/eu-cdn.rugbypass.com\/images\/competitions\/logos\/png\/japan-rugby-league-one.png?v=1762927429","logoCircle":"https:\/\/eu-cdn.rugbypass.com\/images\/competitions\/logos\/circle\/japan-rugby-league-one.png?v=1762927428","season":{"season":202501,"years":{"2025":2025,"2026":2026},"label":"2025\/2026","completed":1,"standings":1,"started":1,"months":0,"games":114},"stats":{"success":1,"stats":{"teamId":1154,"penaltyConceded":1,"penaltyDefence":1,"scrumOffence":1,"carries":15,"metresMade":2,"passes":3,"crossedGainline":2,"failedGainline":13,"postContactMetres":2,"carryDistance":41,"metresInContact":2,"tackle":26,"missedTackle":7,"totalAttemptedTackles":37,"totalSuccessfulTackles":26,"totalUnsuccessfulTackles":11,"backInGame":1,"contestedBreakdown":1,"upperBodyTackles":14,"lowerBodyTackles":18,"percentTackleMade":70.27,"percentLowerBodyTackles":56.25,"percentUpperBodyTackles":43.75,"points":0,"appearances":8,"minutesPlayed":282,"minutesPlayedFirstHalf":82,"minutesPlayedSecondHalf":200},"topPlayerStats":{"carries":{"id":240029,"value":133},"metresMade":{"id":240029,"value":380},"passes":{"id":240029,"value":46},"crossedGainline":{"id":240029,"value":83},"postContactMetres":{"id":240029,"value":198},"carryDistance":{"id":240029,"value":710},"metresInContact":{"id":240029,"value":198},"tackle":{"id":149640,"value":158},"totalAttemptedTackles":{"id":233260,"value":188},"totalSuccessfulTackles":{"id":149640,"value":158},"percentTackleMade":{"id":105812,"value":100},"points":{"id":240029,"value":30},"appearances":{"id":233260,"value":21},"minutesPlayed":{"id":244398,"value":1170},"minutesPlayedSecondHalf":{"id":201853,"value":600},"penaltyConceded":{"id":131550,"value":24},"penaltyDefence":{"id":131550,"value":19},"penaltyOffence":{"id":226244,"value":8},"foulPlay":{"id":233311,"value":2},"notReleasing":{"id":240029,"value":3},"scrumOffence":{"id":131550,"value":16},"wrongSideAtRuck":{"id":241333,"value":2},"freeKick":{"id":118560,"value":4},"missedTackle":{"id":200697,"value":29},"totalUnsuccessfulTackles":{"id":200697,"value":37},"upperBodyTackles":{"id":149640,"value":91},"lowerBodyTackles":{"id":241435,"value":89},"percentLowerBodyTackles":{"id":133595,"value":100},"percentUpperBodyTackles":{"id":250405,"value":100},"tryScored":{"id":240029,"value":6},"minutesPlayedFirstHalf":{"id":155277,"value":800},"notRollingAway":{"id":149640,"value":6},"offFeetAtRuck":{"id":258974,"value":4},"lineoutOffence":{"id":154943,"value":1},"offload":{"id":240029,"value":24},"defenderBeaten":{"id":240029,"value":30},"totalTurnovers":{"id":240029,"value":10},"failedGainline":{"id":233260,"value":63},"lostBallForced":{"id":240029,"value":3},"droppedBallUnforced":{"id":240029,"value":5},"lostInRuckOrMaul":{"id":233260,"value":3},"handlingError":{"id":240029,"value":10},"dominantContact":{"id":240029,"value":30},"errors":{"id":240029,"value":10},"breakAssist":{"id":240029,"value":3},"dominantTackleContact":{"id":240029,"value":12},"outOfGame":{"id":185503,"value":37},"backInGame":{"id":105693,"value":28},"contestedBreakdown":{"id":205490,"value":22},"trapped":{"id":154521,"value":25},"lineoutsWonOwnThrow":{"id":103443,"value":8},"tapBack":{"id":154943,"value":1},"aerialContest":{"id":201853,"value":2},"cleanBreak":{"id":226244,"value":5},"neutral":{"id":201853,"value":4},"collapsingMaul":{"id":154521,"value":2},"tryAssist":{"id":201853,"value":1},"badPass":{"id":201853,"value":2},"turnoverWon":{"id":258974,"value":5},"jackalPenaltyWon":{"id":205490,"value":3},"counterRuck":{"id":256073,"value":2},"attackingCatch":{"id":201853,"value":1},"defensiveCatch":{"id":185473,"value":3},"defensiveCatchSuccess":{"id":201853,"value":1},"restartCatch":{"id":201853,"value":1},"restartCatchSuccess":{"id":201853,"value":1},"yellowCard":{"id":131550,"value":2},"obstruction":{"id":233311,"value":1},"sinBinEnd":{"id":131550,"value":2},"wrongSideAtMaul":{"id":250706,"value":1},"tackleTurnoverWon":{"id":258974,"value":4},"offside":{"id":185503,"value":6},"accidentalKnockOn":{"id":124110,"value":1},"tapBackSuccess":{"id":251438,"value":1},"aerialContestWon":{"id":251438,"value":1},"percentAerialContestWon":{"id":251438,"value":100},"redCard":{"id":154521,"value":1},"offsideAtKick":{"id":185503,"value":1},"handsInRuck":{"id":205490,"value":1},"wonClean":{"id":241456,"value":3},"lineoutThrowsWon":{"id":241456,"value":4},"throwFront":{"id":241456,"value":4},"kicksInPlay":{"id":219653,"value":1},"retainedKick":{"id":219653,"value":1},"territorial":{"id":219653,"value":1},"kickBounced":{"id":219653,"value":1},"kickMetres":{"id":233260,"value":30},"allKickMetres":{"id":233260,"value":30},"carriedInTouch":{"id":244399,"value":1},"attemptedInterception":{"id":244399,"value":1},"lineoutSteals":{"id":244399,"value":1},"otherError":{"id":245604,"value":2},"forwardPass":{"id":156526,"value":1},"jackalTurnoverWon":{"id":191815,"value":1},"attackingCatchSuccess":{"id":256073,"value":1},"duelDefence":{"id":185473,"value":1},"otherOffence":{"id":233260,"value":1},"maulObstruction":{"id":233260,"value":2},"dissentAdvance":{"id":188603,"value":1},"wonOther":{"id":241456,"value":1},"lostClean":{"id":241456,"value":3},"lostOverthrown":{"id":241456,"value":2},"lineoutThrowsLost":{"id":241456,"value":5},"throwMiddle":{"id":241456,"value":3},"throw15+":{"id":241456,"value":2},"attackingKicks":{"id":103443,"value":1}}},"epoch":1780812300},"main":{"totalMinsPlayed":282,"main":[{"value":26,"title":"Tackles Completed"},{"value":15,"title":"Carries"},{"value":0,"title":"Tries"},{"value":2,"title":"Metres Carried"},{"value":0,"title":"Turnovers Won"},{"value":0,"title":"Dominant Tackles"},{"value":0,"title":"Try Assists"}],"profile":[{"value":"16%","title":"Tackles Completed","type":1,"key":"totalSuccessfulTackles","raw":26,"top":158,"color":"#d96437"},{"value":"11%","title":"Carries","type":1,"key":"carries","raw":15,"top":133,"color":"#d55637"},{"value":"2%","title":"Tries","type":1,"key":"tryScored","raw":0,"top":6,"color":"#cf403a"},{"value":"2%","title":"Metres Carried","type":1,"key":"metresMade","raw":2,"top":380,"color":"#cf403a"},{"value":"2%","title":"Turnovers Won","type":1,"key":"turnoverWon","raw":0,"top":5,"color":"#cf403a"},{"value":"2%","title":"Dominant Tackles","type":1,"key":"dominantTackleContact","raw":0,"top":12,"color":"#cf403a"},{"value":"2%","title":"Try Assists","type":1,"key":"tryAssist","raw":0,"top":1,"color":"#cf403a"}]},"group":{"groups":[{"title":"Attack","stats":[{"title":"Points","value":{"value":0,"title":"Points"},"overall":{"value":"2%","title":"Points","type":1,"key":"points","raw":0,"top":30,"color":"#cf403a"}},{"title":"Tries","value":{"value":0,"title":"Tries"},"overall":{"value":"2%","title":"Tries","type":1,"key":"tryScored","raw":0,"top":6,"color":"#cf403a"}},{"title":"Line Breaks","value":{"value":0,"title":"Line Breaks"},"overall":{"value":"2%","title":"Line Breaks","type":1,"key":"cleanBreak","raw":0,"top":5,"color":"#cf403a"}},{"title":"Carries","value":{"value":15,"title":"Carries"},"overall":{"value":"11%","title":"Carries","type":1,"key":"carries","raw":15,"top":133,"color":"#d55637"}},{"title":"Carries Per Minute","value":{"value":0.05,"title":"Carries Per Minute"},"overall":{"value":"2%","title":"Carries Per Minute","type":1,"key":"carries","raw":0,"top":133,"color":"#cf403a"}},{"title":"Metres Carried","value":{"value":2,"title":"Metres Carried"},"overall":{"value":"2%","title":"Metres Carried","type":1,"key":"metresMade","raw":2,"top":380,"color":"#cf403a"}},{"title":"Turnovers Won","value":{"value":0,"title":"Turnovers Won"},"overall":{"value":"2%","title":"Turnovers Won","type":1,"key":"turnoverWon","raw":0,"top":5,"color":"#cf403a"}},{"title":"Defenders Beaten","value":{"value":0,"title":"Defenders Beaten"},"overall":{"value":"2%","title":"Defenders Beaten","type":1,"key":"defenderBeaten","raw":0,"top":30,"color":"#cf403a"}},{"title":"Post Contact Metres","value":{"value":2,"title":"Post Contact Metres"},"overall":{"value":"2%","title":"Post Contact Metres","type":1,"key":"postContactMetres","raw":2,"top":198,"color":"#cf403a"}}]},{"title":"Defence","stats":[{"title":"Tackles Made","value":{"value":37,"title":"Tackles Made"},"overall":{"value":"20%","title":"Tackles Made","type":1,"key":"totalAttemptedTackles","raw":37,"top":188,"color":"#dc6f37"}},{"title":"Tackles Completed","value":{"value":26,"title":"Tackles Completed"},"overall":{"value":"16%","title":"Tackles Completed","type":1,"key":"totalSuccessfulTackles","raw":26,"top":158,"color":"#d96437"}},{"title":"Dominant Tackles","value":{"value":0,"title":"Dominant Tackles"},"overall":{"value":"2%","title":"Dominant Tackles","type":1,"key":"dominantTackleContact","raw":0,"top":12,"color":"#cf403a"}},{"title":"Tackles Per Minute","value":{"value":0.09,"title":"Tackles Per Minute"},"overall":{"value":"2%","title":"Tackles Per Minute","type":1,"key":"tackle","raw":0,"top":158,"color":"#cf403a"}},{"title":"Turnovers Won","value":{"value":0,"title":"Turnovers Won"},"overall":{"value":"2%","title":"Turnovers Won","type":1,"key":"turnoverWon","raw":0,"top":5,"color":"#cf403a"}}]},{"title":"Passing","stats":[{"title":"Try Assists","value":{"value":0,"title":"Try Assists"},"overall":{"value":"2%","title":"Try Assists","type":1,"key":"tryAssist","raw":0,"top":1,"color":"#cf403a"}},{"title":"Successful Passes","value":{"value":3,"title":"Successful Passes"},"overall":{"value":"7%","title":"Successful Passes","type":1,"key":"passes","raw":3,"top":46,"color":"#d24c39"}},{"title":"Bad Passes","value":{"value":0,"title":"Bad Passes"},"overall":{"value":"2%","title":"Bad Passes","type":1,"key":"badPass","raw":0,"top":2,"color":"#cf403a"}},{"title":"Pass Accuracy","value":{"value":"100%","title":"Pass Accuracy"},"overall":{"value":"100%","title":"Pass Accuracy","type":1,"key":"pass_accuracy","raw":"100%","top":0,"color":"#479d6c"}}]},{"title":"Discipline","stats":[{"title":"Penalties Conceded","value":{"value":1,"title":"Penalties Conceded"},"overall":{"value":"4%","title":"Penalties Conceded","type":1,"key":"penaltyConceded","raw":1,"top":24,"color":"#d04439"}},{"title":"Yellow Cards","value":{"value":0,"title":"Yellow Cards"},"overall":{"value":"2%","title":"Yellow Cards","type":1,"key":"yellowCard","raw":0,"top":2,"color":"#cf403a"}},{"title":"Red Cards","value":{"value":0,"title":"Red Cards"},"overall":{"value":"2%","title":"Red Cards","type":1,"key":"redCard","raw":0,"top":1,"color":"#cf403a"}}]}]}},{"competition":{"rid":"1002","oid":"421","ovid":"2074","name":"Japan Rugby League One","logo":"https:\/\/eu-cdn.rugbypass.com\/images\/competitions\/logos\/png\/japan-rugby-league-one.png?v=1762927429","logoCircle":"https:\/\/eu-cdn.rugbypass.com\/images\/competitions\/logos\/circle\/japan-rugby-league-one.png?v=1762927428","season":{"season":202401,"years":{"2024":2024,"2025":2025},"label":"2024\/2025","completed":1,"standings":1,"started":1,"months":0,"games":114},"stats":{"success":1,"stats":{"teamId":1154,"tryScored":1,"points":5,"appearances":14,"minutesPlayed":763,"minutesPlayedFirstHalf":520,"minutesPlayedSecondHalf":243,"penaltyConceded":11,"penaltyDefence":5,"penaltyOffence":6,"notRollingAway":1,"foulPlay":1,"offFeetAtRuck":3,"maulObstruction":1,"scrumOffence":6,"freeKick":1,"carries":45,"metresMade":104,"passes":7,"offload":1,"defenderBeaten":4,"cleanBreak":3,"totalTurnovers":5,"crossedGainline":19,"failedGainline":24,"neutral":2,"lostBallForced":1,"droppedBallUnforced":3,"handlingError":5,"dominantContact":2,"errors":5,"postContactMetres":14,"carryDistance":204,"metresInContact":14,"tackle":53,"missedTackle":16,"turnoverWon":5,"tackleTurnoverWon":1,"dominantTackleContact":2,"totalAttemptedTackles":78,"totalSuccessfulTackles":53,"totalUnsuccessfulTackles":25,"jackalPenaltyWon":1,"jackalTurnoverWon":2,"outOfGame":5,"backInGame":4,"contestedBreakdown":1,"percentTackleMade":67.95,"restartCatch":1,"restartCatchSuccess":1},"topPlayerStats":{"penaltyConceded":{"id":233260,"value":22},"penaltyDefence":{"id":233260,"value":16},"penaltyOffence":{"id":250405,"value":8},"scrumOffence":{"id":233260,"value":18},"freeKick":{"id":201853,"value":3},"carries":{"id":240029,"value":129},"metresMade":{"id":240029,"value":270},"passes":{"id":219653,"value":55},"offload":{"id":240029,"value":26},"totalTurnovers":{"id":240029,"value":14},"crossedGainline":{"id":240029,"value":63},"failedGainline":{"id":240029,"value":64},"lostBallForced":{"id":244399,"value":6},"droppedBallUnforced":{"id":240029,"value":5},"handlingError":{"id":240029,"value":11},"errors":{"id":240029,"value":14},"postContactMetres":{"id":240029,"value":140},"breakAssist":{"id":240029,"value":5},"carryDistance":{"id":240029,"value":643},"metresInContact":{"id":240029,"value":140},"tackle":{"id":156526,"value":164},"missedTackle":{"id":245427,"value":33},"dominantTackleContact":{"id":240029,"value":10},"totalAttemptedTackles":{"id":245427,"value":194},"totalSuccessfulTackles":{"id":156526,"value":164},"totalUnsuccessfulTackles":{"id":245427,"value":43},"outOfGame":{"id":135402,"value":30},"backInGame":{"id":131550,"value":28},"contestedBreakdown":{"id":133595,"value":8},"trapped":{"id":135402,"value":11},"percentTackleMade":{"id":250706,"value":100},"tapBack":{"id":137767,"value":1},"aerialContest":{"id":245427,"value":2},"points":{"id":240029,"value":15},"appearances":{"id":155277,"value":21},"minutesPlayed":{"id":244398,"value":1182},"minutesPlayedFirstHalf":{"id":155277,"value":800},"minutesPlayedSecondHalf":{"id":149640,"value":669},"collapsingMaul":{"id":154943,"value":1},"foulPlay":{"id":201853,"value":2},"lineoutOffence":{"id":201853,"value":2},"notReleasing":{"id":244398,"value":3},"defenderBeaten":{"id":240029,"value":35},"dominantContact":{"id":240029,"value":29},"lineoutsWonOwnThrow":{"id":131550,"value":5},"lineoutSteals":{"id":201853,"value":2},"yellowCard":{"id":233311,"value":2},"notRollingAway":{"id":188603,"value":3},"offFeetAtRuck":{"id":251931,"value":3},"offside":{"id":124110,"value":2},"sinBinEnd":{"id":133285,"value":2},"tryAssist":{"id":240029,"value":2},"cleanBreak":{"id":226244,"value":5},"neutral":{"id":201853,"value":4},"forwardPass":{"id":201853,"value":1},"lostInRuckOrMaul":{"id":242481,"value":2},"accidentalKnockOn":{"id":201853,"value":2},"turnoverWon":{"id":226244,"value":7},"tackleTurnoverWon":{"id":226244,"value":5},"badPass":{"id":233311,"value":1},"tryScored":{"id":240029,"value":3},"maulObstruction":{"id":251931,"value":1},"jackalPenaltyWon":{"id":138736,"value":4},"jackalTurnoverWon":{"id":251931,"value":2},"restartCatch":{"id":251931,"value":1},"restartCatchSuccess":{"id":251931,"value":1},"wrongSideAtRuck":{"id":118560,"value":1},"counterRuck":{"id":124110,"value":2},"upperBodyTackles":{"id":149640,"value":13},"lowerBodyTackles":{"id":131550,"value":16},"percentLowerBodyTackles":{"id":146659,"value":100},"percentUpperBodyTackles":{"id":242481,"value":100},"redCard":{"id":242481,"value":1},"otherError":{"id":242481,"value":1},"handsInRuck":{"id":138338,"value":1},"wrongSideAtMaul":{"id":138338,"value":1},"carriedInTouch":{"id":138338,"value":1},"defensiveCatch":{"id":138338,"value":1},"defensiveCatchSuccess":{"id":138338,"value":1},"accidentalOffside":{"id":240029,"value":1},"wonClean":{"id":251438,"value":1},"lineoutThrowsWon":{"id":251438,"value":1},"throwBack":{"id":251438,"value":1},"otherOffence":{"id":205490,"value":1},"offsideAtKick":{"id":207232,"value":1},"attackingCatch":{"id":105693,"value":1},"kicksInPlay":{"id":173932,"value":1},"retainedKick":{"id":173932,"value":1},"contestable":{"id":173932,"value":1},"attackingKicks":{"id":173932,"value":1},"kickBounced":{"id":173932,"value":1},"kickMetres":{"id":233260,"value":37},"allKickMetres":{"id":233260,"value":37},"dissentAdvance":{"id":176115,"value":1},"redCardSecondYellow":{"id":140692,"value":1},"attackingCatchSuccess":{"id":241457,"value":1},"aerialContestWon":{"id":241457,"value":1},"percentAerialContestWon":{"id":241457,"value":100},"throwMiddle":{"id":138736,"value":1},"obstruction":{"id":185473,"value":1},"attemptedInterception":{"id":241435,"value":1},"interception":{"id":241435,"value":1},"restartOppCollection":{"id":241435,"value":1},"totalRestarts":{"id":241435,"value":1},"restart22m":{"id":241435,"value":1},"territorial":{"id":233260,"value":1}}},"epoch":1748757900},"main":{"totalMinsPlayed":763,"main":[{"value":53,"title":"Tackles Completed"},{"value":45,"title":"Carries"},{"value":1,"title":"Tries"},{"value":104,"title":"Metres Carried"},{"value":5,"title":"Turnovers Won"},{"value":2,"title":"Dominant Tackles"},{"value":0,"title":"Try Assists"}],"profile":[{"value":"32%","title":"Tackles Completed","type":1,"key":"totalSuccessfulTackles","raw":53,"top":164,"color":"#e59139"},{"value":"35%","title":"Carries","type":1,"key":"carries","raw":45,"top":129,"color":"#e89b3b"},{"value":"33%","title":"Tries","type":1,"key":"tryScored","raw":1,"top":3,"color":"#e6943a"},{"value":"39%","title":"Metres Carried","type":1,"key":"metresMade","raw":104,"top":270,"color":"#eca63d"},{"value":"71%","title":"Turnovers Won","type":1,"key":"turnoverWon","raw":5,"top":7,"color":"#9eb647"},{"value":"20%","title":"Dominant Tackles","type":1,"key":"dominantTackleContact","raw":2,"top":10,"color":"#dc6f37"},{"value":"2%","title":"Try Assists","type":1,"key":"tryAssist","raw":0,"top":2,"color":"#cf403a"}]},"group":{"groups":[{"title":"Attack","stats":[{"title":"Points","value":{"value":5,"title":"Points"},"overall":{"value":"33%","title":"Points","type":1,"key":"points","raw":5,"top":15,"color":"#e6943a"}},{"title":"Tries","value":{"value":1,"title":"Tries"},"overall":{"value":"33%","title":"Tries","type":1,"key":"tryScored","raw":1,"top":3,"color":"#e6943a"}},{"title":"Line Breaks","value":{"value":3,"title":"Line Breaks"},"overall":{"value":"60%","title":"Line Breaks","type":1,"key":"cleanBreak","raw":3,"top":5,"color":"#cec143"}},{"title":"Carries","value":{"value":45,"title":"Carries"},"overall":{"value":"35%","title":"Carries","type":1,"key":"carries","raw":45,"top":129,"color":"#e89b3b"}},{"title":"Carries Per Minute","value":{"value":0.06,"title":"Carries Per Minute"},"overall":{"value":"2%","title":"Carries Per Minute","type":1,"key":"carries","raw":0,"top":129,"color":"#cf403a"}},{"title":"Metres Carried","value":{"value":104,"title":"Metres Carried"},"overall":{"value":"39%","title":"Metres Carried","type":1,"key":"metresMade","raw":104,"top":270,"color":"#eca63d"}},{"title":"Turnovers Won","value":{"value":5,"title":"Turnovers Won"},"overall":{"value":"71%","title":"Turnovers Won","type":1,"key":"turnoverWon","raw":5,"top":7,"color":"#9eb647"}},{"title":"Defenders Beaten","value":{"value":4,"title":"Defenders Beaten"},"overall":{"value":"11%","title":"Defenders Beaten","type":1,"key":"defenderBeaten","raw":4,"top":35,"color":"#d55637"}},{"title":"Post Contact Metres","value":{"value":14,"title":"Post Contact Metres"},"overall":{"value":"10%","title":"Post Contact Metres","type":1,"key":"postContactMetres","raw":14,"top":140,"color":"#d55438"}}]},{"title":"Defence","stats":[{"title":"Tackles Made","value":{"value":78,"title":"Tackles Made"},"overall":{"value":"40%","title":"Tackles Made","type":1,"key":"totalAttemptedTackles","raw":78,"top":194,"color":"#eca93d"}},{"title":"Tackles Completed","value":{"value":53,"title":"Tackles Completed"},"overall":{"value":"32%","title":"Tackles Completed","type":1,"key":"totalSuccessfulTackles","raw":53,"top":164,"color":"#e59139"}},{"title":"Dominant Tackles","value":{"value":2,"title":"Dominant Tackles"},"overall":{"value":"20%","title":"Dominant Tackles","type":1,"key":"dominantTackleContact","raw":2,"top":10,"color":"#dc6f37"}},{"title":"Tackles Per Minute","value":{"value":0.07,"title":"Tackles Per Minute"},"overall":{"value":"2%","title":"Tackles Per Minute","type":1,"key":"tackle","raw":0,"top":164,"color":"#cf403a"}},{"title":"Turnovers Won","value":{"value":5,"title":"Turnovers Won"},"overall":{"value":"71%","title":"Turnovers Won","type":1,"key":"turnoverWon","raw":5,"top":7,"color":"#9eb647"}}]},{"title":"Passing","stats":[{"title":"Try Assists","value":{"value":0,"title":"Try Assists"},"overall":{"value":"2%","title":"Try Assists","type":1,"key":"tryAssist","raw":0,"top":2,"color":"#cf403a"}},{"title":"Successful Passes","value":{"value":7,"title":"Successful Passes"},"overall":{"value":"13%","title":"Successful Passes","type":1,"key":"passes","raw":7,"top":55,"color":"#d75c37"}},{"title":"Bad Passes","value":{"value":0,"title":"Bad Passes"},"overall":{"value":"2%","title":"Bad Passes","type":1,"key":"badPass","raw":0,"top":1,"color":"#cf403a"}},{"title":"Pass Accuracy","value":{"value":"100%","title":"Pass Accuracy"},"overall":{"value":"100%","title":"Pass Accuracy","type":1,"key":"pass_accuracy","raw":"100%","top":0,"color":"#479d6c"}}]},{"title":"Discipline","stats":[{"title":"Penalties Conceded","value":{"value":11,"title":"Penalties Conceded"},"overall":{"value":"50%","title":"Penalties Conceded","type":1,"key":"penaltyConceded","raw":11,"top":22,"color":"#f6c745"}},{"title":"Yellow Cards","value":{"value":0,"title":"Yellow Cards"},"overall":{"value":"2%","title":"Yellow Cards","type":1,"key":"yellowCard","raw":0,"top":2,"color":"#cf403a"}},{"title":"Red Cards","value":{"value":0,"title":"Red Cards"},"overall":{"value":"2%","title":"Red Cards","type":1,"key":"redCard","raw":0,"top":1,"color":"#cf403a"}}]}]}},{"competition":{"rid":"1002","oid":"421","ovid":"2074","name":"Japan Rugby League One","logo":"https:\/\/eu-cdn.rugbypass.com\/images\/competitions\/logos\/png\/japan-rugby-league-one.png?v=1762927429","logoCircle":"https:\/\/eu-cdn.rugbypass.com\/images\/competitions\/logos\/circle\/japan-rugby-league-one.png?v=1762927428","season":{"season":202301,"years":{"2023":2023,"2024":2024},"label":"2023\/2024","completed":1,"standings":1,"started":1,"months":0,"games":100},"stats":{"success":1,"stats":{"teamId":1154,"carries":1,"metresMade":3,"crossedGainline":1,"postContactMetres":2,"carryDistance":6,"metresInContact":2,"tackle":1,"totalAttemptedTackles":1,"totalSuccessfulTackles":1,"percentTackleMade":100,"points":0,"appearances":1,"minutesPlayed":21},"topPlayerStats":{"penaltyConceded":{"id":131550,"value":19},"penaltyDefence":{"id":131550,"value":13},"penaltyOffence":{"id":250283,"value":7},"notRollingAway":{"id":135181,"value":2},"scrumOffence":{"id":131550,"value":17},"wrongSideAtRuck":{"id":105812,"value":1},"carries":{"id":185473,"value":88},"metresMade":{"id":240029,"value":225},"passes":{"id":209737,"value":31},"offload":{"id":240029,"value":14},"defenderBeaten":{"id":240029,"value":27},"cleanBreak":{"id":240029,"value":4},"totalTurnovers":{"id":201853,"value":6},"crossedGainline":{"id":240029,"value":43},"failedGainline":{"id":185473,"value":52},"droppedBallUnforced":{"id":137767,"value":4},"handlingError":{"id":240029,"value":6},"dominantContact":{"id":240029,"value":29},"errors":{"id":201853,"value":6},"postContactMetres":{"id":240029,"value":129},"carryDistance":{"id":240029,"value":465},"metresInContact":{"id":240029,"value":129},"tackle":{"id":149640,"value":140},"missedTackle":{"id":138338,"value":21},"dominantTackleContact":{"id":149640,"value":15},"totalAttemptedTackles":{"id":149640,"value":162},"totalSuccessfulTackles":{"id":149640,"value":140},"totalUnsuccessfulTackles":{"id":138338,"value":30},"outOfGame":{"id":209672,"value":13},"backInGame":{"id":135402,"value":10},"contestedBreakdown":{"id":209672,"value":7},"percentTackleMade":{"id":251931,"value":100},"points":{"id":240029,"value":20},"appearances":{"id":133285,"value":18},"minutesPlayed":{"id":131550,"value":933},"minutesPlayedSecondHalf":{"id":233279,"value":236},"offFeetAtRuck":{"id":143548,"value":3},"lineoutsWonOwnThrow":{"id":133285,"value":9},"yellowCard":{"id":137767,"value":1},"offsideAtKick":{"id":137767,"value":1},"foulPlay":{"id":210618,"value":2},"offside":{"id":210618,"value":3},"sinBinEnd":{"id":137767,"value":1},"freeKick":{"id":244398,"value":3},"breakAssist":{"id":240029,"value":4},"turnoverWon":{"id":138736,"value":6},"tackleTurnoverWon":{"id":240029,"value":3},"defensiveCatch":{"id":137767,"value":1},"minutesPlayedFirstHalf":{"id":219653,"value":240},"notReleasing":{"id":138338,"value":2},"tryAssist":{"id":154943,"value":1},"lostInRuckOrMaul":{"id":138338,"value":3},"badPass":{"id":201853,"value":1},"lostBallForced":{"id":141139,"value":3},"interception":{"id":201853,"value":1},"jackalTurnoverWon":{"id":138338,"value":3},"otherOffence":{"id":250706,"value":1},"collapsingMaul":{"id":118560,"value":1},"neutral":{"id":185473,"value":3},"jackalPenaltyWon":{"id":138338,"value":2},"lineoutSteals":{"id":124110,"value":1},"forwardPass":{"id":155277,"value":1},"restartCatch":{"id":135181,"value":3},"restartCatchSuccess":{"id":135181,"value":2},"carriedInTouch":{"id":210618,"value":1},"accidentalKnockOn":{"id":210618,"value":1},"counterRuck":{"id":101950,"value":2},"handsInRuck":{"id":244399,"value":2},"maulObstruction":{"id":138338,"value":1},"accidentalOffside":{"id":138338,"value":1},"tryScored":{"id":240029,"value":4},"wrongSideAtMaul":{"id":240029,"value":1},"attackingCatch":{"id":226244,"value":2},"attackingCatchSuccess":{"id":226244,"value":2},"aerialContest":{"id":226244,"value":2},"aerialContestWon":{"id":226244,"value":2},"percentAerialContestWon":{"id":173932,"value":100},"tapBack":{"id":219653,"value":1},"redCard":{"id":240032,"value":1},"attemptedInterception":{"id":131550,"value":1},"lineoutOffence":{"id":205490,"value":1},"carriedOver":{"id":205490,"value":1},"obstruction":{"id":233279,"value":1},"upperBodyTackles":{"id":159865,"value":6},"lowerBodyTackles":{"id":240438,"value":4},"percentLowerBodyTackles":{"id":240438,"value":80},"percentUpperBodyTackles":{"id":141139,"value":100},"defensiveCatchSuccess":{"id":240438,"value":1},"otherError":{"id":251368,"value":1}}},"epoch":1716703500},"main":{"totalMinsPlayed":21,"main":[{"value":1,"title":"Tackles Completed"},{"value":1,"title":"Carries"},{"value":0,"title":"Tries"},{"value":3,"title":"Metres Carried"},{"value":0,"title":"Turnovers Won"},{"value":0,"title":"Dominant Tackles"},{"value":0,"title":"Try Assists"}],"profile":[{"value":"2%","title":"Tackles Completed","type":1,"key":"totalSuccessfulTackles","raw":1,"top":140,"color":"#cf403a"},{"value":"2%","title":"Carries","type":1,"key":"carries","raw":1,"top":88,"color":"#cf403a"},{"value":"2%","title":"Tries","type":1,"key":"tryScored","raw":0,"top":4,"color":"#cf403a"},{"value":"2%","title":"Metres Carried","type":1,"key":"metresMade","raw":3,"top":225,"color":"#cf403a"},{"value":"2%","title":"Turnovers Won","type":1,"key":"turnoverWon","raw":0,"top":6,"color":"#cf403a"},{"value":"2%","title":"Dominant Tackles","type":1,"key":"dominantTackleContact","raw":0,"top":15,"color":"#cf403a"},{"value":"2%","title":"Try Assists","type":1,"key":"tryAssist","raw":0,"top":1,"color":"#cf403a"}]},"group":{"groups":[{"title":"Attack","stats":[{"title":"Points","value":{"value":0,"title":"Points"},"overall":{"value":"2%","title":"Points","type":1,"key":"points","raw":0,"top":20,"color":"#cf403a"}},{"title":"Tries","value":{"value":0,"title":"Tries"},"overall":{"value":"2%","title":"Tries","type":1,"key":"tryScored","raw":0,"top":4,"color":"#cf403a"}},{"title":"Line Breaks","value":{"value":0,"title":"Line Breaks"},"overall":{"value":"2%","title":"Line Breaks","type":1,"key":"cleanBreak","raw":0,"top":4,"color":"#cf403a"}},{"title":"Carries","value":{"value":1,"title":"Carries"},"overall":{"value":"2%","title":"Carries","type":1,"key":"carries","raw":1,"top":88,"color":"#cf403a"}},{"title":"Carries Per Minute","value":{"value":0.05,"title":"Carries Per Minute"},"overall":{"value":"2%","title":"Carries Per Minute","type":1,"key":"carries","raw":0,"top":88,"color":"#cf403a"}},{"title":"Metres Carried","value":{"value":3,"title":"Metres Carried"},"overall":{"value":"2%","title":"Metres Carried","type":1,"key":"metresMade","raw":3,"top":225,"color":"#cf403a"}},{"title":"Turnovers Won","value":{"value":0,"title":"Turnovers Won"},"overall":{"value":"2%","title":"Turnovers Won","type":1,"key":"turnoverWon","raw":0,"top":6,"color":"#cf403a"}},{"title":"Defenders Beaten","value":{"value":0,"title":"Defenders Beaten"},"overall":{"value":"2%","title":"Defenders Beaten","type":1,"key":"defenderBeaten","raw":0,"top":27,"color":"#cf403a"}},{"title":"Post Contact Metres","value":{"value":2,"title":"Post Contact Metres"},"overall":{"value":"2%","title":"Post Contact Metres","type":1,"key":"postContactMetres","raw":2,"top":129,"color":"#cf403a"}}]},{"title":"Defence","stats":[{"title":"Tackles Made","value":{"value":1,"title":"Tackles Made"},"overall":{"value":"2%","title":"Tackles Made","type":1,"key":"totalAttemptedTackles","raw":1,"top":162,"color":"#cf403a"}},{"title":"Tackles Completed","value":{"value":1,"title":"Tackles Completed"},"overall":{"value":"2%","title":"Tackles Completed","type":1,"key":"totalSuccessfulTackles","raw":1,"top":140,"color":"#cf403a"}},{"title":"Dominant Tackles","value":{"value":0,"title":"Dominant Tackles"},"overall":{"value":"2%","title":"Dominant Tackles","type":1,"key":"dominantTackleContact","raw":0,"top":15,"color":"#cf403a"}},{"title":"Tackles Per Minute","value":{"value":0.05,"title":"Tackles Per Minute"},"overall":{"value":"2%","title":"Tackles Per Minute","type":1,"key":"tackle","raw":0,"top":140,"color":"#cf403a"}},{"title":"Turnovers Won","value":{"value":0,"title":"Turnovers Won"},"overall":{"value":"2%","title":"Turnovers Won","type":1,"key":"turnoverWon","raw":0,"top":6,"color":"#cf403a"}}]},{"title":"Passing","stats":[{"title":"Try Assists","value":{"value":0,"title":"Try Assists"},"overall":{"value":"2%","title":"Try Assists","type":1,"key":"tryAssist","raw":0,"top":1,"color":"#cf403a"}},{"title":"Successful Passes","value":{"value":0,"title":"Successful Passes"},"overall":{"value":"2%","title":"Successful Passes","type":1,"key":"passes","raw":0,"top":31,"color":"#cf403a"}},{"title":"Bad Passes","value":{"value":0,"title":"Bad Passes"},"overall":{"value":"2%","title":"Bad Passes","type":1,"key":"badPass","raw":0,"top":1,"color":"#cf403a"}},{"title":"Pass Accuracy","value":{"value":"0%","title":"Pass Accuracy"},"overall":{"value":"100%","title":"Pass Accuracy","type":1,"key":"pass_accuracy","raw":"0%","top":0,"color":"#479d6c"}}]},{"title":"Discipline","stats":[{"title":"Penalties Conceded","value":{"value":0,"title":"Penalties Conceded"},"overall":{"value":"2%","title":"Penalties Conceded","type":1,"key":"penaltyConceded","raw":0,"top":19,"color":"#cf403a"}},{"title":"Yellow Cards","value":{"value":0,"title":"Yellow Cards"},"overall":{"value":"2%","title":"Yellow Cards","type":1,"key":"yellowCard","raw":0,"top":1,"color":"#cf403a"}},{"title":"Red Cards","value":{"value":0,"title":"Red Cards"},"overall":{"value":"2%","title":"Red Cards","type":1,"key":"redCard","raw":0,"top":1,"color":"#cf403a"}}]}]}}]
[{"title":"Japan Rugby League One","logo":"Japan Rugby League One","id":"2074","games":[{"title":"Tokyo Sungoliath vs Black Rams Tokyo","date":"22 May 2026","dateSmall":"22 May","time":1779514200,"compLogo":"https:\/\/eu-cdn.rugbypass.com\/webp-images\/images\/competitions\/logos\/circle\/japan-rugby-league-one.png.webp?maxw=72&v=1762927428","compTitle":"Japan Rugby League One","draw":false,"win":false,"opposition":{"name":"Tokyo Sungoliath","id":"3908","logo":"https:\/\/eu-cdn.rugbypass.com\/webp-images\/images\/team-images\/logos\/png\/5209.png.webp?maxw=72&v=1762927735"},"stats":{"mins":12,"tries":0,"yellow_cards":0,"red_cards":0,"conversions":0}},{"title":"Tokyo Sungoliath vs Black Rams Tokyo","date":"9 May 2026","dateSmall":"9 May","time":1778391000,"compLogo":"https:\/\/eu-cdn.rugbypass.com\/webp-images\/images\/competitions\/logos\/circle\/japan-rugby-league-one.png.webp?maxw=72&v=1762927428","compTitle":"Japan Rugby League One","draw":false,"win":false,"opposition":{"name":"Tokyo Sungoliath","id":"3908","logo":"https:\/\/eu-cdn.rugbypass.com\/webp-images\/images\/team-images\/logos\/png\/5209.png.webp?maxw=72&v=1762927735"},"stats":{"mins":62,"tries":0,"yellow_cards":0,"red_cards":0,"conversions":0}},{"title":"Black Rams Tokyo vs Kubota Spears","date":"2 May 2026","dateSmall":"2 May","time":1777780800,"compLogo":"https:\/\/eu-cdn.rugbypass.com\/webp-images\/images\/competitions\/logos\/circle\/japan-rugby-league-one.png.webp?maxw=72&v=1762927428","compTitle":"Japan Rugby League One","draw":false,"win":false,"opposition":{"name":"Kubota Spears","id":"1525","logo":"https:\/\/eu-cdn.rugbypass.com\/webp-images\/images\/team-images\/logos\/png\/5204.png.webp?maxw=72&v=1762927735"},"stats":{"mins":40,"tries":0,"yellow_cards":0,"red_cards":0,"conversions":0}},{"title":"Black Rams Tokyo vs Toyota Verblitz","date":"25 Apr 2026","dateSmall":"25 Apr","time":1777181400,"compLogo":"https:\/\/eu-cdn.rugbypass.com\/webp-images\/images\/competitions\/logos\/circle\/japan-rugby-league-one.png.webp?maxw=72&v=1762927428","compTitle":"Japan Rugby League One","draw":false,"win":false,"opposition":{"name":"Toyota Verblitz","id":"1886","logo":"https:\/\/eu-cdn.rugbypass.com\/webp-images\/images\/team-images\/logos\/png\/5211.png.webp?maxw=72&v=1762927735"},"stats":{"mins":60,"tries":0,"yellow_cards":0,"red_cards":0,"conversions":0}},{"title":"Honda Heat vs Black Rams Tokyo","date":"17 Apr 2026","dateSmall":"17 Apr","time":1776420000,"compLogo":"https:\/\/eu-cdn.rugbypass.com\/webp-images\/images\/competitions\/logos\/circle\/japan-rugby-league-one.png.webp?maxw=72&v=1762927428","compTitle":"Japan Rugby League One","draw":false,"win":true,"opposition":{"name":"Mie Honda Heat","id":"6343","logo":"https:\/\/eu-cdn.rugbypass.com\/webp-images\/images\/team-images\/logos\/png\/10005202.png.webp?maxw=72&v=1762927733"},"stats":{"mins":26,"tries":0,"yellow_cards":0,"red_cards":0,"conversions":0}},{"title":"Black Rams Tokyo vs Kobe Kobelco Steelers","date":"4 Apr 2026","dateSmall":"4 Apr","time":1775361600,"compLogo":"https:\/\/eu-cdn.rugbypass.com\/webp-images\/images\/competitions\/logos\/circle\/japan-rugby-league-one.png.webp?maxw=72&v=1762927428","compTitle":"Japan Rugby League One","draw":false,"win":false,"opposition":{"name":"Kobelco Kobe Steelers","id":"1314","logo":"https:\/\/eu-cdn.rugbypass.com\/webp-images\/images\/team-images\/logos\/png\/5203.png.webp?maxw=72&v=1762927735"},"stats":{"mins":36,"tries":0,"yellow_cards":0,"red_cards":0,"conversions":0}},{"title":"Black Rams Tokyo vs Mitsubishi DynaBoars","date":"28 Mar 2026","dateSmall":"28 Mar","time":1774762200,"compLogo":"https:\/\/eu-cdn.rugbypass.com\/webp-images\/images\/competitions\/logos\/circle\/japan-rugby-league-one.png.webp?maxw=72&v=1762927428","compTitle":"Japan Rugby League One","draw":false,"win":true,"opposition":{"name":"Mitsubishi Sagamihara Dynaboars","id":"1652","logo":"https:\/\/eu-cdn.rugbypass.com\/webp-images\/images\/team-images\/logos\/png\/594.png.webp?maxw=72&v=1762927735"},"stats":{"mins":21,"tries":0,"yellow_cards":0,"red_cards":0,"conversions":0}},{"title":"Saitama Wild Knights vs Black Rams Tokyo","date":"20 Mar 2026","dateSmall":"20 Mar","time":1774071000,"compLogo":"https:\/\/eu-cdn.rugbypass.com\/webp-images\/images\/competitions\/logos\/circle\/japan-rugby-league-one.png.webp?maxw=72&v=1762927428","compTitle":"Japan Rugby League One","draw":false,"win":false,"opposition":{"name":"Saitama Wild Knights","id":"3459","logo":"https:\/\/eu-cdn.rugbypass.com\/webp-images\/images\/team-images\/logos\/png\/19567.png.webp?maxw=72&v=1762927734"},"stats":{"mins":25,"tries":0,"yellow_cards":0,"red_cards":0,"conversions":0}},{"title":"Black Rams Tokyo vs Honda Heat","date":"10 May 2025","dateSmall":"10 May","time":1746941400,"compLogo":"https:\/\/eu-cdn.rugbypass.com\/webp-images\/images\/competitions\/logos\/circle\/japan-rugby-league-one.png.webp?maxw=72&v=1762927428","compTitle":"Japan Rugby League One","draw":false,"win":true,"opposition":{"name":"Mie Honda Heat","id":"6343","logo":"https:\/\/eu-cdn.rugbypass.com\/webp-images\/images\/team-images\/logos\/png\/10005202.png.webp?maxw=72&v=1762927733"},"stats":{"mins":50,"tries":0,"yellow_cards":0,"red_cards":0,"conversions":0}},{"title":"Tokyo Sungoliath vs Black Rams Tokyo","date":"2 May 2025","dateSmall":"2 May","time":1746244800,"compLogo":"https:\/\/eu-cdn.rugbypass.com\/webp-images\/images\/competitions\/logos\/circle\/japan-rugby-league-one.png.webp?maxw=72&v=1762927428","compTitle":"Japan Rugby League One","draw":false,"win":false,"opposition":{"name":"Tokyo Sungoliath","id":"3908","logo":"https:\/\/eu-cdn.rugbypass.com\/webp-images\/images\/team-images\/logos\/png\/5209.png.webp?maxw=72&v=1762927735"},"stats":{"mins":59,"tries":0,"yellow_cards":0,"red_cards":0,"conversions":0}},{"title":"Saitama Wild Knights vs Black Rams Tokyo","date":"25 Apr 2025","dateSmall":"25 Apr","time":1745645400,"compLogo":"https:\/\/eu-cdn.rugbypass.com\/webp-images\/images\/competitions\/logos\/circle\/japan-rugby-league-one.png.webp?maxw=72&v=1762927428","compTitle":"Japan Rugby League One","draw":false,"win":false,"opposition":{"name":"Saitama Wild Knights","id":"3459","logo":"https:\/\/eu-cdn.rugbypass.com\/webp-images\/images\/team-images\/logos\/png\/19567.png.webp?maxw=72&v=1762927734"},"stats":{"mins":51,"tries":0,"yellow_cards":0,"red_cards":0,"conversions":0}},{"title":"Black Rams Tokyo vs Toyota Verblitz","date":"12 Apr 2025","dateSmall":"12 Apr","time":1744522200,"compLogo":"https:\/\/eu-cdn.rugbypass.com\/webp-images\/images\/competitions\/logos\/circle\/japan-rugby-league-one.png.webp?maxw=72&v=1762927428","compTitle":"Japan Rugby League One","draw":false,"win":true,"opposition":{"name":"Toyota Verblitz","id":"1886","logo":"https:\/\/eu-cdn.rugbypass.com\/webp-images\/images\/team-images\/logos\/png\/5211.png.webp?maxw=72&v=1762927735"},"stats":{"mins":55,"tries":0,"yellow_cards":0,"red_cards":0,"conversions":0}},{"title":"Black Rams Tokyo vs Kubota Spears","date":"5 Apr 2025","dateSmall":"5 Apr","time":1743917400,"compLogo":"https:\/\/eu-cdn.rugbypass.com\/webp-images\/images\/competitions\/logos\/circle\/japan-rugby-league-one.png.webp?maxw=72&v=1762927428","compTitle":"Japan Rugby League One","draw":false,"win":false,"opposition":{"name":"Kubota Spears","id":"1525","logo":"https:\/\/eu-cdn.rugbypass.com\/webp-images\/images\/team-images\/logos\/png\/5204.png.webp?maxw=72&v=1762927735"},"stats":{"mins":63,"tries":0,"yellow_cards":0,"red_cards":0,"conversions":0}},{"title":"Black Rams Tokyo vs Kobe Kobelco Steelers","date":"29 Mar 2025","dateSmall":"29 Mar","time":1743312600,"compLogo":"https:\/\/eu-cdn.rugbypass.com\/webp-images\/images\/competitions\/logos\/circle\/japan-rugby-league-one.png.webp?maxw=72&v=1762927428","compTitle":"Japan Rugby League One","draw":false,"win":false,"opposition":{"name":"Kobelco Kobe Steelers","id":"1314","logo":"https:\/\/eu-cdn.rugbypass.com\/webp-images\/images\/team-images\/logos\/png\/5203.png.webp?maxw=72&v=1762927735"},"stats":{"mins":76,"tries":0,"yellow_cards":0,"red_cards":0,"conversions":0}},{"title":"Shizuoka Blue Revs vs Black Rams Tokyo","date":"21 Mar 2025","dateSmall":"21 Mar","time":1742621400,"compLogo":"https:\/\/eu-cdn.rugbypass.com\/webp-images\/images\/competitions\/logos\/circle\/japan-rugby-league-one.png.webp?maxw=72&v=1762927428","compTitle":"Japan Rugby League One","draw":false,"win":false,"opposition":{"name":"Shizuoka BlueRevs","id":"4749","logo":"https:\/\/eu-cdn.rugbypass.com\/webp-images\/images\/team-images\/logos\/png\/5212.png.webp?maxw=72&v=1762927735"},"stats":{"mins":53,"tries":0,"yellow_cards":0,"red_cards":0,"conversions":0}},{"title":"Yokohama Canon Eagles vs Black Rams Tokyo","date":"14 Mar 2025","dateSmall":"14 Mar","time":1742016600,"compLogo":"https:\/\/eu-cdn.rugbypass.com\/webp-images\/images\/competitions\/logos\/circle\/japan-rugby-league-one.png.webp?maxw=72&v=1762927428","compTitle":"Japan Rugby League One","draw":false,"win":true,"opposition":{"name":"Yokohama Canon Eagles","id":"2008","logo":"https:\/\/eu-cdn.rugbypass.com\/webp-images\/images\/team-images\/logos\/png\/5200.png.webp?maxw=72&v=1762927735"},"stats":{"mins":61,"tries":0,"yellow_cards":0,"red_cards":0,"conversions":0}},{"title":"Mitsubishi DynaBoars vs Black Rams Tokyo","date":"28 Feb 2025","dateSmall":"28 Feb","time":1740798000,"compLogo":"https:\/\/eu-cdn.rugbypass.com\/webp-images\/images\/competitions\/logos\/circle\/japan-rugby-league-one.png.webp?maxw=72&v=1762927428","compTitle":"Japan Rugby League One","draw":false,"win":true,"opposition":{"name":"Mitsubishi Sagamihara Dynaboars","id":"1652","logo":"https:\/\/eu-cdn.rugbypass.com\/webp-images\/images\/team-images\/logos\/png\/594.png.webp?maxw=72&v=1762927735"},"stats":{"mins":76,"tries":0,"yellow_cards":0,"red_cards":0,"conversions":0}},{"title":"Black Rams Tokyo vs Toshiba Brave Lupus","date":"21 Feb 2025","dateSmall":"21 Feb","time":1740193200,"compLogo":"https:\/\/eu-cdn.rugbypass.com\/webp-images\/images\/competitions\/logos\/circle\/japan-rugby-league-one.png.webp?maxw=72&v=1762927428","compTitle":"Japan Rugby League One","draw":false,"win":false,"opposition":{"name":"Toshiba Brave Lupus Tokyo","id":"3342","logo":"https:\/\/eu-cdn.rugbypass.com\/webp-images\/images\/team-images\/logos\/png\/19702.png.webp?maxw=72&v=1762927734"},"stats":{"mins":22,"tries":1,"yellow_cards":0,"red_cards":0,"conversions":0}},{"title":"Black Rams Tokyo vs Urayasu D-Rocks","date":"14 Feb 2025","dateSmall":"14 Feb","time":1739597400,"compLogo":"https:\/\/eu-cdn.rugbypass.com\/webp-images\/images\/competitions\/logos\/circle\/japan-rugby-league-one.png.webp?maxw=72&v=1762927428","compTitle":"Japan Rugby League One","draw":false,"win":true,"opposition":{"name":"Urayasu D-Rocks","id":"4788","logo":"https:\/\/eu-cdn.rugbypass.com\/webp-images\/images\/team-images\/logos\/png\/10005207.png.webp?maxw=72&v=1762927733"},"stats":{"mins":47,"tries":0,"yellow_cards":0,"red_cards":0,"conversions":0}},{"title":"Black Rams Tokyo vs Shizuoka Blue Revs","date":"7 Feb 2025","dateSmall":"7 Feb","time":1738983600,"compLogo":"https:\/\/eu-cdn.rugbypass.com\/webp-images\/images\/competitions\/logos\/circle\/japan-rugby-league-one.png.webp?maxw=72&v=1762927428","compTitle":"Japan Rugby League One","draw":false,"win":false,"opposition":{"name":"Shizuoka BlueRevs","id":"4749","logo":"https:\/\/eu-cdn.rugbypass.com\/webp-images\/images\/team-images\/logos\/png\/5212.png.webp?maxw=72&v=1762927735"},"stats":{"mins":50,"tries":0,"yellow_cards":0,"red_cards":0,"conversions":0}},{"title":"Kobe Kobelco Steelers vs Black Rams Tokyo","date":"31 Jan 2025","dateSmall":"31 Jan","time":1738378800,"compLogo":"https:\/\/eu-cdn.rugbypass.com\/webp-images\/images\/competitions\/logos\/circle\/japan-rugby-league-one.png.webp?maxw=72&v=1762927428","compTitle":"Japan Rugby League One","draw":false,"win":false,"opposition":{"name":"Kobelco Kobe Steelers","id":"1314","logo":"https:\/\/eu-cdn.rugbypass.com\/webp-images\/images\/team-images\/logos\/png\/5203.png.webp?maxw=72&v=1762927735"},"stats":{"mins":54,"tries":0,"yellow_cards":0,"red_cards":0,"conversions":0}},{"title":"Kubota Spears vs Black Rams Tokyo","date":"17 Jan 2025","dateSmall":"17 Jan","time":1737169200,"compLogo":"https:\/\/eu-cdn.rugbypass.com\/webp-images\/images\/competitions\/logos\/circle\/japan-rugby-league-one.png.webp?maxw=72&v=1762927428","compTitle":"Japan Rugby League One","draw":false,"win":false,"opposition":{"name":"Kubota Spears","id":"1525","logo":"https:\/\/eu-cdn.rugbypass.com\/webp-images\/images\/team-images\/logos\/png\/5204.png.webp?maxw=72&v=1762927735"},"stats":{"mins":46,"tries":0,"yellow_cards":0,"red_cards":0,"conversions":0}},{"title":"Black Rams Tokyo vs Toyota Verblitz","date":"4 May 2024","dateSmall":"4 May","time":1714887300,"compLogo":"https:\/\/eu-cdn.rugbypass.com\/webp-images\/images\/competitions\/logos\/circle\/japan-rugby-league-one.png.webp?maxw=72&v=1762927428","compTitle":"Japan Rugby League One","draw":false,"win":false,"opposition":{"name":"Toyota Verblitz","id":"1886","logo":"https:\/\/eu-cdn.rugbypass.com\/webp-images\/images\/team-images\/logos\/png\/5211.png.webp?maxw=72&v=1762927735"},"stats":{"mins":21,"tries":0,"yellow_cards":0,"red_cards":0,"conversions":0}}]}]
Taishi Tsumura Stats
Stats compared to other Props
![]() {{selectedCompetition.competition.name}} {{selectedCompetition.competition.season.label}}
-
![]() {{item.competition.name}} {{item.competition.season.label}}
{{graphStats[0].value}}
{{graphStats[0].title}}
{{graphStats[1].value}}
{{graphStats[1].title}}
{{graphStats[2].title}}
{{graphStats[2].value}}
{{graphStats[3].title}}
{{graphStats[3].value}}
{{graphStats[4].title}}
{{graphStats[4].value}}
{{graphStats[5].value}}
{{graphStats[5].title}}
Taishi Tsumura Stats
Stats compared to other Props
{{item.title}}
{{item.value}}
Match Stats
![]() {{selectedMatchesComp}}
- All
-
![]() {{item.title}}
22 May 2026
22 May
L
v

Tokyo Sungoliath
9 May 2026
9 May
L
v
Tokyo Sungoliath
2 May 2026
2 May
L
v

Kubota Spears
25 Apr 2026
25 Apr
L
v

Toyota Verblitz
17 Apr 2026
17 Apr
W
v

Mie Honda Heat
4 Apr 2026
4 Apr
L
v

Kobelco Kobe Steelers
28 Mar 2026
28 Mar
W
v

Mitsubishi Sagamihara Dynaboars
20 Mar 2026
20 Mar
L
v

Saitama Wild Knights
10 May 2025
10 May
W
v
Mie Honda Heat
2 May 2025
2 May
L
v
Tokyo Sungoliath
{{game.date}}
{{game.dateSmall}}
W L
v
![]()
{{game.stats.mins}}
{{game.stats.tries}}
{{game.stats.conversions}}
{{game.stats.yellow_cards}}
{{game.stats.red_cards}}
Taishi Tsumura Performance Analysis
Japan Rugby League One 2025/2026
Taishi Tsumura featured in 8 matches during the 2025/2026 Japan Rugby League One, representing BlackRams Tokyo. Results included 2 wins and 6 losses.
Taishi Tsumura represented BlackRams Tokyo in the 2025/2026 Japan Rugby League One season, who finished 4th in the regular season table.
Taishi Tsumura played 283 minutes across the Japan Rugby League One 2025/2026. In attack he made 8m with ball in hand, beating 0 defenders and scoring 0 tries. Defensively he completed 25 tackles at a rate of 3.13 per game.
In the Japan Rugby League One 2025/2026, Taishi Tsumura completed 3 passes at an accuracy of 100%, contributing 0 try assists and making 19 touches.