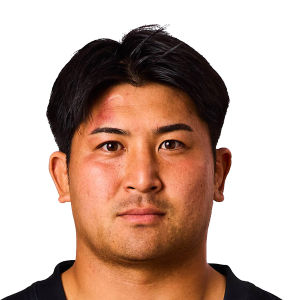
Shuhei Matsuhashi News

Nations Championship
England star hails Eddie Jones’ ‘massive part in English rugby history’
England hit 'really important' period for 'our Jason Robinson' says Sinfield
Wales sweating on the fitness of Aaron Wainwright for All Blacks clash
2003 World Cup-winning captain Martin Johnson watches history being made
Latest
England rocked by Feyi-Waboso and Curry blows as injuries hit hard
Springboks lead cut after latest World Rugby Men’s Rankings update
Why Louis Rees-Zammit is playing with a 'smile on my face’ for Wales
Dewi Lake admits Wales ‘let ourselves down’
Eddie Jones: '100 per cent... That could have been a historic win for Japan'
Rees-Zammit and Adams shine as Wales struggle past Japan in Cardiff
[{"competition":{"rid":"1002","oid":"421","ovid":"2074","name":"Japan Rugby League One","logo":"https:\/\/eu-cdn.rugbypass.com\/images\/competitions\/logos\/png\/japan-rugby-league-one.png?v=1762927429","logoCircle":"https:\/\/eu-cdn.rugbypass.com\/images\/competitions\/logos\/circle\/japan-rugby-league-one.png?v=1762927428","season":{"season":202501,"years":{"2025":2025,"2026":2026},"label":"2025\/2026","completed":1,"standings":1,"started":1,"months":0,"games":114},"stats":{"success":1,"stats":{"teamId":1154,"tryScored":3,"points":15,"appearances":12,"minutesPlayed":787,"minutesPlayedFirstHalf":436,"minutesPlayedSecondHalf":352,"penaltyConceded":5,"penaltyDefence":4,"penaltyOffence":1,"notRollingAway":1,"offFeetAtRuck":2,"notReleasing":1,"offside":1,"carries":83,"metresMade":158,"passes":44,"offload":6,"defenderBeaten":9,"cleanBreak":5,"totalTurnovers":12,"crossedGainline":39,"failedGainline":42,"neutral":2,"droppedBallUnforced":8,"lostInRuckOrMaul":3,"otherError":1,"handlingError":8,"dominantContact":7,"errors":12,"postContactMetres":42,"breakAssist":2,"carryDistance":343,"metresInContact":42,"tackle":127,"missedTackle":15,"turnoverWon":14,"interception":1,"tackleTurnoverWon":4,"dominantTackleContact":4,"totalAttemptedTackles":155,"totalSuccessfulTackles":127,"totalUnsuccessfulTackles":28,"jackalPenaltyWon":5,"jackalTurnoverWon":1,"counterRuck":1,"outOfGame":5,"backInGame":2,"contestedBreakdown":3,"trapped":4,"upperBodyTackles":64,"lowerBodyTackles":54,"percentTackleMade":81.94,"percentLowerBodyTackles":45.76,"percentUpperBodyTackles":54.24,"wonClean":1,"lineoutsWonOwnThrow":6,"lineoutThrowsWon":1,"kicksInPlay":1,"attackingKicks":1,"kickBounced":1,"kickMetres":22,"allKickMetres":22,"attackingCatch":1,"tapBack":1,"aerialContest":2},"topPlayerStats":{"tryScored":{"id":214107,"value":13},"points":{"id":214107,"value":65},"appearances":{"id":245177,"value":19},"minutesPlayed":{"id":245177,"value":1507},"minutesPlayedFirstHalf":{"id":245177,"value":760},"minutesPlayedSecondHalf":{"id":245177,"value":747},"penaltyConceded":{"id":135261,"value":18},"penaltyDefence":{"id":125619,"value":12},"penaltyOffence":{"id":135261,"value":7},"notReleasing":{"id":135261,"value":6},"offside":{"id":125619,"value":4},"carries":{"id":185642,"value":195},"metresMade":{"id":245177,"value":679},"passes":{"id":179379,"value":171},"offload":{"id":163435,"value":25},"tryAssist":{"id":179379,"value":8},"defenderBeaten":{"id":240625,"value":50},"cleanBreak":{"id":163435,"value":18},"totalTurnovers":{"id":118827,"value":20},"crossedGainline":{"id":185642,"value":116},"failedGainline":{"id":135261,"value":88},"neutral":{"id":120076,"value":53},"forwardPass":{"id":135261,"value":2},"lostBallForced":{"id":213814,"value":4},"droppedBallUnforced":{"id":118827,"value":13},"accidentalKnockOn":{"id":138727,"value":1},"handlingError":{"id":118827,"value":19},"dominantContact":{"id":240625,"value":44},"errors":{"id":118827,"value":20},"postContactMetres":{"id":179379,"value":232},"breakAssist":{"id":179379,"value":10},"carryDistance":{"id":240625,"value":1068},"metresInContact":{"id":179379,"value":232},"kickError":{"id":138727,"value":1},"kicksInPlay":{"id":200003,"value":11},"retainedKick":{"id":245177,"value":3},"territorial":{"id":213814,"value":4},"contestable":{"id":245177,"value":3},"attackingKicks":{"id":163435,"value":6},"kickBounced":{"id":200003,"value":9},"kickMetres":{"id":200003,"value":324},"allKickMetres":{"id":200003,"value":324},"tackle":{"id":185642,"value":285},"missedTackle":{"id":185642,"value":35},"turnoverWon":{"id":173835,"value":29},"interception":{"id":213814,"value":2},"tackleTurnoverWon":{"id":185642,"value":7},"dominantTackleContact":{"id":214107,"value":16},"totalAttemptedTackles":{"id":185642,"value":338},"totalSuccessfulTackles":{"id":185642,"value":285},"totalUnsuccessfulTackles":{"id":185642,"value":53},"jackalPenaltyWon":{"id":173835,"value":15},"outOfGame":{"id":135261,"value":83},"backInGame":{"id":239835,"value":38},"contestedBreakdown":{"id":135261,"value":37},"trapped":{"id":135261,"value":51},"upperBodyTackles":{"id":245177,"value":186},"lowerBodyTackles":{"id":125619,"value":102},"percentTackleMade":{"id":250291,"value":100},"percentLowerBodyTackles":{"id":163987,"value":72.73},"percentUpperBodyTackles":{"id":259984,"value":100},"wonClean":{"id":173835,"value":3},"lineoutsWonOwnThrow":{"id":239835,"value":53},"lineoutSteals":{"id":239835,"value":8},"lineoutThrowsWon":{"id":173835,"value":3},"attackingCatch":{"id":245177,"value":8},"attackingCatchSuccess":{"id":245177,"value":3},"restartCatch":{"id":154414,"value":29},"restartCatchSuccess":{"id":154414,"value":27},"tapBack":{"id":163435,"value":4},"aerialContest":{"id":200003,"value":10},"aerialContestWon":{"id":245177,"value":3},"percentAerialContestWon":{"id":179379,"value":100},"notRollingAway":{"id":125619,"value":3},"offFeetAtRuck":{"id":226235,"value":4},"lostInRuckOrMaul":{"id":135261,"value":8},"otherError":{"id":174775,"value":1},"jackalTurnoverWon":{"id":245177,"value":8},"counterRuck":{"id":101182,"value":4},"foulPlay":{"id":163435,"value":3},"handsInRuck":{"id":213814,"value":3},"defensiveCatch":{"id":120076,"value":15},"defensiveCatchSuccess":{"id":120076,"value":9},"tapBackSuccess":{"id":213814,"value":2},"carriedInTouch":{"id":120076,"value":2},"duelDefence":{"id":120076,"value":7},"yellowCard":{"id":239835,"value":3},"otherOffence":{"id":142873,"value":2},"sinBinEnd":{"id":239835,"value":3},"kickBox":{"id":179379,"value":1},"collapsingMaul":{"id":245177,"value":1},"lineoutOffence":{"id":245177,"value":3},"freeKick":{"id":245177,"value":1},"badPass":{"id":118827,"value":3},"tryKick":{"id":245177,"value":1},"restartRetained":{"id":245177,"value":1},"totalRestarts":{"id":245177,"value":1},"restartsRetained":{"id":245177,"value":1},"restart22m":{"id":245177,"value":1},"percentRestartsRetained":{"id":245177,"value":100},"wrongSideAtRuck":{"id":255165,"value":2},"wrongSideAtMaul":{"id":200003,"value":2},"attemptedInterception":{"id":214107,"value":1},"dissent":{"id":135261,"value":1},"maulObstruction":{"id":163265,"value":1},"obstruction":{"id":200003,"value":2},"deliberateKnockOn":{"id":200003,"value":2},"kickChargedDown":{"id":239835,"value":1},"dissentAdvance":{"id":167098,"value":1},"offsideAtKick":{"id":255165,"value":1},"scrumOffence":{"id":255165,"value":1},"duelDefenceSuccess":{"id":120076,"value":2},"carriedOver":{"id":216441,"value":1},"lostNotStraight":{"id":173835,"value":1},"lineoutThrowsLost":{"id":173835,"value":1},"throwFront":{"id":173835,"value":3},"redCard":{"id":144142,"value":1},"restartOppCollection":{"id":207036,"value":1},"restart50m":{"id":207036,"value":1}}},"epoch":1780812300},"main":{"totalMinsPlayed":787,"main":[{"value":6,"title":"Lineout Takes"},{"value":83,"title":"Carries"},{"value":3,"title":"Tries"},{"value":14,"title":"Turnovers Won"},{"value":127,"title":"Tackles Completed"},{"value":4,"title":"Dominant Tackles"},{"value":0,"title":"Try Assists"}],"profile":[{"value":"11%","title":"Lineout Takes","type":1,"key":"lineoutsWonOwnThrow","raw":6,"top":53,"color":"#d55637"},{"value":"43%","title":"Carries","type":1,"key":"carries","raw":83,"top":195,"color":"#efb240"},{"value":"23%","title":"Tries","type":1,"key":"tryScored","raw":3,"top":13,"color":"#de7637"},{"value":"48%","title":"Turnovers Won","type":1,"key":"turnoverWon","raw":14,"top":29,"color":"#f4c143"},{"value":"45%","title":"Tackles Completed","type":1,"key":"totalSuccessfulTackles","raw":127,"top":285,"color":"#f1b841"},{"value":"25%","title":"Dominant Tackles","type":1,"key":"dominantTackleContact","raw":4,"top":16,"color":"#e07d37"},{"value":"2%","title":"Try Assists","type":1,"key":"tryAssist","raw":0,"top":8,"color":"#cf403a"}]},"group":{"groups":[{"title":"Attack","stats":[{"title":"Points","value":{"value":15,"title":"Points"},"overall":{"value":"23%","title":"Points","type":1,"key":"points","raw":15,"top":65,"color":"#de7637"}},{"title":"Tries","value":{"value":3,"title":"Tries"},"overall":{"value":"23%","title":"Tries","type":1,"key":"tryScored","raw":3,"top":13,"color":"#de7637"}},{"title":"Line Breaks","value":{"value":5,"title":"Line Breaks"},"overall":{"value":"28%","title":"Line Breaks","type":1,"key":"cleanBreak","raw":5,"top":18,"color":"#e28638"}},{"title":"Carries","value":{"value":83,"title":"Carries"},"overall":{"value":"43%","title":"Carries","type":1,"key":"carries","raw":83,"top":195,"color":"#efb240"}},{"title":"Carries Per Minute","value":{"value":0.11,"title":"Carries Per Minute"},"overall":{"value":"2%","title":"Carries Per Minute","type":1,"key":"carries","raw":0,"top":195,"color":"#cf403a"}},{"title":"Metres Carried","value":{"value":158,"title":"Metres Carried"},"overall":{"value":"23%","title":"Metres Carried","type":1,"key":"metresMade","raw":158,"top":679,"color":"#de7637"}},{"title":"Turnovers Won","value":{"value":14,"title":"Turnovers Won"},"overall":{"value":"48%","title":"Turnovers Won","type":1,"key":"turnoverWon","raw":14,"top":29,"color":"#f4c143"}},{"title":"Defenders Beaten","value":{"value":9,"title":"Defenders Beaten"},"overall":{"value":"18%","title":"Defenders Beaten","type":1,"key":"defenderBeaten","raw":9,"top":50,"color":"#da6937"}},{"title":"Post Contact Metres","value":{"value":42,"title":"Post Contact Metres"},"overall":{"value":"18%","title":"Post Contact Metres","type":1,"key":"postContactMetres","raw":42,"top":232,"color":"#da6937"}}]},{"title":"Defence","stats":[{"title":"Tackles Made","value":{"value":155,"title":"Tackles Made"},"overall":{"value":"46%","title":"Tackles Made","type":1,"key":"totalAttemptedTackles","raw":155,"top":338,"color":"#f2bb42"}},{"title":"Tackles Completed","value":{"value":127,"title":"Tackles Completed"},"overall":{"value":"45%","title":"Tackles Completed","type":1,"key":"totalSuccessfulTackles","raw":127,"top":285,"color":"#f1b841"}},{"title":"Dominant Tackles","value":{"value":4,"title":"Dominant Tackles"},"overall":{"value":"25%","title":"Dominant Tackles","type":1,"key":"dominantTackleContact","raw":4,"top":16,"color":"#e07d37"}},{"title":"Tackles Per Minute","value":{"value":0.16,"title":"Tackles Per Minute"},"overall":{"value":"2%","title":"Tackles Per Minute","type":1,"key":"tackle","raw":0,"top":285,"color":"#cf403a"}},{"title":"Turnovers Won","value":{"value":14,"title":"Turnovers Won"},"overall":{"value":"48%","title":"Turnovers Won","type":1,"key":"turnoverWon","raw":14,"top":29,"color":"#f4c143"}}]},{"title":"Passing","stats":[{"title":"Try Assists","value":{"value":0,"title":"Try Assists"},"overall":{"value":"2%","title":"Try Assists","type":1,"key":"tryAssist","raw":0,"top":8,"color":"#cf403a"}},{"title":"Successful Passes","value":{"value":44,"title":"Successful Passes"},"overall":{"value":"26%","title":"Successful Passes","type":1,"key":"passes","raw":44,"top":171,"color":"#e18038"}},{"title":"Bad Passes","value":{"value":0,"title":"Bad Passes"},"overall":{"value":"2%","title":"Bad Passes","type":1,"key":"badPass","raw":0,"top":3,"color":"#cf403a"}},{"title":"Pass Accuracy","value":{"value":"100%","title":"Pass Accuracy"},"overall":{"value":"100%","title":"Pass Accuracy","type":1,"key":"pass_accuracy","raw":"100%","top":0,"color":"#479d6c"}}]},{"title":"Discipline","stats":[{"title":"Penalties Conceded","value":{"value":5,"title":"Penalties Conceded"},"overall":{"value":"28%","title":"Penalties Conceded","type":1,"key":"penaltyConceded","raw":5,"top":18,"color":"#e28638"}},{"title":"Yellow Cards","value":{"value":0,"title":"Yellow Cards"},"overall":{"value":"2%","title":"Yellow Cards","type":1,"key":"yellowCard","raw":0,"top":3,"color":"#cf403a"}},{"title":"Red Cards","value":{"value":0,"title":"Red Cards"},"overall":{"value":"2%","title":"Red Cards","type":1,"key":"redCard","raw":0,"top":1,"color":"#cf403a"}}]},{"title":"Lineouts","stats":[{"title":"Lineout Takes","value":{"value":6,"title":"Lineout Takes"},"overall":{"value":"2%","title":"Lineout Takes","type":1,"key":"lineout_takes","raw":0,"top":0,"color":"#ce3d3b"}},{"title":"Lineouts Won","value":{"value":6,"title":"Lineouts Won"},"overall":{"value":"11%","title":"Lineouts Won","type":1,"key":"lineoutsWonOwnThrow","raw":6,"top":53,"color":"#d55637"}},{"title":"Lineouts Stolen","value":{"value":0,"title":"Lineouts Stolen"},"overall":{"value":"2%","title":"Lineouts Stolen","type":1,"key":"lineoutSteals","raw":0,"top":8,"color":"#cf403a"}}]}]}},{"competition":{"rid":"1002","oid":"421","ovid":"2074","name":"Japan Rugby League One","logo":"https:\/\/eu-cdn.rugbypass.com\/images\/competitions\/logos\/png\/japan-rugby-league-one.png?v=1762927429","logoCircle":"https:\/\/eu-cdn.rugbypass.com\/images\/competitions\/logos\/circle\/japan-rugby-league-one.png?v=1762927428","season":{"season":202401,"years":{"2024":2024,"2025":2025},"label":"2024\/2025","completed":1,"standings":1,"started":1,"months":0,"games":114},"stats":{"success":1,"stats":{"teamId":1154,"tryScored":4,"points":20,"appearances":16,"minutesPlayed":660,"minutesPlayedFirstHalf":291,"minutesPlayedSecondHalf":369,"penaltyConceded":10,"penaltyDefence":7,"penaltyOffence":3,"foulPlay":1,"offFeetAtRuck":3,"notReleasing":2,"offside":3,"carries":68,"metresMade":135,"passes":39,"offload":2,"defenderBeaten":10,"cleanBreak":3,"totalTurnovers":1,"crossedGainline":26,"failedGainline":37,"neutral":5,"lostBallForced":1,"handlingError":1,"dominantContact":8,"errors":1,"postContactMetres":36,"breakAssist":1,"carryDistance":250,"metresInContact":36,"tackle":134,"missedTackle":11,"turnoverWon":7,"dominantTackleContact":2,"totalAttemptedTackles":152,"totalSuccessfulTackles":134,"totalUnsuccessfulTackles":18,"jackalPenaltyWon":3,"jackalTurnoverWon":1,"counterRuck":1,"outOfGame":15,"backInGame":5,"contestedBreakdown":2,"trapped":2,"percentTackleMade":88.16,"kicksInPlay":1,"territorial":1,"kickBounced":1,"kickMetres":55,"allKickMetres":55,"attackingCatch":1,"attackingCatchSuccess":1,"restartCatch":5,"restartCatchSuccess":4,"tapBack":1,"aerialContest":2,"aerialContestWon":1,"percentAerialContestWon":50},"topPlayerStats":{"carries":{"id":135261,"value":270},"metresMade":{"id":163435,"value":754},"passes":{"id":197868,"value":143},"offload":{"id":163435,"value":31},"tryAssist":{"id":213814,"value":8},"defenderBeaten":{"id":163435,"value":64},"cleanBreak":{"id":197868,"value":18},"crossedGainline":{"id":135261,"value":135},"neutral":{"id":120076,"value":72},"dominantContact":{"id":114429,"value":57},"postContactMetres":{"id":114429,"value":277},"carryDistance":{"id":197868,"value":1332},"metresInContact":{"id":114429,"value":277},"restartCatch":{"id":120076,"value":47},"restartCatchSuccess":{"id":120076,"value":42},"points":{"id":197868,"value":55},"appearances":{"id":125619,"value":20},"minutesPlayed":{"id":120076,"value":1545},"minutesPlayedSecondHalf":{"id":214107,"value":760},"tryScored":{"id":197868,"value":11},"minutesPlayedFirstHalf":{"id":125619,"value":800},"penaltyConceded":{"id":120076,"value":24},"penaltyDefence":{"id":120076,"value":15},"foulPlay":{"id":114429,"value":5},"offside":{"id":163435,"value":6},"totalTurnovers":{"id":214107,"value":22},"failedGainline":{"id":135261,"value":133},"lostBallForced":{"id":163435,"value":6},"droppedBallUnforced":{"id":214107,"value":11},"accidentalKnockOn":{"id":197868,"value":2},"handlingError":{"id":214107,"value":18},"errors":{"id":214107,"value":22},"breakAssist":{"id":197868,"value":13},"tackle":{"id":120076,"value":307},"missedTackle":{"id":197868,"value":37},"turnoverWon":{"id":118827,"value":27},"dominantTackleContact":{"id":245177,"value":18},"totalAttemptedTackles":{"id":120076,"value":350},"totalSuccessfulTackles":{"id":120076,"value":307},"totalUnsuccessfulTackles":{"id":226235,"value":60},"jackalPenaltyWon":{"id":173835,"value":13},"jackalTurnoverWon":{"id":118827,"value":11},"outOfGame":{"id":135261,"value":94},"backInGame":{"id":239901,"value":46},"trapped":{"id":135261,"value":38},"percentTackleMade":{"id":226239,"value":100},"lineoutsWonOwnThrow":{"id":154414,"value":61},"lineoutSteals":{"id":197868,"value":5},"penaltyOffence":{"id":120076,"value":9},"offFeetAtRuck":{"id":174775,"value":3},"notReleasing":{"id":120076,"value":5},"counterRuck":{"id":142873,"value":4},"contestedBreakdown":{"id":135261,"value":19},"kicksInPlay":{"id":213814,"value":12},"territorial":{"id":213814,"value":9},"kickBounced":{"id":200003,"value":9},"kickMetres":{"id":213814,"value":419},"allKickMetres":{"id":213814,"value":419},"attackingCatch":{"id":114429,"value":4},"attackingCatchSuccess":{"id":209502,"value":3},"tapBack":{"id":163435,"value":4},"aerialContest":{"id":114429,"value":7},"aerialContestWon":{"id":209502,"value":3},"percentAerialContestWon":{"id":118508,"value":100},"yellowCard":{"id":197868,"value":5},"dissent":{"id":213814,"value":1},"notRollingAway":{"id":245177,"value":4},"obstruction":{"id":213814,"value":1},"wrongSideAtRuck":{"id":255692,"value":2},"sinBinEnd":{"id":197868,"value":5},"forwardPass":{"id":163435,"value":2},"lostInRuckOrMaul":{"id":120076,"value":6},"kickError":{"id":213814,"value":1},"retainedKick":{"id":163435,"value":3},"contestable":{"id":163435,"value":3},"attackingKicks":{"id":200003,"value":8},"interception":{"id":139970,"value":2},"tackleTurnoverWon":{"id":163435,"value":7},"defensiveCatch":{"id":120076,"value":14},"defensiveCatchSuccess":{"id":120076,"value":9},"scrumOffence":{"id":163435,"value":2},"lineoutOffence":{"id":214107,"value":3},"carriedInTouch":{"id":245177,"value":2},"upperBodyTackles":{"id":245177,"value":19},"lowerBodyTackles":{"id":188855,"value":13},"percentLowerBodyTackles":{"id":188855,"value":72.22},"percentUpperBodyTackles":{"id":241002,"value":100},"handsInRuck":{"id":135261,"value":2},"otherOffence":{"id":241618,"value":1},"freeKick":{"id":241618,"value":1},"dissentAdvance":{"id":245177,"value":1},"maulObstruction":{"id":245177,"value":1},"carriedOver":{"id":245177,"value":1},"attemptedInterception":{"id":245177,"value":1},"collapsingMaul":{"id":214107,"value":2},"offsideAtKick":{"id":163435,"value":2},"accidentalOffside":{"id":199566,"value":1},"wrongSideAtMaul":{"id":214107,"value":2},"badPass":{"id":197868,"value":2},"kickChargedDown":{"id":200003,"value":2},"redCard":{"id":254804,"value":1},"deliberateKnockOn":{"id":163435,"value":1},"offsideAtRestart":{"id":163435,"value":1},"otherError":{"id":120076,"value":1},"missedDropGoal":{"id":173835,"value":1},"wonClean":{"id":173835,"value":1},"lineoutThrowsWon":{"id":173835,"value":1},"throwFront":{"id":173835,"value":1},"restartOppCollection":{"id":240625,"value":1},"totalRestarts":{"id":240625,"value":1},"restart22m":{"id":240625,"value":1},"throw15+":{"id":118827,"value":1},"5SecondRule":{"id":200003,"value":1},"lostHandlingError":{"id":219674,"value":1},"lineoutThrowsLost":{"id":219674,"value":1}}},"epoch":1748757900},"main":{"totalMinsPlayed":660,"main":[{"value":0,"title":"Lineout Takes"},{"value":68,"title":"Carries"},{"value":4,"title":"Tries"},{"value":7,"title":"Turnovers Won"},{"value":134,"title":"Tackles Completed"},{"value":2,"title":"Dominant Tackles"},{"value":0,"title":"Try Assists"}],"profile":[{"value":"2%","title":"Lineout Takes","type":1,"key":"lineoutsWonOwnThrow","raw":0,"top":61,"color":"#cf403a"},{"value":"25%","title":"Carries","type":1,"key":"carries","raw":68,"top":270,"color":"#e07d37"},{"value":"36%","title":"Tries","type":1,"key":"tryScored","raw":4,"top":11,"color":"#e99d3b"},{"value":"26%","title":"Turnovers Won","type":1,"key":"turnoverWon","raw":7,"top":27,"color":"#e18038"},{"value":"44%","title":"Tackles Completed","type":1,"key":"totalSuccessfulTackles","raw":134,"top":307,"color":"#f0b540"},{"value":"11%","title":"Dominant Tackles","type":1,"key":"dominantTackleContact","raw":2,"top":18,"color":"#d55637"},{"value":"2%","title":"Try Assists","type":1,"key":"tryAssist","raw":0,"top":8,"color":"#cf403a"}]},"group":{"groups":[{"title":"Attack","stats":[{"title":"Points","value":{"value":20,"title":"Points"},"overall":{"value":"36%","title":"Points","type":1,"key":"points","raw":20,"top":55,"color":"#e99d3b"}},{"title":"Tries","value":{"value":4,"title":"Tries"},"overall":{"value":"36%","title":"Tries","type":1,"key":"tryScored","raw":4,"top":11,"color":"#e99d3b"}},{"title":"Line Breaks","value":{"value":3,"title":"Line Breaks"},"overall":{"value":"17%","title":"Line Breaks","type":1,"key":"cleanBreak","raw":3,"top":18,"color":"#d96636"}},{"title":"Carries","value":{"value":68,"title":"Carries"},"overall":{"value":"25%","title":"Carries","type":1,"key":"carries","raw":68,"top":270,"color":"#e07d37"}},{"title":"Carries Per Minute","value":{"value":0.1,"title":"Carries Per Minute"},"overall":{"value":"2%","title":"Carries Per Minute","type":1,"key":"carries","raw":0,"top":270,"color":"#cf403a"}},{"title":"Metres Carried","value":{"value":135,"title":"Metres Carried"},"overall":{"value":"18%","title":"Metres Carried","type":1,"key":"metresMade","raw":135,"top":754,"color":"#da6937"}},{"title":"Turnovers Won","value":{"value":7,"title":"Turnovers Won"},"overall":{"value":"26%","title":"Turnovers Won","type":1,"key":"turnoverWon","raw":7,"top":27,"color":"#e18038"}},{"title":"Defenders Beaten","value":{"value":10,"title":"Defenders Beaten"},"overall":{"value":"16%","title":"Defenders Beaten","type":1,"key":"defenderBeaten","raw":10,"top":64,"color":"#d96437"}},{"title":"Post Contact Metres","value":{"value":36,"title":"Post Contact Metres"},"overall":{"value":"13%","title":"Post Contact Metres","type":1,"key":"postContactMetres","raw":36,"top":277,"color":"#d75c37"}}]},{"title":"Defence","stats":[{"title":"Tackles Made","value":{"value":152,"title":"Tackles Made"},"overall":{"value":"43%","title":"Tackles Made","type":1,"key":"totalAttemptedTackles","raw":152,"top":350,"color":"#efb240"}},{"title":"Tackles Completed","value":{"value":134,"title":"Tackles Completed"},"overall":{"value":"44%","title":"Tackles Completed","type":1,"key":"totalSuccessfulTackles","raw":134,"top":307,"color":"#f0b540"}},{"title":"Dominant Tackles","value":{"value":2,"title":"Dominant Tackles"},"overall":{"value":"11%","title":"Dominant Tackles","type":1,"key":"dominantTackleContact","raw":2,"top":18,"color":"#d55637"}},{"title":"Tackles Per Minute","value":{"value":0.2,"title":"Tackles Per Minute"},"overall":{"value":"2%","title":"Tackles Per Minute","type":1,"key":"tackle","raw":0,"top":307,"color":"#cf403a"}},{"title":"Turnovers Won","value":{"value":7,"title":"Turnovers Won"},"overall":{"value":"26%","title":"Turnovers Won","type":1,"key":"turnoverWon","raw":7,"top":27,"color":"#e18038"}}]},{"title":"Passing","stats":[{"title":"Try Assists","value":{"value":0,"title":"Try Assists"},"overall":{"value":"2%","title":"Try Assists","type":1,"key":"tryAssist","raw":0,"top":8,"color":"#cf403a"}},{"title":"Successful Passes","value":{"value":39,"title":"Successful Passes"},"overall":{"value":"27%","title":"Successful Passes","type":1,"key":"passes","raw":39,"top":143,"color":"#e18238"}},{"title":"Bad Passes","value":{"value":0,"title":"Bad Passes"},"overall":{"value":"2%","title":"Bad Passes","type":1,"key":"badPass","raw":0,"top":2,"color":"#cf403a"}},{"title":"Pass Accuracy","value":{"value":"100%","title":"Pass Accuracy"},"overall":{"value":"100%","title":"Pass Accuracy","type":1,"key":"pass_accuracy","raw":"100%","top":0,"color":"#479d6c"}}]},{"title":"Discipline","stats":[{"title":"Penalties Conceded","value":{"value":10,"title":"Penalties Conceded"},"overall":{"value":"42%","title":"Penalties Conceded","type":1,"key":"penaltyConceded","raw":10,"top":24,"color":"#eeaf3f"}},{"title":"Yellow Cards","value":{"value":0,"title":"Yellow Cards"},"overall":{"value":"2%","title":"Yellow Cards","type":1,"key":"yellowCard","raw":0,"top":5,"color":"#cf403a"}},{"title":"Red Cards","value":{"value":0,"title":"Red Cards"},"overall":{"value":"2%","title":"Red Cards","type":1,"key":"redCard","raw":0,"top":1,"color":"#cf403a"}}]},{"title":"Lineouts","stats":[{"title":"Lineout Takes","value":{"value":0,"title":"Lineout Takes"},"overall":{"value":"2%","title":"Lineout Takes","type":1,"key":"lineout_takes","raw":0,"top":0,"color":"#ce3d3b"}},{"title":"Lineouts Won","value":{"value":0,"title":"Lineouts Won"},"overall":{"value":"2%","title":"Lineouts Won","type":1,"key":"lineoutsWonOwnThrow","raw":0,"top":61,"color":"#cf403a"}},{"title":"Lineouts Stolen","value":{"value":0,"title":"Lineouts Stolen"},"overall":{"value":"2%","title":"Lineouts Stolen","type":1,"key":"lineoutSteals","raw":0,"top":5,"color":"#cf403a"}}]}]}},{"competition":{"rid":"1002","oid":"421","ovid":"2074","name":"Japan Rugby League One","logo":"https:\/\/eu-cdn.rugbypass.com\/images\/competitions\/logos\/png\/japan-rugby-league-one.png?v=1762927429","logoCircle":"https:\/\/eu-cdn.rugbypass.com\/images\/competitions\/logos\/circle\/japan-rugby-league-one.png?v=1762927428","season":{"season":202301,"years":{"2023":2023,"2024":2024},"label":"2023\/2024","completed":1,"standings":1,"started":1,"months":0,"games":100},"stats":{"success":1,"stats":{"teamId":1154,"tryScored":2,"points":10,"appearances":15,"minutesPlayed":1071,"minutesPlayedFirstHalf":80,"minutesPlayedSecondHalf":68,"penaltyConceded":7,"penaltyDefence":5,"penaltyOffence":2,"notRollingAway":1,"foulPlay":1,"offFeetAtRuck":1,"notReleasing":2,"wrongSideAtMaul":2,"carries":75,"metresMade":132,"passes":64,"offload":9,"tryAssist":1,"defenderBeaten":7,"cleanBreak":4,"totalTurnovers":9,"crossedGainline":33,"failedGainline":39,"neutral":3,"lostBallForced":2,"droppedBallUnforced":5,"lostInRuckOrMaul":1,"handlingError":8,"dominantContact":14,"errors":9,"postContactMetres":52,"breakAssist":1,"carryDistance":276,"metresInContact":52,"tackle":174,"missedTackle":24,"turnoverWon":15,"interception":1,"tackleTurnoverWon":2,"dominantTackleContact":5,"totalAttemptedTackles":210,"totalSuccessfulTackles":174,"totalUnsuccessfulTackles":36,"jackalPenaltyWon":6,"jackalTurnoverWon":1,"counterRuck":4,"outOfGame":21,"backInGame":8,"contestedBreakdown":8,"percentTackleMade":82.86,"lineoutsWonOwnThrow":1,"lineoutSteals":1,"kicksInPlay":3,"territorial":2,"attackingKicks":1,"kickBounced":3,"kickMetres":86,"allKickMetres":86,"tapBack":3,"aerialContest":3},"topPlayerStats":{"passes":{"id":179379,"value":100},"tackle":{"id":101182,"value":214},"missedTackle":{"id":104738,"value":29},"totalAttemptedTackles":{"id":101182,"value":267},"totalSuccessfulTackles":{"id":101182,"value":214},"totalUnsuccessfulTackles":{"id":104738,"value":61},"percentTackleMade":{"id":244377,"value":100},"points":{"id":197868,"value":50},"appearances":{"id":154414,"value":18},"minutesPlayed":{"id":154414,"value":1367},"penaltyConceded":{"id":245177,"value":14},"penaltyDefence":{"id":245177,"value":12},"lineoutOffence":{"id":245177,"value":3},"dissentAdvance":{"id":138727,"value":1},"wrongSideAtMaul":{"id":174775,"value":2},"carries":{"id":114429,"value":235},"metresMade":{"id":179379,"value":913},"offload":{"id":239835,"value":31},"tryAssist":{"id":168620,"value":6},"defenderBeaten":{"id":179379,"value":55},"cleanBreak":{"id":179379,"value":16},"totalTurnovers":{"id":114429,"value":24},"crossedGainline":{"id":114429,"value":120},"failedGainline":{"id":114429,"value":102},"neutral":{"id":168620,"value":37},"lostBallForced":{"id":214107,"value":5},"lostInRuckOrMaul":{"id":114429,"value":8},"accidentalKnockOn":{"id":114429,"value":3},"handlingError":{"id":209236,"value":20},"dominantContact":{"id":179379,"value":62},"errors":{"id":114429,"value":24},"postContactMetres":{"id":179379,"value":302},"carryDistance":{"id":179379,"value":1227},"metresInContact":{"id":179379,"value":302},"turnoverWon":{"id":179379,"value":21},"interception":{"id":168620,"value":3},"tackleTurnoverWon":{"id":240836,"value":7},"dominantTackleContact":{"id":197868,"value":14},"jackalTurnoverWon":{"id":179379,"value":4},"outOfGame":{"id":244373,"value":30},"wonClean":{"id":138727,"value":1},"lineoutsWonOwnThrow":{"id":168620,"value":55},"lineoutSteals":{"id":209502,"value":7},"lineoutThrowsWon":{"id":138727,"value":1},"restartCatch":{"id":168620,"value":32},"restartCatchSuccess":{"id":168620,"value":29},"minutesPlayedFirstHalf":{"id":101182,"value":240},"minutesPlayedSecondHalf":{"id":154414,"value":259},"tryScored":{"id":197868,"value":10},"penaltyOffence":{"id":239831,"value":6},"notRollingAway":{"id":209236,"value":5},"foulPlay":{"id":214107,"value":2},"offFeetAtRuck":{"id":125619,"value":3},"notReleasing":{"id":101182,"value":4},"droppedBallUnforced":{"id":209236,"value":14},"breakAssist":{"id":239835,"value":11},"jackalPenaltyWon":{"id":173835,"value":15},"counterRuck":{"id":174775,"value":4},"backInGame":{"id":244373,"value":21},"contestedBreakdown":{"id":244373,"value":10},"kicksInPlay":{"id":179379,"value":10},"territorial":{"id":179379,"value":6},"attackingKicks":{"id":239835,"value":5},"kickBounced":{"id":179379,"value":10},"kickMetres":{"id":179379,"value":346},"allKickMetres":{"id":179379,"value":346},"tapBack":{"id":174775,"value":3},"aerialContest":{"id":209502,"value":6},"defensiveCatch":{"id":114429,"value":4},"defensiveCatchSuccess":{"id":239835,"value":3},"offside":{"id":167098,"value":4},"carriedInTouch":{"id":239835,"value":4},"collapsingMaul":{"id":239835,"value":2},"obstruction":{"id":139970,"value":1},"wrongSideAtRuck":{"id":179379,"value":3},"attackingCatch":{"id":209502,"value":5},"attackingCatchSuccess":{"id":209502,"value":3},"aerialContestWon":{"id":209502,"value":3},"percentAerialContestWon":{"id":220272,"value":100},"handsInRuck":{"id":199566,"value":2},"scrumOffence":{"id":179379,"value":1},"badPass":{"id":239835,"value":4},"retainedKick":{"id":179379,"value":3},"contestable":{"id":179379,"value":4},"forwardPass":{"id":241618,"value":1},"yellowCard":{"id":114429,"value":3},"otherOffence":{"id":245177,"value":1},"sinBinEnd":{"id":114429,"value":2},"redCard":{"id":214107,"value":1},"freeKick":{"id":214107,"value":1},"attemptedInterception":{"id":214107,"value":1},"otherError":{"id":214107,"value":1},"penaltyKickMetres":{"id":135261,"value":86},"maulObstruction":{"id":244373,"value":1},"tryKick":{"id":171003,"value":1},"deliberateKnockOn":{"id":188855,"value":1},"offsideAtKick":{"id":100137,"value":2},"carriedOver":{"id":168620,"value":1},"accidentalOffside":{"id":197868,"value":1},"fiftyTwentyTwoKick":{"id":173835,"value":1},"kickError":{"id":209236,"value":1},"upperBodyTackles":{"id":239831,"value":11},"lowerBodyTackles":{"id":241363,"value":6},"percentLowerBodyTackles":{"id":241363,"value":100},"percentUpperBodyTackles":{"id":134084,"value":100}}},"epoch":1716703500},"main":{"totalMinsPlayed":1071,"main":[{"value":1,"title":"Lineout Takes"},{"value":75,"title":"Carries"},{"value":2,"title":"Tries"},{"value":15,"title":"Turnovers Won"},{"value":174,"title":"Tackles Completed"},{"value":5,"title":"Dominant Tackles"},{"value":1,"title":"Try Assists"}],"profile":[{"value":"2%","title":"Lineout Takes","type":1,"key":"lineoutsWonOwnThrow","raw":1,"top":55,"color":"#cf403a"},{"value":"32%","title":"Carries","type":1,"key":"carries","raw":75,"top":235,"color":"#e59139"},{"value":"20%","title":"Tries","type":1,"key":"tryScored","raw":2,"top":10,"color":"#dc6f37"},{"value":"71%","title":"Turnovers Won","type":1,"key":"turnoverWon","raw":15,"top":21,"color":"#9eb647"},{"value":"81%","title":"Tackles Completed","type":1,"key":"totalSuccessfulTackles","raw":174,"top":214,"color":"#77ac51"},{"value":"36%","title":"Dominant Tackles","type":1,"key":"dominantTackleContact","raw":5,"top":14,"color":"#e99d3b"},{"value":"17%","title":"Try Assists","type":1,"key":"tryAssist","raw":1,"top":6,"color":"#d96636"}]},"group":{"groups":[{"title":"Attack","stats":[{"title":"Points","value":{"value":10,"title":"Points"},"overall":{"value":"20%","title":"Points","type":1,"key":"points","raw":10,"top":50,"color":"#dc6f37"}},{"title":"Tries","value":{"value":2,"title":"Tries"},"overall":{"value":"20%","title":"Tries","type":1,"key":"tryScored","raw":2,"top":10,"color":"#dc6f37"}},{"title":"Line Breaks","value":{"value":4,"title":"Line Breaks"},"overall":{"value":"25%","title":"Line Breaks","type":1,"key":"cleanBreak","raw":4,"top":16,"color":"#e07d37"}},{"title":"Carries","value":{"value":75,"title":"Carries"},"overall":{"value":"32%","title":"Carries","type":1,"key":"carries","raw":75,"top":235,"color":"#e59139"}},{"title":"Carries Per Minute","value":{"value":0.07,"title":"Carries Per Minute"},"overall":{"value":"2%","title":"Carries Per Minute","type":1,"key":"carries","raw":0,"top":235,"color":"#cf403a"}},{"title":"Metres Carried","value":{"value":132,"title":"Metres Carried"},"overall":{"value":"14%","title":"Metres Carried","type":1,"key":"metresMade","raw":132,"top":913,"color":"#d75e37"}},{"title":"Turnovers Won","value":{"value":15,"title":"Turnovers Won"},"overall":{"value":"71%","title":"Turnovers Won","type":1,"key":"turnoverWon","raw":15,"top":21,"color":"#9eb647"}},{"title":"Defenders Beaten","value":{"value":7,"title":"Defenders Beaten"},"overall":{"value":"13%","title":"Defenders Beaten","type":1,"key":"defenderBeaten","raw":7,"top":55,"color":"#d75c37"}},{"title":"Post Contact Metres","value":{"value":52,"title":"Post Contact Metres"},"overall":{"value":"17%","title":"Post Contact Metres","type":1,"key":"postContactMetres","raw":52,"top":302,"color":"#d96636"}}]},{"title":"Defence","stats":[{"title":"Tackles Made","value":{"value":210,"title":"Tackles Made"},"overall":{"value":"79%","title":"Tackles Made","type":1,"key":"totalAttemptedTackles","raw":210,"top":267,"color":"#7eae4e"}},{"title":"Tackles Completed","value":{"value":174,"title":"Tackles Completed"},"overall":{"value":"81%","title":"Tackles Completed","type":1,"key":"totalSuccessfulTackles","raw":174,"top":214,"color":"#77ac51"}},{"title":"Dominant Tackles","value":{"value":5,"title":"Dominant Tackles"},"overall":{"value":"36%","title":"Dominant Tackles","type":1,"key":"dominantTackleContact","raw":5,"top":14,"color":"#e99d3b"}},{"title":"Tackles Per Minute","value":{"value":0.16,"title":"Tackles Per Minute"},"overall":{"value":"2%","title":"Tackles Per Minute","type":1,"key":"tackle","raw":0,"top":214,"color":"#cf403a"}},{"title":"Turnovers Won","value":{"value":15,"title":"Turnovers Won"},"overall":{"value":"71%","title":"Turnovers Won","type":1,"key":"turnoverWon","raw":15,"top":21,"color":"#9eb647"}}]},{"title":"Passing","stats":[{"title":"Try Assists","value":{"value":1,"title":"Try Assists"},"overall":{"value":"17%","title":"Try Assists","type":1,"key":"tryAssist","raw":1,"top":6,"color":"#d96636"}},{"title":"Successful Passes","value":{"value":64,"title":"Successful Passes"},"overall":{"value":"64%","title":"Successful Passes","type":1,"key":"passes","raw":64,"top":100,"color":"#bdbd44"}},{"title":"Bad Passes","value":{"value":0,"title":"Bad Passes"},"overall":{"value":"2%","title":"Bad Passes","type":1,"key":"badPass","raw":0,"top":4,"color":"#cf403a"}},{"title":"Pass Accuracy","value":{"value":"100%","title":"Pass Accuracy"},"overall":{"value":"100%","title":"Pass Accuracy","type":1,"key":"pass_accuracy","raw":"100%","top":0,"color":"#479d6c"}}]},{"title":"Discipline","stats":[{"title":"Penalties Conceded","value":{"value":7,"title":"Penalties Conceded"},"overall":{"value":"50%","title":"Penalties Conceded","type":1,"key":"penaltyConceded","raw":7,"top":14,"color":"#f6c745"}},{"title":"Yellow Cards","value":{"value":0,"title":"Yellow Cards"},"overall":{"value":"2%","title":"Yellow Cards","type":1,"key":"yellowCard","raw":0,"top":3,"color":"#cf403a"}},{"title":"Red Cards","value":{"value":0,"title":"Red Cards"},"overall":{"value":"2%","title":"Red Cards","type":1,"key":"redCard","raw":0,"top":1,"color":"#cf403a"}}]},{"title":"Lineouts","stats":[{"title":"Lineout Takes","value":{"value":2,"title":"Lineout Takes"},"overall":{"value":"2%","title":"Lineout Takes","type":1,"key":"lineout_takes","raw":0,"top":0,"color":"#ce3d3b"}},{"title":"Lineouts Won","value":{"value":1,"title":"Lineouts Won"},"overall":{"value":"2%","title":"Lineouts Won","type":1,"key":"lineoutsWonOwnThrow","raw":1,"top":55,"color":"#cf403a"}},{"title":"Lineouts Stolen","value":{"value":1,"title":"Lineouts Stolen"},"overall":{"value":"14%","title":"Lineouts Stolen","type":1,"key":"lineoutSteals","raw":1,"top":7,"color":"#d75e37"}}]}]}},{"competition":{"rid":"1002","oid":"421","ovid":"2074","name":"Japan Rugby League One","logo":"https:\/\/eu-cdn.rugbypass.com\/images\/competitions\/logos\/png\/japan-rugby-league-one.png?v=1762927429","logoCircle":"https:\/\/eu-cdn.rugbypass.com\/images\/competitions\/logos\/circle\/japan-rugby-league-one.png?v=1762927428","season":{"season":202201,"years":{"2022":2022,"2023":2023},"label":"2022\/2023","completed":1,"standings":1,"started":1,"months":0,"games":100},"stats":{"success":1,"stats":{"teamId":1154,"tryScored":3,"points":15,"appearances":7,"minutesPlayed":383,"penaltyConceded":4,"penaltyDefence":4,"offFeetAtRuck":1,"offside":1,"wrongSideAtMaul":1,"wrongSideAtRuck":1,"carries":28,"metresMade":47,"passes":26,"offload":1,"defenderBeaten":5,"cleanBreak":2,"totalTurnovers":5,"crossedGainline":9,"failedGainline":8,"neutral":11,"carriedInTouch":2,"lostBallForced":1,"droppedBallUnforced":1,"accidentalKnockOn":1,"handlingError":3,"dominantContact":4,"errors":5,"postContactMetres":10,"breakAssist":1,"carryDistance":3,"metresInContact":10,"tackle":42,"missedTackle":4,"turnoverWon":5,"tackleTurnoverWon":1,"dominantTackleContact":2,"totalAttemptedTackles":51,"totalSuccessfulTackles":42,"totalUnsuccessfulTackles":9,"jackalPenaltyWon":4,"counterRuck":1,"outOfGame":4,"percentTackleMade":82.35,"kicksInPlay":1,"attackingKicks":1,"kickBounced":1,"kickMetres":27,"allKickMetres":27,"attackingCatch":1,"restartCatch":2,"restartCatchSuccess":2,"tapBack":1,"aerialContest":2},"topPlayerStats":{"tryScored":{"id":241298,"value":8},"points":{"id":241298,"value":40},"appearances":{"id":241298,"value":18},"minutesPlayed":{"id":120076,"value":1177},"minutesPlayedFirstHalf":{"id":171003,"value":160},"minutesPlayedSecondHalf":{"id":101182,"value":150},"penaltyConceded":{"id":101182,"value":19},"penaltyOffence":{"id":101182,"value":7},"notReleasing":{"id":101182,"value":6},"carries":{"id":120076,"value":200},"metresMade":{"id":214107,"value":631},"passes":{"id":120076,"value":84},"tryAssist":{"id":116916,"value":4},"defenderBeaten":{"id":241298,"value":44},"cleanBreak":{"id":241298,"value":12},"crossedGainline":{"id":120076,"value":94},"failedGainline":{"id":120076,"value":63},"neutral":{"id":120076,"value":43},"dominantContact":{"id":120076,"value":55},"postContactMetres":{"id":120076,"value":236},"carryDistance":{"id":118827,"value":72},"metresInContact":{"id":120076,"value":236},"tackle":{"id":244373,"value":191},"missedTackle":{"id":101081,"value":32},"turnoverWon":{"id":118827,"value":25},"tackleTurnoverWon":{"id":118827,"value":10},"totalAttemptedTackles":{"id":244373,"value":241},"totalSuccessfulTackles":{"id":244373,"value":191},"totalUnsuccessfulTackles":{"id":240836,"value":53},"jackalPenaltyWon":{"id":173835,"value":12},"jackalTurnoverWon":{"id":118827,"value":8},"counterRuck":{"id":118508,"value":5},"backInGame":{"id":125619,"value":30},"percentTackleMade":{"id":220045,"value":100},"penaltyDefence":{"id":101182,"value":12},"notRollingAway":{"id":101182,"value":4},"foulPlay":{"id":118827,"value":3},"offFeetAtRuck":{"id":118827,"value":4},"offside":{"id":144110,"value":5},"dissentAdvance":{"id":138727,"value":1},"offload":{"id":120076,"value":26},"totalTurnovers":{"id":171003,"value":17},"carriedOver":{"id":138727,"value":1},"lostBallForced":{"id":118827,"value":5},"droppedBallUnforced":{"id":171003,"value":7},"handlingError":{"id":171003,"value":14},"errors":{"id":171003,"value":17},"dominantTackleContact":{"id":241363,"value":19},"outOfGame":{"id":199566,"value":30},"lineoutsWonOwnThrow":{"id":168620,"value":59},"lineoutSteals":{"id":199033,"value":8},"kicksInPlay":{"id":125619,"value":2},"retainedKick":{"id":138727,"value":1},"contestable":{"id":138727,"value":1},"attackingKicks":{"id":125619,"value":2},"kickBounced":{"id":125619,"value":2},"kickMetres":{"id":173835,"value":70},"allKickMetres":{"id":173835,"value":70},"attackingCatch":{"id":114429,"value":4},"defensiveCatch":{"id":114429,"value":10},"defensiveCatchSuccess":{"id":114429,"value":9},"restartCatch":{"id":199033,"value":21},"restartCatchSuccess":{"id":199033,"value":20},"aerialContest":{"id":114429,"value":8},"wrongSideAtMaul":{"id":101182,"value":3},"wrongSideAtRuck":{"id":120076,"value":2},"carriedInTouch":{"id":174775,"value":2},"accidentalKnockOn":{"id":171003,"value":2},"breakAssist":{"id":120076,"value":8},"tapBack":{"id":114429,"value":4},"handsInRuck":{"id":142873,"value":3},"lineoutOffence":{"id":168620,"value":3},"forwardPass":{"id":120076,"value":2},"attackingCatchSuccess":{"id":118508,"value":3},"aerialContestWon":{"id":118508,"value":3},"percentAerialContestWon":{"id":118508,"value":100},"obstruction":{"id":226235,"value":2},"lostInRuckOrMaul":{"id":241298,"value":3},"attemptedInterception":{"id":139970,"value":1},"wonClean":{"id":139970,"value":1},"lineoutThrowsWon":{"id":139970,"value":1},"redCard":{"id":195098,"value":1},"badPass":{"id":211746,"value":2},"territorial":{"id":173835,"value":2},"collapsingMaul":{"id":198403,"value":3},"interception":{"id":198403,"value":2},"deliberateKnockOn":{"id":214107,"value":1},"freeKick":{"id":214107,"value":1},"maulObstruction":{"id":163265,"value":1},"yellowCard":{"id":209502,"value":1},"sinBinEnd":{"id":209502,"value":1},"restartOppError":{"id":244373,"value":1},"totalRestarts":{"id":244373,"value":1},"restartsRetained":{"id":244373,"value":1},"restart50m":{"id":244373,"value":1},"percentRestartsRetained":{"id":244373,"value":100},"accidentalOffside":{"id":245242,"value":1},"kickChargedDown":{"id":101182,"value":1},"tryKick":{"id":114429,"value":1},"offsideAtKick":{"id":168620,"value":1},"dissent":{"id":168620,"value":1},"otherOffence":{"id":241002,"value":1},"kickBox":{"id":118827,"value":1},"otherError":{"id":239640,"value":1}}},"epoch":1684560900},"main":{"totalMinsPlayed":383,"main":[{"value":0,"title":"Lineout Takes"},{"value":28,"title":"Carries"},{"value":3,"title":"Tries"},{"value":5,"title":"Turnovers Won"},{"value":42,"title":"Tackles Completed"},{"value":2,"title":"Dominant Tackles"},{"value":0,"title":"Try Assists"}],"profile":[{"value":"2%","title":"Lineout Takes","type":1,"key":"lineoutsWonOwnThrow","raw":0,"top":59,"color":"#cf403a"},{"value":"14%","title":"Carries","type":1,"key":"carries","raw":28,"top":200,"color":"#d75e37"},{"value":"38%","title":"Tries","type":1,"key":"tryScored","raw":3,"top":8,"color":"#eaa33c"},{"value":"20%","title":"Turnovers Won","type":1,"key":"turnoverWon","raw":5,"top":25,"color":"#dc6f37"},{"value":"22%","title":"Tackles Completed","type":1,"key":"totalSuccessfulTackles","raw":42,"top":191,"color":"#dd7437"},{"value":"11%","title":"Dominant Tackles","type":1,"key":"dominantTackleContact","raw":2,"top":19,"color":"#d55637"},{"value":"2%","title":"Try Assists","type":1,"key":"tryAssist","raw":0,"top":4,"color":"#cf403a"}]},"group":{"groups":[{"title":"Attack","stats":[{"title":"Points","value":{"value":15,"title":"Points"},"overall":{"value":"38%","title":"Points","type":1,"key":"points","raw":15,"top":40,"color":"#eaa33c"}},{"title":"Tries","value":{"value":3,"title":"Tries"},"overall":{"value":"38%","title":"Tries","type":1,"key":"tryScored","raw":3,"top":8,"color":"#eaa33c"}},{"title":"Line Breaks","value":{"value":2,"title":"Line Breaks"},"overall":{"value":"17%","title":"Line Breaks","type":1,"key":"cleanBreak","raw":2,"top":12,"color":"#d96636"}},{"title":"Carries","value":{"value":28,"title":"Carries"},"overall":{"value":"14%","title":"Carries","type":1,"key":"carries","raw":28,"top":200,"color":"#d75e37"}},{"title":"Carries Per Minute","value":{"value":0.07,"title":"Carries Per Minute"},"overall":{"value":"2%","title":"Carries Per Minute","type":1,"key":"carries","raw":0,"top":200,"color":"#cf403a"}},{"title":"Metres Carried","value":{"value":47,"title":"Metres Carried"},"overall":{"value":"7%","title":"Metres Carried","type":1,"key":"metresMade","raw":47,"top":631,"color":"#d24c39"}},{"title":"Turnovers Won","value":{"value":5,"title":"Turnovers Won"},"overall":{"value":"20%","title":"Turnovers Won","type":1,"key":"turnoverWon","raw":5,"top":25,"color":"#dc6f37"}},{"title":"Defenders Beaten","value":{"value":5,"title":"Defenders Beaten"},"overall":{"value":"11%","title":"Defenders Beaten","type":1,"key":"defenderBeaten","raw":5,"top":44,"color":"#d55637"}},{"title":"Post Contact Metres","value":{"value":10,"title":"Post Contact Metres"},"overall":{"value":"4%","title":"Post Contact Metres","type":1,"key":"postContactMetres","raw":10,"top":236,"color":"#d04439"}}]},{"title":"Defence","stats":[{"title":"Tackles Made","value":{"value":51,"title":"Tackles Made"},"overall":{"value":"21%","title":"Tackles Made","type":1,"key":"totalAttemptedTackles","raw":51,"top":241,"color":"#dd7237"}},{"title":"Tackles Completed","value":{"value":42,"title":"Tackles Completed"},"overall":{"value":"22%","title":"Tackles Completed","type":1,"key":"totalSuccessfulTackles","raw":42,"top":191,"color":"#dd7437"}},{"title":"Dominant Tackles","value":{"value":2,"title":"Dominant Tackles"},"overall":{"value":"11%","title":"Dominant Tackles","type":1,"key":"dominantTackleContact","raw":2,"top":19,"color":"#d55637"}},{"title":"Tackles Per Minute","value":{"value":0.11,"title":"Tackles Per Minute"},"overall":{"value":"2%","title":"Tackles Per Minute","type":1,"key":"tackle","raw":0,"top":191,"color":"#cf403a"}},{"title":"Turnovers Won","value":{"value":5,"title":"Turnovers Won"},"overall":{"value":"20%","title":"Turnovers Won","type":1,"key":"turnoverWon","raw":5,"top":25,"color":"#dc6f37"}}]},{"title":"Passing","stats":[{"title":"Try Assists","value":{"value":0,"title":"Try Assists"},"overall":{"value":"2%","title":"Try Assists","type":1,"key":"tryAssist","raw":0,"top":4,"color":"#cf403a"}},{"title":"Successful Passes","value":{"value":26,"title":"Successful Passes"},"overall":{"value":"31%","title":"Successful Passes","type":1,"key":"passes","raw":26,"top":84,"color":"#e58e39"}},{"title":"Bad Passes","value":{"value":0,"title":"Bad Passes"},"overall":{"value":"2%","title":"Bad Passes","type":1,"key":"badPass","raw":0,"top":2,"color":"#cf403a"}},{"title":"Pass Accuracy","value":{"value":"100%","title":"Pass Accuracy"},"overall":{"value":"100%","title":"Pass Accuracy","type":1,"key":"pass_accuracy","raw":"100%","top":0,"color":"#479d6c"}}]},{"title":"Discipline","stats":[{"title":"Penalties Conceded","value":{"value":4,"title":"Penalties Conceded"},"overall":{"value":"21%","title":"Penalties Conceded","type":1,"key":"penaltyConceded","raw":4,"top":19,"color":"#dd7237"}},{"title":"Yellow Cards","value":{"value":0,"title":"Yellow Cards"},"overall":{"value":"2%","title":"Yellow Cards","type":1,"key":"yellowCard","raw":0,"top":1,"color":"#cf403a"}},{"title":"Red Cards","value":{"value":0,"title":"Red Cards"},"overall":{"value":"2%","title":"Red Cards","type":1,"key":"redCard","raw":0,"top":1,"color":"#cf403a"}}]},{"title":"Lineouts","stats":[{"title":"Lineout Takes","value":{"value":0,"title":"Lineout Takes"},"overall":{"value":"2%","title":"Lineout Takes","type":1,"key":"lineout_takes","raw":0,"top":0,"color":"#ce3d3b"}},{"title":"Lineouts Won","value":{"value":0,"title":"Lineouts Won"},"overall":{"value":"2%","title":"Lineouts Won","type":1,"key":"lineoutsWonOwnThrow","raw":0,"top":59,"color":"#cf403a"}},{"title":"Lineouts Stolen","value":{"value":0,"title":"Lineouts Stolen"},"overall":{"value":"2%","title":"Lineouts Stolen","type":1,"key":"lineoutSteals","raw":0,"top":8,"color":"#cf403a"}}]}]}}]
[{"title":"Japan Rugby League One","logo":"Japan Rugby League One","id":"2074","games":[{"title":"Black Rams Tokyo vs Kubota Spears","date":"2 May 2026","dateSmall":"2 May","time":1777780800,"compLogo":"https:\/\/eu-cdn.rugbypass.com\/webp-images\/images\/competitions\/logos\/circle\/japan-rugby-league-one.png.webp?maxw=72&v=1762927428","compTitle":"Japan Rugby League One","draw":false,"win":false,"opposition":{"name":"Kubota Spears","id":"1525","logo":"https:\/\/eu-cdn.rugbypass.com\/webp-images\/images\/team-images\/logos\/png\/5204.png.webp?maxw=72&v=1762927735"},"stats":{"mins":80,"tries":0,"yellow_cards":0,"red_cards":0,"conversions":0}},{"title":"Black Rams Tokyo vs Toyota Verblitz","date":"25 Apr 2026","dateSmall":"25 Apr","time":1777181400,"compLogo":"https:\/\/eu-cdn.rugbypass.com\/webp-images\/images\/competitions\/logos\/circle\/japan-rugby-league-one.png.webp?maxw=72&v=1762927428","compTitle":"Japan Rugby League One","draw":false,"win":false,"opposition":{"name":"Toyota Verblitz","id":"1886","logo":"https:\/\/eu-cdn.rugbypass.com\/webp-images\/images\/team-images\/logos\/png\/5211.png.webp?maxw=72&v=1762927735"},"stats":{"mins":60,"tries":0,"yellow_cards":0,"red_cards":0,"conversions":0}},{"title":"Honda Heat vs Black Rams Tokyo","date":"17 Apr 2026","dateSmall":"17 Apr","time":1776420000,"compLogo":"https:\/\/eu-cdn.rugbypass.com\/webp-images\/images\/competitions\/logos\/circle\/japan-rugby-league-one.png.webp?maxw=72&v=1762927428","compTitle":"Japan Rugby League One","draw":false,"win":true,"opposition":{"name":"Mie Honda Heat","id":"6343","logo":"https:\/\/eu-cdn.rugbypass.com\/webp-images\/images\/team-images\/logos\/png\/10005202.png.webp?maxw=72&v=1762927733"},"stats":{"mins":80,"tries":0,"yellow_cards":0,"red_cards":0,"conversions":0}},{"title":"Black Rams Tokyo vs Kobe Kobelco Steelers","date":"4 Apr 2026","dateSmall":"4 Apr","time":1775361600,"compLogo":"https:\/\/eu-cdn.rugbypass.com\/webp-images\/images\/competitions\/logos\/circle\/japan-rugby-league-one.png.webp?maxw=72&v=1762927428","compTitle":"Japan Rugby League One","draw":false,"win":false,"opposition":{"name":"Kobelco Kobe Steelers","id":"1314","logo":"https:\/\/eu-cdn.rugbypass.com\/webp-images\/images\/team-images\/logos\/png\/5203.png.webp?maxw=72&v=1762927735"},"stats":{"mins":79,"tries":1,"yellow_cards":0,"red_cards":0,"conversions":0}},{"title":"Black Rams Tokyo vs Mitsubishi DynaBoars","date":"28 Mar 2026","dateSmall":"28 Mar","time":1774762200,"compLogo":"https:\/\/eu-cdn.rugbypass.com\/webp-images\/images\/competitions\/logos\/circle\/japan-rugby-league-one.png.webp?maxw=72&v=1762927428","compTitle":"Japan Rugby League One","draw":false,"win":true,"opposition":{"name":"Mitsubishi Sagamihara Dynaboars","id":"1652","logo":"https:\/\/eu-cdn.rugbypass.com\/webp-images\/images\/team-images\/logos\/png\/594.png.webp?maxw=72&v=1762927735"},"stats":{"mins":67,"tries":0,"yellow_cards":0,"red_cards":0,"conversions":0}},{"title":"Saitama Wild Knights vs Black Rams Tokyo","date":"20 Mar 2026","dateSmall":"20 Mar","time":1774071000,"compLogo":"https:\/\/eu-cdn.rugbypass.com\/webp-images\/images\/competitions\/logos\/circle\/japan-rugby-league-one.png.webp?maxw=72&v=1762927428","compTitle":"Japan Rugby League One","draw":false,"win":false,"opposition":{"name":"Saitama Wild Knights","id":"3459","logo":"https:\/\/eu-cdn.rugbypass.com\/webp-images\/images\/team-images\/logos\/png\/19567.png.webp?maxw=72&v=1762927734"},"stats":{"mins":73,"tries":0,"yellow_cards":0,"red_cards":0,"conversions":0}},{"title":"Black Rams Tokyo vs Shizuoka Blue Revs","date":"13 Mar 2026","dateSmall":"13 Mar","time":1773460800,"compLogo":"https:\/\/eu-cdn.rugbypass.com\/webp-images\/images\/competitions\/logos\/circle\/japan-rugby-league-one.png.webp?maxw=72&v=1762927428","compTitle":"Japan Rugby League One","draw":false,"win":true,"opposition":{"name":"Shizuoka BlueRevs","id":"4749","logo":"https:\/\/eu-cdn.rugbypass.com\/webp-images\/images\/team-images\/logos\/png\/5212.png.webp?maxw=72&v=1762927735"},"stats":{"mins":70,"tries":1,"yellow_cards":0,"red_cards":0,"conversions":0}},{"title":"Toshiba Brave Lupus vs Black Rams Tokyo","date":"27 Feb 2026","dateSmall":"27 Feb","time":1772247600,"compLogo":"https:\/\/eu-cdn.rugbypass.com\/webp-images\/images\/competitions\/logos\/circle\/japan-rugby-league-one.png.webp?maxw=72&v=1762927428","compTitle":"Japan Rugby League One","draw":false,"win":true,"opposition":{"name":"Toshiba Brave Lupus Tokyo","id":"3342","logo":"https:\/\/eu-cdn.rugbypass.com\/webp-images\/images\/team-images\/logos\/png\/19702.png.webp?maxw=72&v=1762927734"},"stats":{"mins":75,"tries":1,"yellow_cards":0,"red_cards":0,"conversions":0}},{"title":"Black Rams Tokyo vs Saitama Wild Knights","date":"6 Feb 2026","dateSmall":"6 Feb","time":1770436800,"compLogo":"https:\/\/eu-cdn.rugbypass.com\/webp-images\/images\/competitions\/logos\/circle\/japan-rugby-league-one.png.webp?maxw=72&v=1762927428","compTitle":"Japan Rugby League One","draw":false,"win":false,"opposition":{"name":"Saitama Wild Knights","id":"3459","logo":"https:\/\/eu-cdn.rugbypass.com\/webp-images\/images\/team-images\/logos\/png\/19567.png.webp?maxw=72&v=1762927734"},"stats":{"mins":10,"tries":0,"yellow_cards":0,"red_cards":0,"conversions":0}},{"title":"Black Rams Tokyo vs Honda Heat","date":"26 Dec 2025","dateSmall":"26 Dec","time":1766808300,"compLogo":"https:\/\/eu-cdn.rugbypass.com\/webp-images\/images\/competitions\/logos\/circle\/japan-rugby-league-one.png.webp?maxw=72&v=1762927428","compTitle":"Japan Rugby League One","draw":false,"win":true,"opposition":{"name":"Mie Honda Heat","id":"6343","logo":"https:\/\/eu-cdn.rugbypass.com\/webp-images\/images\/team-images\/logos\/png\/10005202.png.webp?maxw=72&v=1762927733"},"stats":{"mins":59,"tries":0,"yellow_cards":0,"red_cards":0,"conversions":0}},{"title":"Kubota Spears vs Black Rams Tokyo","date":"19 Dec 2025","dateSmall":"19 Dec","time":1766208600,"compLogo":"https:\/\/eu-cdn.rugbypass.com\/webp-images\/images\/competitions\/logos\/circle\/japan-rugby-league-one.png.webp?maxw=72&v=1762927428","compTitle":"Japan Rugby League One","draw":false,"win":false,"opposition":{"name":"Kubota Spears","id":"1525","logo":"https:\/\/eu-cdn.rugbypass.com\/webp-images\/images\/team-images\/logos\/png\/5204.png.webp?maxw=72&v=1762927735"},"stats":{"mins":80,"tries":0,"yellow_cards":0,"red_cards":0,"conversions":0}},{"title":"Black Rams Tokyo vs Tokyo Sungoliath","date":"12 Dec 2025","dateSmall":"12 Dec","time":1765598400,"compLogo":"https:\/\/eu-cdn.rugbypass.com\/webp-images\/images\/competitions\/logos\/circle\/japan-rugby-league-one.png.webp?maxw=72&v=1762927428","compTitle":"Japan Rugby League One","draw":false,"win":false,"opposition":{"name":"Tokyo Sungoliath","id":"3908","logo":"https:\/\/eu-cdn.rugbypass.com\/webp-images\/images\/team-images\/logos\/png\/5209.png.webp?maxw=72&v=1762927735"},"stats":{"mins":54,"tries":0,"yellow_cards":0,"red_cards":0,"conversions":0}},{"title":"Black Rams Tokyo vs Honda Heat","date":"10 May 2025","dateSmall":"10 May","time":1746941400,"compLogo":"https:\/\/eu-cdn.rugbypass.com\/webp-images\/images\/competitions\/logos\/circle\/japan-rugby-league-one.png.webp?maxw=72&v=1762927428","compTitle":"Japan Rugby League One","draw":false,"win":true,"opposition":{"name":"Mie Honda Heat","id":"6343","logo":"https:\/\/eu-cdn.rugbypass.com\/webp-images\/images\/team-images\/logos\/png\/10005202.png.webp?maxw=72&v=1762927733"},"stats":{"mins":66,"tries":2,"yellow_cards":0,"red_cards":0,"conversions":0}},{"title":"Tokyo Sungoliath vs Black Rams Tokyo","date":"2 May 2025","dateSmall":"2 May","time":1746244800,"compLogo":"https:\/\/eu-cdn.rugbypass.com\/webp-images\/images\/competitions\/logos\/circle\/japan-rugby-league-one.png.webp?maxw=72&v=1762927428","compTitle":"Japan Rugby League One","draw":false,"win":false,"opposition":{"name":"Tokyo Sungoliath","id":"3908","logo":"https:\/\/eu-cdn.rugbypass.com\/webp-images\/images\/team-images\/logos\/png\/5209.png.webp?maxw=72&v=1762927735"},"stats":{"mins":11,"tries":0,"yellow_cards":0,"red_cards":0,"conversions":0}},{"title":"Saitama Wild Knights vs Black Rams Tokyo","date":"25 Apr 2025","dateSmall":"25 Apr","time":1745645400,"compLogo":"https:\/\/eu-cdn.rugbypass.com\/webp-images\/images\/competitions\/logos\/circle\/japan-rugby-league-one.png.webp?maxw=72&v=1762927428","compTitle":"Japan Rugby League One","draw":false,"win":false,"opposition":{"name":"Saitama Wild Knights","id":"3459","logo":"https:\/\/eu-cdn.rugbypass.com\/webp-images\/images\/team-images\/logos\/png\/19567.png.webp?maxw=72&v=1762927734"},"stats":{"mins":69,"tries":0,"yellow_cards":0,"red_cards":0,"conversions":0}},{"title":"Black Rams Tokyo vs Toyota Verblitz","date":"12 Apr 2025","dateSmall":"12 Apr","time":1744522200,"compLogo":"https:\/\/eu-cdn.rugbypass.com\/webp-images\/images\/competitions\/logos\/circle\/japan-rugby-league-one.png.webp?maxw=72&v=1762927428","compTitle":"Japan Rugby League One","draw":false,"win":true,"opposition":{"name":"Toyota Verblitz","id":"1886","logo":"https:\/\/eu-cdn.rugbypass.com\/webp-images\/images\/team-images\/logos\/png\/5211.png.webp?maxw=72&v=1762927735"},"stats":{"mins":21,"tries":0,"yellow_cards":0,"red_cards":0,"conversions":0}},{"title":"Black Rams Tokyo vs Kubota Spears","date":"5 Apr 2025","dateSmall":"5 Apr","time":1743917400,"compLogo":"https:\/\/eu-cdn.rugbypass.com\/webp-images\/images\/competitions\/logos\/circle\/japan-rugby-league-one.png.webp?maxw=72&v=1762927428","compTitle":"Japan Rugby League One","draw":false,"win":false,"opposition":{"name":"Kubota Spears","id":"1525","logo":"https:\/\/eu-cdn.rugbypass.com\/webp-images\/images\/team-images\/logos\/png\/5204.png.webp?maxw=72&v=1762927735"},"stats":{"mins":8,"tries":0,"yellow_cards":0,"red_cards":0,"conversions":0}},{"title":"Black Rams Tokyo vs Kobe Kobelco Steelers","date":"29 Mar 2025","dateSmall":"29 Mar","time":1743312600,"compLogo":"https:\/\/eu-cdn.rugbypass.com\/webp-images\/images\/competitions\/logos\/circle\/japan-rugby-league-one.png.webp?maxw=72&v=1762927428","compTitle":"Japan Rugby League One","draw":false,"win":false,"opposition":{"name":"Kobelco Kobe Steelers","id":"1314","logo":"https:\/\/eu-cdn.rugbypass.com\/webp-images\/images\/team-images\/logos\/png\/5203.png.webp?maxw=72&v=1762927735"},"stats":{"mins":13,"tries":0,"yellow_cards":0,"red_cards":0,"conversions":0}},{"title":"Shizuoka Blue Revs vs Black Rams Tokyo","date":"21 Mar 2025","dateSmall":"21 Mar","time":1742621400,"compLogo":"https:\/\/eu-cdn.rugbypass.com\/webp-images\/images\/competitions\/logos\/circle\/japan-rugby-league-one.png.webp?maxw=72&v=1762927428","compTitle":"Japan Rugby League One","draw":false,"win":false,"opposition":{"name":"Shizuoka BlueRevs","id":"4749","logo":"https:\/\/eu-cdn.rugbypass.com\/webp-images\/images\/team-images\/logos\/png\/5212.png.webp?maxw=72&v=1762927735"},"stats":{"mins":5,"tries":0,"yellow_cards":0,"red_cards":0,"conversions":0}},{"title":"Black Rams Tokyo vs Toshiba Brave Lupus","date":"21 Feb 2025","dateSmall":"21 Feb","time":1740193200,"compLogo":"https:\/\/eu-cdn.rugbypass.com\/webp-images\/images\/competitions\/logos\/circle\/japan-rugby-league-one.png.webp?maxw=72&v=1762927428","compTitle":"Japan Rugby League One","draw":false,"win":false,"opposition":{"name":"Toshiba Brave Lupus Tokyo","id":"3342","logo":"https:\/\/eu-cdn.rugbypass.com\/webp-images\/images\/team-images\/logos\/png\/19702.png.webp?maxw=72&v=1762927734"},"stats":{"mins":61,"tries":1,"yellow_cards":0,"red_cards":0,"conversions":0}},{"title":"Black Rams Tokyo vs Urayasu D-Rocks","date":"14 Feb 2025","dateSmall":"14 Feb","time":1739597400,"compLogo":"https:\/\/eu-cdn.rugbypass.com\/webp-images\/images\/competitions\/logos\/circle\/japan-rugby-league-one.png.webp?maxw=72&v=1762927428","compTitle":"Japan Rugby League One","draw":false,"win":true,"opposition":{"name":"Urayasu D-Rocks","id":"4788","logo":"https:\/\/eu-cdn.rugbypass.com\/webp-images\/images\/team-images\/logos\/png\/10005207.png.webp?maxw=72&v=1762927733"},"stats":{"mins":16,"tries":0,"yellow_cards":0,"red_cards":0,"conversions":0}},{"title":"Black Rams Tokyo vs Shizuoka Blue Revs","date":"7 Feb 2025","dateSmall":"7 Feb","time":1738983600,"compLogo":"https:\/\/eu-cdn.rugbypass.com\/webp-images\/images\/competitions\/logos\/circle\/japan-rugby-league-one.png.webp?maxw=72&v=1762927428","compTitle":"Japan Rugby League One","draw":false,"win":false,"opposition":{"name":"Shizuoka BlueRevs","id":"4749","logo":"https:\/\/eu-cdn.rugbypass.com\/webp-images\/images\/team-images\/logos\/png\/5212.png.webp?maxw=72&v=1762927735"},"stats":{"mins":21,"tries":0,"yellow_cards":0,"red_cards":0,"conversions":0}},{"title":"Kobe Kobelco Steelers vs Black Rams Tokyo","date":"31 Jan 2025","dateSmall":"31 Jan","time":1738378800,"compLogo":"https:\/\/eu-cdn.rugbypass.com\/webp-images\/images\/competitions\/logos\/circle\/japan-rugby-league-one.png.webp?maxw=72&v=1762927428","compTitle":"Japan Rugby League One","draw":false,"win":false,"opposition":{"name":"Kobelco Kobe Steelers","id":"1314","logo":"https:\/\/eu-cdn.rugbypass.com\/webp-images\/images\/team-images\/logos\/png\/5203.png.webp?maxw=72&v=1762927735"},"stats":{"mins":80,"tries":1,"yellow_cards":0,"red_cards":0,"conversions":0}},{"title":"Kubota Spears vs Black Rams Tokyo","date":"17 Jan 2025","dateSmall":"17 Jan","time":1737169200,"compLogo":"https:\/\/eu-cdn.rugbypass.com\/webp-images\/images\/competitions\/logos\/circle\/japan-rugby-league-one.png.webp?maxw=72&v=1762927428","compTitle":"Japan Rugby League One","draw":false,"win":false,"opposition":{"name":"Kubota Spears","id":"1525","logo":"https:\/\/eu-cdn.rugbypass.com\/webp-images\/images\/team-images\/logos\/png\/5204.png.webp?maxw=72&v=1762927735"},"stats":{"mins":34,"tries":0,"yellow_cards":0,"red_cards":0,"conversions":0}},{"title":"Toyota Verblitz vs Black Rams Tokyo","date":"10 Jan 2025","dateSmall":"10 Jan","time":1736574000,"compLogo":"https:\/\/eu-cdn.rugbypass.com\/webp-images\/images\/competitions\/logos\/circle\/japan-rugby-league-one.png.webp?maxw=72&v=1762927428","compTitle":"Japan Rugby League One","draw":false,"win":false,"opposition":{"name":"Toyota Verblitz","id":"1886","logo":"https:\/\/eu-cdn.rugbypass.com\/webp-images\/images\/team-images\/logos\/png\/5211.png.webp?maxw=72&v=1762927735"},"stats":{"mins":80,"tries":0,"yellow_cards":0,"red_cards":0,"conversions":0}},{"title":"Black Rams Tokyo vs Saitama Wild Knights","date":"3 Jan 2025","dateSmall":"3 Jan","time":1735963200,"compLogo":"https:\/\/eu-cdn.rugbypass.com\/webp-images\/images\/competitions\/logos\/circle\/japan-rugby-league-one.png.webp?maxw=72&v=1762927428","compTitle":"Japan Rugby League One","draw":false,"win":false,"opposition":{"name":"Saitama Wild Knights","id":"3459","logo":"https:\/\/eu-cdn.rugbypass.com\/webp-images\/images\/team-images\/logos\/png\/19567.png.webp?maxw=72&v=1762927734"},"stats":{"mins":80,"tries":0,"yellow_cards":0,"red_cards":0,"conversions":0}},{"title":"Black Rams Tokyo vs Tokyo Sungoliath","date":"27 Dec 2024","dateSmall":"27 Dec","time":1735358400,"compLogo":"https:\/\/eu-cdn.rugbypass.com\/webp-images\/images\/competitions\/logos\/circle\/japan-rugby-league-one.png.webp?maxw=72&v=1762927428","compTitle":"Japan Rugby League One","draw":false,"win":true,"opposition":{"name":"Tokyo Sungoliath","id":"3908","logo":"https:\/\/eu-cdn.rugbypass.com\/webp-images\/images\/team-images\/logos\/png\/5209.png.webp?maxw=72&v=1762927735"},"stats":{"mins":15,"tries":0,"yellow_cards":0,"red_cards":0,"conversions":0}},{"title":"Honda Heat vs Black Rams Tokyo","date":"20 Dec 2024","dateSmall":"20 Dec","time":1734750600,"compLogo":"https:\/\/eu-cdn.rugbypass.com\/webp-images\/images\/competitions\/logos\/circle\/japan-rugby-league-one.png.webp?maxw=72&v=1762927428","compTitle":"Japan Rugby League One","draw":false,"win":false,"opposition":{"name":"Mie Honda Heat","id":"6343","logo":"https:\/\/eu-cdn.rugbypass.com\/webp-images\/images\/team-images\/logos\/png\/10005202.png.webp?maxw=72&v=1762927733"},"stats":{"mins":80,"tries":0,"yellow_cards":0,"red_cards":0,"conversions":0}},{"title":"Black Rams Tokyo vs Toyota Verblitz","date":"4 May 2024","dateSmall":"4 May","time":1714887300,"compLogo":"https:\/\/eu-cdn.rugbypass.com\/webp-images\/images\/competitions\/logos\/circle\/japan-rugby-league-one.png.webp?maxw=72&v=1762927428","compTitle":"Japan Rugby League One","draw":false,"win":false,"opposition":{"name":"Toyota Verblitz","id":"1886","logo":"https:\/\/eu-cdn.rugbypass.com\/webp-images\/images\/team-images\/logos\/png\/5211.png.webp?maxw=72&v=1762927735"},"stats":{"mins":68,"tries":0,"yellow_cards":0,"red_cards":0,"conversions":0}},{"title":"Mitsubishi DynaBoars vs Black Rams Tokyo","date":"26 Apr 2024","dateSmall":"26 Apr","time":1714186800,"compLogo":"https:\/\/eu-cdn.rugbypass.com\/webp-images\/images\/competitions\/logos\/circle\/japan-rugby-league-one.png.webp?maxw=72&v=1762927428","compTitle":"Japan Rugby League One","draw":false,"win":true,"opposition":{"name":"Mitsubishi Sagamihara Dynaboars","id":"1652","logo":"https:\/\/eu-cdn.rugbypass.com\/webp-images\/images\/team-images\/logos\/png\/594.png.webp?maxw=72&v=1762927735"},"stats":{"mins":80,"tries":0,"yellow_cards":0,"red_cards":0,"conversions":0}},{"title":"Kintetsu Liners vs Black Rams Tokyo","date":"20 Apr 2024","dateSmall":"20 Apr","time":1713677400,"compLogo":"https:\/\/eu-cdn.rugbypass.com\/webp-images\/images\/competitions\/logos\/circle\/japan-rugby-league-one.png.webp?maxw=72&v=1762927428","compTitle":"Japan Rugby League One","draw":false,"win":false,"opposition":{"name":"Hanazono Kintetsu Liners","id":"5624","logo":"https:\/\/eu-cdn.rugbypass.com\/webp-images\/images\/team-images\/logos\/png\/19568.png.webp?maxw=72&v=1762927734"},"stats":{"mins":71,"tries":0,"yellow_cards":0,"red_cards":0,"conversions":0}},{"title":"Black Rams Tokyo vs Saitama Wild Knights","date":"12 Apr 2024","dateSmall":"12 Apr","time":1712916000,"compLogo":"https:\/\/eu-cdn.rugbypass.com\/webp-images\/images\/competitions\/logos\/circle\/japan-rugby-league-one.png.webp?maxw=72&v=1762927428","compTitle":"Japan Rugby League One","draw":false,"win":false,"opposition":{"name":"Saitama Wild Knights","id":"3459","logo":"https:\/\/eu-cdn.rugbypass.com\/webp-images\/images\/team-images\/logos\/png\/19567.png.webp?maxw=72&v=1762927734"},"stats":{"mins":68,"tries":1,"yellow_cards":0,"red_cards":0,"conversions":0}},{"title":"Toshiba Brave Lupus vs Black Rams Tokyo","date":"23 Mar 2024","dateSmall":"23 Mar","time":1711258200,"compLogo":"https:\/\/eu-cdn.rugbypass.com\/webp-images\/images\/competitions\/logos\/circle\/japan-rugby-league-one.png.webp?maxw=72&v=1762927428","compTitle":"Japan Rugby League One","draw":false,"win":false,"opposition":{"name":"Toshiba Brave Lupus Tokyo","id":"3342","logo":"https:\/\/eu-cdn.rugbypass.com\/webp-images\/images\/team-images\/logos\/png\/19702.png.webp?maxw=72&v=1762927734"},"stats":{"mins":40,"tries":0,"yellow_cards":0,"red_cards":0,"conversions":0}},{"title":"Black Rams Tokyo vs Shizuoka Blue Revs","date":"15 Mar 2024","dateSmall":"15 Mar","time":1710561600,"compLogo":"https:\/\/eu-cdn.rugbypass.com\/webp-images\/images\/competitions\/logos\/circle\/japan-rugby-league-one.png.webp?maxw=72&v=1762927428","compTitle":"Japan Rugby League One","draw":false,"win":false,"opposition":{"name":"Shizuoka BlueRevs","id":"4749","logo":"https:\/\/eu-cdn.rugbypass.com\/webp-images\/images\/team-images\/logos\/png\/5212.png.webp?maxw=72&v=1762927735"},"stats":{"mins":80,"tries":0,"yellow_cards":0,"red_cards":0,"conversions":0}},{"title":"Honda Heat vs Black Rams Tokyo","date":"9 Mar 2024","dateSmall":"9 Mar","time":1710039600,"compLogo":"https:\/\/eu-cdn.rugbypass.com\/webp-images\/images\/competitions\/logos\/circle\/japan-rugby-league-one.png.webp?maxw=72&v=1762927428","compTitle":"Japan Rugby League One","draw":false,"win":true,"opposition":{"name":"Mie Honda Heat","id":"6343","logo":"https:\/\/eu-cdn.rugbypass.com\/webp-images\/images\/team-images\/logos\/png\/10005202.png.webp?maxw=72&v=1762927733"},"stats":{"mins":80,"tries":1,"yellow_cards":0,"red_cards":0,"conversions":0}},{"title":"Tokyo Sungoliath vs Black Rams Tokyo","date":"1 Mar 2024","dateSmall":"1 Mar","time":1709355900,"compLogo":"https:\/\/eu-cdn.rugbypass.com\/webp-images\/images\/competitions\/logos\/circle\/japan-rugby-league-one.png.webp?maxw=72&v=1762927428","compTitle":"Japan Rugby League One","draw":false,"win":false,"opposition":{"name":"Tokyo Sungoliath","id":"3908","logo":"https:\/\/eu-cdn.rugbypass.com\/webp-images\/images\/team-images\/logos\/png\/5209.png.webp?maxw=72&v=1762927735"},"stats":{"mins":68,"tries":0,"yellow_cards":0,"red_cards":0,"conversions":0}},{"title":"Black Rams Tokyo vs Kobe Kobelco Steelers","date":"24 Feb 2024","dateSmall":"24 Feb","time":1708833600,"compLogo":"https:\/\/eu-cdn.rugbypass.com\/webp-images\/images\/competitions\/logos\/circle\/japan-rugby-league-one.png.webp?maxw=72&v=1762927428","compTitle":"Japan Rugby League One","draw":false,"win":false,"opposition":{"name":"Kobelco Kobe Steelers","id":"1314","logo":"https:\/\/eu-cdn.rugbypass.com\/webp-images\/images\/team-images\/logos\/png\/5203.png.webp?maxw=72&v=1762927735"},"stats":{"mins":80,"tries":0,"yellow_cards":0,"red_cards":0,"conversions":0}},{"title":"Black Rams Tokyo vs Kubota Spears","date":"26 Jan 2024","dateSmall":"26 Jan","time":1706328000,"compLogo":"https:\/\/eu-cdn.rugbypass.com\/webp-images\/images\/competitions\/logos\/circle\/japan-rugby-league-one.png.webp?maxw=72&v=1762927428","compTitle":"Japan Rugby League One","draw":false,"win":false,"opposition":{"name":"Kubota Spears","id":"1525","logo":"https:\/\/eu-cdn.rugbypass.com\/webp-images\/images\/team-images\/logos\/png\/5204.png.webp?maxw=72&v=1762927735"},"stats":{"mins":80,"tries":0,"yellow_cards":0,"red_cards":0,"conversions":0}},{"title":"Yokohama Canon Eagles vs Black Rams Tokyo","date":"12 Jan 2024","dateSmall":"12 Jan","time":1705122600,"compLogo":"https:\/\/eu-cdn.rugbypass.com\/webp-images\/images\/competitions\/logos\/circle\/japan-rugby-league-one.png.webp?maxw=72&v=1762927428","compTitle":"Japan Rugby League One","draw":false,"win":false,"opposition":{"name":"Yokohama Canon Eagles","id":"2008","logo":"https:\/\/eu-cdn.rugbypass.com\/webp-images\/images\/team-images\/logos\/png\/5200.png.webp?maxw=72&v=1762927735"},"stats":{"mins":80,"tries":0,"yellow_cards":0,"red_cards":0,"conversions":0}},{"title":"Black Rams Tokyo vs Kintetsu Liners","date":"5 Jan 2024","dateSmall":"5 Jan","time":1704519000,"compLogo":"https:\/\/eu-cdn.rugbypass.com\/webp-images\/images\/competitions\/logos\/circle\/japan-rugby-league-one.png.webp?maxw=72&v=1762927428","compTitle":"Japan Rugby League One","draw":false,"win":true,"opposition":{"name":"Hanazono Kintetsu Liners","id":"5624","logo":"https:\/\/eu-cdn.rugbypass.com\/webp-images\/images\/team-images\/logos\/png\/19568.png.webp?maxw=72&v=1762927734"},"stats":{"mins":80,"tries":0,"yellow_cards":0,"red_cards":0,"conversions":0}},{"title":"Saitama Wild Knights vs Black Rams Tokyo","date":"22 Dec 2023","dateSmall":"22 Dec","time":1703300400,"compLogo":"https:\/\/eu-cdn.rugbypass.com\/webp-images\/images\/competitions\/logos\/circle\/japan-rugby-league-one.png.webp?maxw=72&v=1762927428","compTitle":"Japan Rugby League One","draw":false,"win":false,"opposition":{"name":"Saitama Wild Knights","id":"3459","logo":"https:\/\/eu-cdn.rugbypass.com\/webp-images\/images\/team-images\/logos\/png\/19567.png.webp?maxw=72&v=1762927734"},"stats":{"mins":40,"tries":0,"yellow_cards":0,"red_cards":0,"conversions":0}},{"title":"Black Rams Tokyo vs Mitsubishi DynaBoars","date":"15 Dec 2023","dateSmall":"15 Dec","time":1702699200,"compLogo":"https:\/\/eu-cdn.rugbypass.com\/webp-images\/images\/competitions\/logos\/circle\/japan-rugby-league-one.png.webp?maxw=72&v=1762927428","compTitle":"Japan Rugby League One","draw":false,"win":false,"opposition":{"name":"Mitsubishi Sagamihara Dynaboars","id":"1652","logo":"https:\/\/eu-cdn.rugbypass.com\/webp-images\/images\/team-images\/logos\/png\/594.png.webp?maxw=72&v=1762927735"},"stats":{"mins":80,"tries":0,"yellow_cards":0,"red_cards":0,"conversions":0}},{"title":"Toyota Verblitz vs Black Rams Tokyo","date":"8 Dec 2023","dateSmall":"8 Dec","time":1702099800,"compLogo":"https:\/\/eu-cdn.rugbypass.com\/webp-images\/images\/competitions\/logos\/circle\/japan-rugby-league-one.png.webp?maxw=72&v=1762927428","compTitle":"Japan Rugby League One","draw":false,"win":false,"opposition":{"name":"Toyota Verblitz","id":"1886","logo":"https:\/\/eu-cdn.rugbypass.com\/webp-images\/images\/team-images\/logos\/png\/5211.png.webp?maxw=72&v=1762927735"},"stats":{"mins":76,"tries":0,"yellow_cards":0,"red_cards":0,"conversions":0}},{"title":"Yokohama Canon Eagles vs Black Rams Tokyo","date":"3 Feb 2023","dateSmall":"3 Feb","time":1675488600,"compLogo":"https:\/\/eu-cdn.rugbypass.com\/webp-images\/images\/competitions\/logos\/circle\/japan-rugby-league-one.png.webp?maxw=72&v=1762927428","compTitle":"Japan Rugby League One","draw":false,"win":false,"opposition":{"name":"Yokohama Canon Eagles","id":"2008","logo":"https:\/\/eu-cdn.rugbypass.com\/webp-images\/images\/team-images\/logos\/png\/5200.png.webp?maxw=72&v=1762927735"},"stats":{"mins":22,"tries":0,"yellow_cards":0,"red_cards":0,"conversions":0}},{"title":"Kubota Spears vs Black Rams Tokyo","date":"28 Jan 2023","dateSmall":"28 Jan","time":1674970200,"compLogo":"https:\/\/eu-cdn.rugbypass.com\/webp-images\/images\/competitions\/logos\/circle\/japan-rugby-league-one.png.webp?maxw=72&v=1762927428","compTitle":"Japan Rugby League One","draw":false,"win":false,"opposition":{"name":"Kubota Spears","id":"1525","logo":"https:\/\/eu-cdn.rugbypass.com\/webp-images\/images\/team-images\/logos\/png\/5204.png.webp?maxw=72&v=1762927735"},"stats":{"mins":80,"tries":1,"yellow_cards":0,"red_cards":0,"conversions":0}},{"title":"Black Rams Tokyo vs Saitama Wild Knights","date":"20 Jan 2023","dateSmall":"20 Jan","time":1674273600,"compLogo":"https:\/\/eu-cdn.rugbypass.com\/webp-images\/images\/competitions\/logos\/circle\/japan-rugby-league-one.png.webp?maxw=72&v=1762927428","compTitle":"Japan Rugby League One","draw":false,"win":false,"opposition":{"name":"Saitama Wild Knights","id":"3459","logo":"https:\/\/eu-cdn.rugbypass.com\/webp-images\/images\/team-images\/logos\/png\/19567.png.webp?maxw=72&v=1762927734"},"stats":{"mins":80,"tries":0,"yellow_cards":0,"red_cards":0,"conversions":0}},{"title":"Shizuoka Blue Revs vs Black Rams Tokyo","date":"14 Jan 2023","dateSmall":"14 Jan","time":1673758800,"compLogo":"https:\/\/eu-cdn.rugbypass.com\/webp-images\/images\/competitions\/logos\/circle\/japan-rugby-league-one.png.webp?maxw=72&v=1762927428","compTitle":"Japan Rugby League One","draw":false,"win":true,"opposition":{"name":"Shizuoka BlueRevs","id":"4749","logo":"https:\/\/eu-cdn.rugbypass.com\/webp-images\/images\/team-images\/logos\/png\/5212.png.webp?maxw=72&v=1762927735"},"stats":{"mins":80,"tries":1,"yellow_cards":0,"red_cards":0,"conversions":0}},{"title":"Toyota Verblitz vs Black Rams Tokyo","date":"7 Jan 2023","dateSmall":"7 Jan","time":1673155800,"compLogo":"https:\/\/eu-cdn.rugbypass.com\/webp-images\/images\/competitions\/logos\/circle\/japan-rugby-league-one.png.webp?maxw=72&v=1762927428","compTitle":"Japan Rugby League One","draw":false,"win":true,"opposition":{"name":"Toyota Verblitz","id":"1886","logo":"https:\/\/eu-cdn.rugbypass.com\/webp-images\/images\/team-images\/logos\/png\/5211.png.webp?maxw=72&v=1762927735"},"stats":{"mins":71,"tries":1,"yellow_cards":0,"red_cards":0,"conversions":0}},{"title":"Toshiba Brave Lupus vs Black Rams Tokyo","date":"23 Dec 2022","dateSmall":"23 Dec","time":1671859800,"compLogo":"https:\/\/eu-cdn.rugbypass.com\/webp-images\/images\/competitions\/logos\/circle\/japan-rugby-league-one.png.webp?maxw=72&v=1762927428","compTitle":"Japan Rugby League One","draw":false,"win":false,"opposition":{"name":"Toshiba Brave Lupus Tokyo","id":"3342","logo":"https:\/\/eu-cdn.rugbypass.com\/webp-images\/images\/team-images\/logos\/png\/19702.png.webp?maxw=72&v=1762927734"},"stats":{"mins":17,"tries":0,"yellow_cards":0,"red_cards":0,"conversions":0}},{"title":"Black Rams Tokyo vs Mitsubishi DynaBoars","date":"16 Dec 2022","dateSmall":"16 Dec","time":1671246000,"compLogo":"https:\/\/eu-cdn.rugbypass.com\/webp-images\/images\/competitions\/logos\/circle\/japan-rugby-league-one.png.webp?maxw=72&v=1762927428","compTitle":"Japan Rugby League One","draw":false,"win":false,"opposition":{"name":"Mitsubishi Sagamihara Dynaboars","id":"1652","logo":"https:\/\/eu-cdn.rugbypass.com\/webp-images\/images\/team-images\/logos\/png\/594.png.webp?maxw=72&v=1762927735"},"stats":{"mins":33,"tries":0,"yellow_cards":0,"red_cards":0,"conversions":0}}]}]
Shuhei Matsuhashi Stats
Stats compared to other Flankers
![]() {{selectedCompetition.competition.name}} {{selectedCompetition.competition.season.label}}
-
![]() {{item.competition.name}} {{item.competition.season.label}}
{{graphStats[0].value}}
{{graphStats[0].title}}
{{graphStats[1].value}}
{{graphStats[1].title}}
{{graphStats[2].title}}
{{graphStats[2].value}}
{{graphStats[3].title}}
{{graphStats[3].value}}
{{graphStats[4].title}}
{{graphStats[4].value}}
{{graphStats[5].value}}
{{graphStats[5].title}}
Shuhei Matsuhashi Stats
Stats compared to other Flankers
{{item.title}}
{{item.value}}
Match Stats
![]() {{selectedMatchesComp}}
- All
-
![]() {{item.title}}
2 May 2026
2 May
L
v

Kubota Spears
25 Apr 2026
25 Apr
L
v

Toyota Verblitz
17 Apr 2026
17 Apr
W
v

Mie Honda Heat
4 Apr 2026
4 Apr
L
v

Kobelco Kobe Steelers
28 Mar 2026
28 Mar
W
v

Mitsubishi Sagamihara Dynaboars
20 Mar 2026
20 Mar
L
v

Saitama Wild Knights
13 Mar 2026
13 Mar
W
v

Shizuoka BlueRevs
27 Feb 2026
27 Feb
W
v

Toshiba Brave Lupus Tokyo
6 Feb 2026
6 Feb
L
v
Saitama Wild Knights
26 Dec 2025
26 Dec
W
v
Mie Honda Heat
{{game.date}}
{{game.dateSmall}}
W L
v
![]()
{{game.stats.mins}}
{{game.stats.tries}}
{{game.stats.conversions}}
{{game.stats.yellow_cards}}
{{game.stats.red_cards}}
Shuhei Matsuhashi Performance Analysis
Japan Rugby League One 2025/2026
Shuhei Matsuhashi featured in 12 matches during the 2025/2026 Japan Rugby League One, representing BlackRams Tokyo. Results included 5 wins and 7 losses.
Shuhei Matsuhashi represented BlackRams Tokyo in the 2025/2026 Japan Rugby League One season, who finished 4th in the regular season table.
Shuhei Matsuhashi played 787 minutes across the Japan Rugby League One 2025/2026. In attack he made 167m with ball in hand, beating 5 defenders and scoring 3 tries. Defensively he completed 123 tackles at a rate of 10.25 per game.
In the Japan Rugby League One 2025/2026, Shuhei Matsuhashi completed 49 passes at an accuracy of 94%, contributing 0 try assists and making 126 touches.