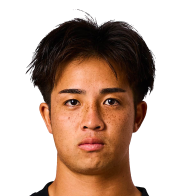
Kotaro Ito News

Super Rugby Pacific
Three takeaways from the 2026 Super Rugby AUS competiton
Maro Itoje back but Sale duo snubbed in 36-man England squad
Maro Itoje admits to being taken aback by Steve Borthwick's novel idea
Alex Coles puts positive spin on Maro Itoje's England absence
Latest
George Ford on Itoje absence and what 'excitable' England new boy is bringing
Borthwick nears Itoje rest decision but many 'different factors' are at play
'I still don’t think I’m over it': Seuseu Naitoa Ah Kuoi on his finals heartbreaks
The case for 'Big Burrito' to be the first name on Wallabies team sheet
Vital England quartet set to make Bok clash but no decision yet on Itoje
Super Round impact report finds event doubled expected visitor spend
[{"competition":{"rid":"1002","oid":"421","ovid":"2074","name":"Japan Rugby League One","logo":"https:\/\/eu-cdn.rugbypass.com\/images\/competitions\/logos\/png\/japan-rugby-league-one.png?v=1762927429","logoCircle":"https:\/\/eu-cdn.rugbypass.com\/images\/competitions\/logos\/circle\/japan-rugby-league-one.png?v=1762927428","season":{"season":202501,"years":{"2025":2025,"2026":2026},"label":"2025\/2026","completed":1,"standings":1,"started":1,"months":0,"games":114},"stats":{"success":1,"stats":{"teamId":1154,"conversion":5,"missedConversion":1,"goalAttempts":6,"missedGoals":1,"successfulGoals":5,"points":10,"percentGoals":83.33,"appearances":14,"minutesPlayed":296,"minutesPlayedFirstHalf":58,"minutesPlayedSecondHalf":238,"carries":40,"metresMade":222,"passes":54,"defenderBeaten":13,"cleanBreak":4,"totalTurnovers":11,"crossedGainline":14,"failedGainline":11,"neutral":15,"badPass":2,"lostBallForced":2,"lostInRuckOrMaul":2,"handlingError":4,"dominantContact":7,"errors":11,"postContactMetres":35,"breakAssist":1,"carryDistance":304,"metresInContact":35,"kickError":5,"kicksInPlay":9,"territorial":7,"attackingKicks":2,"kickBounced":2,"kickChargedDown":2,"penaltyKickMetres":311,"kickMetres":231,"allKickMetres":542,"tackle":25,"missedTackle":7,"turnoverWon":4,"interception":2,"tackleTurnoverWon":1,"totalAttemptedTackles":39,"totalSuccessfulTackles":25,"totalUnsuccessfulTackles":14,"backInGame":4,"trapped":2,"upperBodyTackles":17,"lowerBodyTackles":15,"percentTackleMade":64.1,"percentLowerBodyTackles":46.88,"percentUpperBodyTackles":53.12,"restartRetained":1,"restartOppError":2,"restartOppCollection":15,"restartOwnError":3,"restartNot10":1,"restartOutOfPlay":1,"totalRestarts":21,"restartsRetained":3,"restart50m":20,"restartGoalLine":1,"percentRestartsRetained":14.29,"attackingCatch":1,"attackingCatchSuccess":1,"defensiveCatch":11,"defensiveCatchSuccess":7,"restartCatch":5,"restartCatchSuccess":3,"duelDefence":6,"duelDefenceSuccess":2,"aerialContest":7,"aerialContestWon":3,"percentAerialContestWon":42.86},"topPlayerStats":{"tryScored":{"id":255757,"value":6},"conversion":{"id":110774,"value":63},"penaltyGoal":{"id":250478,"value":27},"missedConversion":{"id":226228,"value":21},"missedPenaltyGoal":{"id":250478,"value":7},"goalAttempts":{"id":250478,"value":98},"missedGoals":{"id":250478,"value":27},"successfulGoals":{"id":110774,"value":79},"points":{"id":250478,"value":194},"percentGoals":{"id":102428,"value":100},"appearances":{"id":110774,"value":20},"minutesPlayed":{"id":239638,"value":1509},"minutesPlayedFirstHalf":{"id":239638,"value":760},"minutesPlayedSecondHalf":{"id":239638,"value":749},"yellowCard":{"id":223050,"value":3},"penaltyConceded":{"id":250478,"value":12},"penaltyDefence":{"id":226228,"value":8},"penaltyOffence":{"id":250478,"value":5},"deliberateKnockOn":{"id":226228,"value":2},"notRollingAway":{"id":250478,"value":2},"foulPlay":{"id":180823,"value":5},"offFeetAtRuck":{"id":250478,"value":1},"notReleasing":{"id":248798,"value":4},"obstruction":{"id":250478,"value":1},"offside":{"id":239743,"value":5},"wrongSideAtRuck":{"id":250478,"value":1},"sinBinEnd":{"id":223050,"value":3},"carries":{"id":239638,"value":218},"metresMade":{"id":239638,"value":1165},"passes":{"id":180823,"value":525},"offload":{"id":226228,"value":17},"tryAssist":{"id":226247,"value":13},"defenderBeaten":{"id":180823,"value":90},"cleanBreak":{"id":180823,"value":15},"totalTurnovers":{"id":239638,"value":35},"crossedGainline":{"id":239638,"value":84},"failedGainline":{"id":180823,"value":73},"neutral":{"id":239638,"value":81},"badPass":{"id":251932,"value":2},"lostBallForced":{"id":239638,"value":4},"droppedBallUnforced":{"id":239638,"value":12},"lostInRuckOrMaul":{"id":239638,"value":8},"accidentalKnockOn":{"id":250478,"value":1},"handlingError":{"id":239638,"value":21},"dominantContact":{"id":239638,"value":25},"errors":{"id":239638,"value":35},"postContactMetres":{"id":239638,"value":163},"breakAssist":{"id":110774,"value":27},"carryDistance":{"id":239638,"value":1644},"metresInContact":{"id":239638,"value":163},"kickError":{"id":250478,"value":15},"kicksInPlay":{"id":144888,"value":189},"retainedKick":{"id":144888,"value":27},"fiftyTwentyTwoKick":{"id":191904,"value":2},"tryKick":{"id":144888,"value":3},"territorial":{"id":180823,"value":139},"kickBox":{"id":250478,"value":4},"contestable":{"id":110774,"value":35},"attackingKicks":{"id":144888,"value":70},"kickBounced":{"id":144888,"value":71},"kickChargedDown":{"id":144888,"value":10},"penaltyKickMetres":{"id":180823,"value":3513},"kickMetres":{"id":180823,"value":6408},"allKickMetres":{"id":180823,"value":9921},"tackle":{"id":226228,"value":95},"missedTackle":{"id":250478,"value":54},"turnoverWon":{"id":180823,"value":14},"interception":{"id":250478,"value":3},"tackleTurnoverWon":{"id":180823,"value":8},"dominantTackleContact":{"id":250478,"value":5},"totalAttemptedTackles":{"id":250478,"value":152},"totalSuccessfulTackles":{"id":226228,"value":95},"totalUnsuccessfulTackles":{"id":250478,"value":70},"counterRuck":{"id":250478,"value":1},"outOfGame":{"id":248798,"value":15},"backInGame":{"id":126623,"value":17},"contestedBreakdown":{"id":142161,"value":3},"trapped":{"id":250478,"value":4},"upperBodyTackles":{"id":180823,"value":75},"lowerBodyTackles":{"id":239743,"value":65},"percentTackleMade":{"id":245959,"value":85.71},"percentLowerBodyTackles":{"id":260483,"value":88.89},"percentUpperBodyTackles":{"id":185336,"value":100},"wonClean":{"id":110774,"value":5},"lineoutsWonOwnThrow":{"id":180823,"value":12},"lineoutThrowsWon":{"id":110774,"value":5},"restartRetained":{"id":110774,"value":8},"restartOppError":{"id":180823,"value":5},"restartOppCollection":{"id":180823,"value":109},"restartOwnError":{"id":226228,"value":4},"restartKickInTouch":{"id":250478,"value":1},"restartNot10":{"id":180823,"value":2},"restartOutOfPlay":{"id":250478,"value":1},"totalRestarts":{"id":180823,"value":123},"restartsRetained":{"id":110774,"value":12},"restart22m":{"id":110774,"value":4},"restart50m":{"id":180823,"value":113},"restartGoalLine":{"id":250478,"value":8},"percentRestartsRetained":{"id":233301,"value":50},"attackingCatch":{"id":191904,"value":4},"defensiveCatch":{"id":239638,"value":75},"defensiveCatchSuccess":{"id":239638,"value":58},"restartCatch":{"id":226247,"value":19},"restartCatchSuccess":{"id":226247,"value":19},"tapBack":{"id":110774,"value":2},"duelDefence":{"id":239638,"value":13},"duelDefenceSuccess":{"id":251932,"value":2},"aerialContest":{"id":239638,"value":17},"aerialContestWon":{"id":110774,"value":5},"percentAerialContestWon":{"id":128087,"value":100},"attackingCatchSuccess":{"id":191904,"value":2},"carriedOver":{"id":191904,"value":1},"forwardPass":{"id":239638,"value":3},"jackalTurnoverWon":{"id":226228,"value":1},"tapBackSuccess":{"id":110774,"value":2},"missedDropGoal":{"id":110774,"value":1},"otherOffence":{"id":110774,"value":1},"attemptedInterception":{"id":110774,"value":1},"throwMiddle":{"id":110774,"value":1},"wonOther":{"id":248798,"value":1},"carriedInTouch":{"id":100133,"value":3},"jackalPenaltyWon":{"id":137924,"value":1},"handsInRuck":{"id":255757,"value":1},"throwBack":{"id":255757,"value":1},"dissent":{"id":226247,"value":1},"otherError":{"id":239743,"value":1}}},"epoch":1780812300},"main":{"totalMinsPlayed":296,"main":[{"value":10,"title":"Points"},{"value":9,"title":"Kicks in Play"},{"value":5,"title":"Goal Converted"},{"value":4,"title":"Line Breaks"},{"value":13,"title":"Defenders Beaten"},{"value":0,"title":"Tries"},{"value":0,"title":"Try Assists"}],"profile":[{"value":"5%","title":"Points","type":1,"key":"points","raw":10,"top":194,"color":"#d14739"},{"value":"5%","title":"Kicks in Play","type":1,"key":"kicksInPlay","raw":9,"top":189,"color":"#d14739"},{"value":"6%","title":"Goal Converted","type":1,"key":"successfulGoals","raw":5,"top":79,"color":"#d14939"},{"value":"27%","title":"Line Breaks","type":1,"key":"cleanBreak","raw":4,"top":15,"color":"#e18238"},{"value":"14%","title":"Defenders Beaten","type":1,"key":"defenderBeaten","raw":13,"top":90,"color":"#d75e37"},{"value":"2%","title":"Tries","type":1,"key":"tryScored","raw":0,"top":6,"color":"#cf403a"},{"value":"2%","title":"Try Assists","type":1,"key":"tryAssist","raw":0,"top":13,"color":"#cf403a"}]},"group":{"groups":[{"title":"Attack","stats":[{"title":"Points","value":{"value":10,"title":"Points"},"overall":{"value":"5%","title":"Points","type":1,"key":"points","raw":10,"top":194,"color":"#d14739"}},{"title":"Tries","value":{"value":0,"title":"Tries"},"overall":{"value":"2%","title":"Tries","type":1,"key":"tryScored","raw":0,"top":6,"color":"#cf403a"}},{"title":"Line Breaks","value":{"value":4,"title":"Line Breaks"},"overall":{"value":"27%","title":"Line Breaks","type":1,"key":"cleanBreak","raw":4,"top":15,"color":"#e18238"}},{"title":"Carries","value":{"value":40,"title":"Carries"},"overall":{"value":"18%","title":"Carries","type":1,"key":"carries","raw":40,"top":218,"color":"#da6937"}},{"title":"Carries Per Minute","value":{"value":0.14,"title":"Carries Per Minute"},"overall":{"value":"2%","title":"Carries Per Minute","type":1,"key":"carries","raw":0,"top":218,"color":"#cf403a"}},{"title":"Metres Carried","value":{"value":222,"title":"Metres Carried"},"overall":{"value":"19%","title":"Metres Carried","type":1,"key":"metresMade","raw":222,"top":1165,"color":"#dc6c37"}},{"title":"Turnovers Won","value":{"value":4,"title":"Turnovers Won"},"overall":{"value":"29%","title":"Turnovers Won","type":1,"key":"turnoverWon","raw":4,"top":14,"color":"#e28938"}},{"title":"Defenders Beaten","value":{"value":13,"title":"Defenders Beaten"},"overall":{"value":"14%","title":"Defenders Beaten","type":1,"key":"defenderBeaten","raw":13,"top":90,"color":"#d75e37"}},{"title":"Post Contact Metres","value":{"value":35,"title":"Post Contact Metres"},"overall":{"value":"21%","title":"Post Contact Metres","type":1,"key":"postContactMetres","raw":35,"top":163,"color":"#dd7237"}}]},{"title":"Defence","stats":[{"title":"Tackles Made","value":{"value":39,"title":"Tackles Made"},"overall":{"value":"26%","title":"Tackles Made","type":1,"key":"totalAttemptedTackles","raw":39,"top":152,"color":"#e18038"}},{"title":"Tackles Completed","value":{"value":25,"title":"Tackles Completed"},"overall":{"value":"26%","title":"Tackles Completed","type":1,"key":"totalSuccessfulTackles","raw":25,"top":95,"color":"#e18038"}},{"title":"Dominant Tackles","value":{"value":0,"title":"Dominant Tackles"},"overall":{"value":"2%","title":"Dominant Tackles","type":1,"key":"dominantTackleContact","raw":0,"top":5,"color":"#cf403a"}},{"title":"Tackles Per Minute","value":{"value":0.08,"title":"Tackles Per Minute"},"overall":{"value":"2%","title":"Tackles Per Minute","type":1,"key":"tackle","raw":0,"top":95,"color":"#cf403a"}},{"title":"Turnovers Won","value":{"value":4,"title":"Turnovers Won"},"overall":{"value":"29%","title":"Turnovers Won","type":1,"key":"turnoverWon","raw":4,"top":14,"color":"#e28938"}}]},{"title":"Passing","stats":[{"title":"Try Assists","value":{"value":0,"title":"Try Assists"},"overall":{"value":"2%","title":"Try Assists","type":1,"key":"tryAssist","raw":0,"top":13,"color":"#cf403a"}},{"title":"Successful Passes","value":{"value":54,"title":"Successful Passes"},"overall":{"value":"10%","title":"Successful Passes","type":1,"key":"passes","raw":54,"top":525,"color":"#d55438"}},{"title":"Bad Passes","value":{"value":2,"title":"Bad Passes"},"overall":{"value":"100%","title":"Bad Passes","type":1,"key":"badPass","raw":2,"top":2,"color":"#479d6c"}},{"title":"Pass Accuracy","value":{"value":"96%","title":"Pass Accuracy"},"overall":{"value":"100%","title":"Pass Accuracy","type":1,"key":"pass_accuracy","raw":"96%","top":0,"color":"#479d6c"}}]},{"title":"Kicking","stats":[{"title":"Successful Penalties","value":{"value":0,"title":"Successful Penalties"},"overall":{"value":"2%","title":"Successful Penalties","type":1,"key":"penaltyGoal","raw":0,"top":27,"color":"#cf403a"}},{"title":"Successful Conversions","value":{"value":5,"title":"Successful Conversions"},"overall":{"value":"8%","title":"Successful Conversions","type":1,"key":"conversion","raw":5,"top":63,"color":"#d34e38"}},{"title":"Kicks in Play","value":{"value":9,"title":"Kicks in Play"},"overall":{"value":"5%","title":"Kicks in Play","type":1,"key":"kicksInPlay","raw":9,"top":189,"color":"#d14739"}},{"title":"Drop Goals","value":{"value":0,"title":"Drop Goals"},"overall":{"value":"2%","title":"Drop Goals","type":1,"key":"dropGoal","raw":0,"top":0,"color":"#ce3d3b"}},{"title":"Goals Converted","value":{"value":5,"title":"Goals Converted"},"overall":{"value":"6%","title":"Goals Converted","type":1,"key":"successfulGoals","raw":5,"top":79,"color":"#d14939"}}]},{"title":"Discipline","stats":[{"title":"Penalties Conceded","value":{"value":0,"title":"Penalties Conceded"},"overall":{"value":"2%","title":"Penalties Conceded","type":1,"key":"penaltyConceded","raw":0,"top":12,"color":"#cf403a"}},{"title":"Yellow Cards","value":{"value":0,"title":"Yellow Cards"},"overall":{"value":"2%","title":"Yellow Cards","type":1,"key":"yellowCard","raw":0,"top":3,"color":"#cf403a"}},{"title":"Red Cards","value":{"value":0,"title":"Red Cards"},"overall":{"value":"2%","title":"Red Cards","type":1,"key":"redCard","raw":0,"top":0,"color":"#ce3d3b"}}]}]}},{"competition":{"rid":"1002","oid":"421","ovid":"2074","name":"Japan Rugby League One","logo":"https:\/\/eu-cdn.rugbypass.com\/images\/competitions\/logos\/png\/japan-rugby-league-one.png?v=1762927429","logoCircle":"https:\/\/eu-cdn.rugbypass.com\/images\/competitions\/logos\/circle\/japan-rugby-league-one.png?v=1762927428","season":{"season":202401,"years":{"2024":2024,"2025":2025},"label":"2024\/2025","completed":1,"standings":1,"started":1,"months":0,"games":114},"stats":{"success":1,"stats":{"teamId":1154,"tryScored":4,"conversion":1,"penaltyGoal":3,"missedConversion":2,"goalAttempts":6,"missedGoals":2,"successfulGoals":4,"points":31,"percentGoals":66.67,"appearances":18,"minutesPlayed":873,"minutesPlayedFirstHalf":419,"minutesPlayedSecondHalf":454,"penaltyConceded":4,"penaltyDefence":2,"penaltyOffence":2,"notRollingAway":1,"notReleasing":1,"offside":1,"wrongSideAtRuck":1,"carries":103,"metresMade":721,"passes":93,"offload":5,"tryAssist":2,"defenderBeaten":33,"cleanBreak":12,"totalTurnovers":16,"crossedGainline":37,"failedGainline":33,"neutral":33,"badPass":2,"carriedInTouch":1,"droppedBallUnforced":7,"lostInRuckOrMaul":1,"handlingError":9,"dominantContact":11,"errors":16,"postContactMetres":55,"breakAssist":6,"carryDistance":946,"metresInContact":55,"kickError":5,"kicksInPlay":47,"retainedKick":2,"territorial":34,"contestable":3,"attackingKicks":10,"kickBounced":15,"kickChargedDown":1,"penaltyKickMetres":689,"kickMetres":1545,"allKickMetres":2234,"tackle":54,"missedTackle":12,"turnoverWon":2,"dominantTackleContact":1,"totalAttemptedTackles":73,"totalSuccessfulTackles":54,"totalUnsuccessfulTackles":19,"jackalPenaltyWon":2,"outOfGame":6,"backInGame":3,"trapped":1,"percentTackleMade":73.97,"wonClean":1,"lostNotStraight":1,"lineoutThrowsWon":1,"lineoutThrowsLost":1,"throwMiddle":1,"throw15+":1,"restartOppError":3,"restartOppCollection":10,"restartOwnError":1,"restartOutOfPlay":1,"totalRestarts":14,"restartsRetained":3,"restart50m":14,"percentRestartsRetained":21.43,"defensiveCatch":25,"defensiveCatchSuccess":22},"topPlayerStats":{"tryScored":{"id":180823,"value":12},"conversion":{"id":239638,"value":65},"penaltyGoal":{"id":226247,"value":21},"missedConversion":{"id":110774,"value":22},"missedPenaltyGoal":{"id":226247,"value":6},"goalAttempts":{"id":191904,"value":97},"missedGoals":{"id":110774,"value":26},"successfulGoals":{"id":191904,"value":77},"points":{"id":191904,"value":190},"percentGoals":{"id":102428,"value":100},"appearances":{"id":226247,"value":19},"minutesPlayed":{"id":180823,"value":1395},"minutesPlayedFirstHalf":{"id":180823,"value":720},"minutesPlayedSecondHalf":{"id":226247,"value":688},"yellowCard":{"id":250478,"value":1},"penaltyConceded":{"id":250478,"value":9},"penaltyDefence":{"id":250478,"value":8},"penaltyOffence":{"id":239638,"value":5},"notRollingAway":{"id":216335,"value":3},"foulPlay":{"id":250478,"value":4},"offFeetAtRuck":{"id":128087,"value":2},"notReleasing":{"id":226228,"value":4},"offside":{"id":110774,"value":3},"sinBinEnd":{"id":250478,"value":1},"carries":{"id":180823,"value":277},"metresMade":{"id":239638,"value":1450},"passes":{"id":223050,"value":567},"offload":{"id":180823,"value":39},"tryAssist":{"id":180823,"value":18},"defenderBeaten":{"id":180823,"value":89},"cleanBreak":{"id":180823,"value":33},"totalTurnovers":{"id":191904,"value":35},"crossedGainline":{"id":180823,"value":103},"failedGainline":{"id":223050,"value":166},"neutral":{"id":102428,"value":92},"badPass":{"id":250478,"value":4},"forwardPass":{"id":102428,"value":3},"lostBallForced":{"id":223050,"value":4},"droppedBallUnforced":{"id":180823,"value":13},"lostInRuckOrMaul":{"id":191904,"value":6},"accidentalOffside":{"id":250478,"value":1},"handlingError":{"id":180823,"value":21},"dominantContact":{"id":180823,"value":30},"errors":{"id":191904,"value":35},"postContactMetres":{"id":180823,"value":173},"breakAssist":{"id":180823,"value":39},"carryDistance":{"id":180823,"value":2096},"metresInContact":{"id":180823,"value":173},"kickError":{"id":191904,"value":12},"kicksInPlay":{"id":110774,"value":200},"retainedKick":{"id":191904,"value":31},"fiftyTwentyTwoKick":{"id":191904,"value":4},"tryKick":{"id":191904,"value":6},"territorial":{"id":180823,"value":132},"kickBox":{"id":223050,"value":3},"contestable":{"id":110774,"value":41},"attackingKicks":{"id":110774,"value":65},"kickBounced":{"id":191904,"value":69},"kickChargedDown":{"id":226228,"value":5},"penaltyKickMetres":{"id":191904,"value":3340},"kickMetres":{"id":180823,"value":6423},"allKickMetres":{"id":180823,"value":9605},"tackle":{"id":223050,"value":127},"missedTackle":{"id":226247,"value":47},"turnoverWon":{"id":250478,"value":6},"interception":{"id":128218,"value":2},"tackleTurnoverWon":{"id":185336,"value":3},"dominantTackleContact":{"id":226247,"value":7},"totalAttemptedTackles":{"id":226247,"value":186},"totalSuccessfulTackles":{"id":223050,"value":127},"totalUnsuccessfulTackles":{"id":226247,"value":71},"outOfGame":{"id":126623,"value":44},"backInGame":{"id":126623,"value":56},"percentTackleMade":{"id":164609,"value":75.36},"wonClean":{"id":191904,"value":6},"lostClean":{"id":250478,"value":1},"lineoutsWonOwnThrow":{"id":180823,"value":9},"lineoutThrowsWon":{"id":191904,"value":8},"lineoutThrowsLost":{"id":250478,"value":1},"throwMiddle":{"id":250478,"value":1},"restartRetained":{"id":223050,"value":11},"restartOppError":{"id":191904,"value":7},"restartOppCollection":{"id":180823,"value":100},"restartOwnError":{"id":250478,"value":5},"restartNot10":{"id":250478,"value":1},"restartOutOfPlay":{"id":137924,"value":3},"totalRestarts":{"id":180823,"value":111},"restartsRetained":{"id":223050,"value":17},"restart50m":{"id":223050,"value":99},"restartGoalLine":{"id":180823,"value":13},"percentRestartsRetained":{"id":244447,"value":30},"attackingCatch":{"id":110774,"value":6},"attackingCatchSuccess":{"id":110774,"value":4},"defensiveCatch":{"id":110774,"value":66},"defensiveCatchSuccess":{"id":110774,"value":55},"restartCatch":{"id":226228,"value":13},"restartCatchSuccess":{"id":102428,"value":13},"aerialContest":{"id":110774,"value":7},"aerialContestWon":{"id":110774,"value":4},"percentAerialContestWon":{"id":250478,"value":100},"wrongSideAtRuck":{"id":251932,"value":1},"carriedInTouch":{"id":239638,"value":3},"jackalPenaltyWon":{"id":251932,"value":2},"trapped":{"id":126623,"value":11},"lostNotStraight":{"id":251932,"value":1},"throw15+":{"id":251932,"value":1},"handsInRuck":{"id":191904,"value":1},"obstruction":{"id":191904,"value":1},"freeKick":{"id":191904,"value":1},"accidentalKnockOn":{"id":191904,"value":1},"jackalTurnoverWon":{"id":191904,"value":1},"lineoutWonPenalty":{"id":191904,"value":2},"throwFront":{"id":191904,"value":2},"restart22m":{"id":110774,"value":5},"upperBodyTackles":{"id":129561,"value":9},"lowerBodyTackles":{"id":223050,"value":7},"percentLowerBodyTackles":{"id":110774,"value":100},"percentUpperBodyTackles":{"id":180823,"value":100},"lostHandlingError":{"id":226228,"value":1},"tapBack":{"id":239638,"value":2},"dropGoal":{"id":110774,"value":1},"missedDropGoal":{"id":110774,"value":1},"deliberateKnockOn":{"id":110774,"value":1},"otherError":{"id":110774,"value":1},"counterRuck":{"id":244447,"value":3},"restartOffside":{"id":110774,"value":1},"duelDefence":{"id":244447,"value":2},"carriedOver":{"id":126623,"value":2},"contestedBreakdown":{"id":126623,"value":4},"otherOffence":{"id":233301,"value":1},"restartKickInTouch":{"id":137924,"value":1},"duelDefenceSuccess":{"id":102428,"value":1},"attemptedInterception":{"id":223050,"value":2}}},"epoch":1748757900},"main":{"totalMinsPlayed":873,"main":[{"value":31,"title":"Points"},{"value":47,"title":"Kicks in Play"},{"value":4,"title":"Goal Converted"},{"value":12,"title":"Line Breaks"},{"value":33,"title":"Defenders Beaten"},{"value":4,"title":"Tries"},{"value":2,"title":"Try Assists"}],"profile":[{"value":"16%","title":"Points","type":1,"key":"points","raw":31,"top":190,"color":"#d96437"},{"value":"24%","title":"Kicks in Play","type":1,"key":"kicksInPlay","raw":47,"top":200,"color":"#de7a37"},{"value":"5%","title":"Goal Converted","type":1,"key":"successfulGoals","raw":4,"top":77,"color":"#d14739"},{"value":"36%","title":"Line Breaks","type":1,"key":"cleanBreak","raw":12,"top":33,"color":"#e99d3b"},{"value":"37%","title":"Defenders Beaten","type":1,"key":"defenderBeaten","raw":33,"top":89,"color":"#e9a03c"},{"value":"33%","title":"Tries","type":1,"key":"tryScored","raw":4,"top":12,"color":"#e6943a"},{"value":"11%","title":"Try Assists","type":1,"key":"tryAssist","raw":2,"top":18,"color":"#d55637"}]},"group":{"groups":[{"title":"Attack","stats":[{"title":"Points","value":{"value":31,"title":"Points"},"overall":{"value":"16%","title":"Points","type":1,"key":"points","raw":31,"top":190,"color":"#d96437"}},{"title":"Tries","value":{"value":4,"title":"Tries"},"overall":{"value":"33%","title":"Tries","type":1,"key":"tryScored","raw":4,"top":12,"color":"#e6943a"}},{"title":"Line Breaks","value":{"value":12,"title":"Line Breaks"},"overall":{"value":"36%","title":"Line Breaks","type":1,"key":"cleanBreak","raw":12,"top":33,"color":"#e99d3b"}},{"title":"Carries","value":{"value":103,"title":"Carries"},"overall":{"value":"37%","title":"Carries","type":1,"key":"carries","raw":103,"top":277,"color":"#e9a03c"}},{"title":"Carries Per Minute","value":{"value":0.12,"title":"Carries Per Minute"},"overall":{"value":"2%","title":"Carries Per Minute","type":1,"key":"carries","raw":0,"top":277,"color":"#cf403a"}},{"title":"Metres Carried","value":{"value":721,"title":"Metres Carried"},"overall":{"value":"50%","title":"Metres Carried","type":1,"key":"metresMade","raw":721,"top":1450,"color":"#f6c745"}},{"title":"Turnovers Won","value":{"value":2,"title":"Turnovers Won"},"overall":{"value":"33%","title":"Turnovers Won","type":1,"key":"turnoverWon","raw":2,"top":6,"color":"#e6943a"}},{"title":"Defenders Beaten","value":{"value":33,"title":"Defenders Beaten"},"overall":{"value":"37%","title":"Defenders Beaten","type":1,"key":"defenderBeaten","raw":33,"top":89,"color":"#e9a03c"}},{"title":"Post Contact Metres","value":{"value":55,"title":"Post Contact Metres"},"overall":{"value":"32%","title":"Post Contact Metres","type":1,"key":"postContactMetres","raw":55,"top":173,"color":"#e59139"}}]},{"title":"Defence","stats":[{"title":"Tackles Made","value":{"value":73,"title":"Tackles Made"},"overall":{"value":"39%","title":"Tackles Made","type":1,"key":"totalAttemptedTackles","raw":73,"top":186,"color":"#eca63d"}},{"title":"Tackles Completed","value":{"value":54,"title":"Tackles Completed"},"overall":{"value":"43%","title":"Tackles Completed","type":1,"key":"totalSuccessfulTackles","raw":54,"top":127,"color":"#efb240"}},{"title":"Dominant Tackles","value":{"value":1,"title":"Dominant Tackles"},"overall":{"value":"14%","title":"Dominant Tackles","type":1,"key":"dominantTackleContact","raw":1,"top":7,"color":"#d75e37"}},{"title":"Tackles Per Minute","value":{"value":0.06,"title":"Tackles Per Minute"},"overall":{"value":"2%","title":"Tackles Per Minute","type":1,"key":"tackle","raw":0,"top":127,"color":"#cf403a"}},{"title":"Turnovers Won","value":{"value":2,"title":"Turnovers Won"},"overall":{"value":"33%","title":"Turnovers Won","type":1,"key":"turnoverWon","raw":2,"top":6,"color":"#e6943a"}}]},{"title":"Passing","stats":[{"title":"Try Assists","value":{"value":2,"title":"Try Assists"},"overall":{"value":"11%","title":"Try Assists","type":1,"key":"tryAssist","raw":2,"top":18,"color":"#d55637"}},{"title":"Successful Passes","value":{"value":93,"title":"Successful Passes"},"overall":{"value":"16%","title":"Successful Passes","type":1,"key":"passes","raw":93,"top":567,"color":"#d96437"}},{"title":"Bad Passes","value":{"value":2,"title":"Bad Passes"},"overall":{"value":"50%","title":"Bad Passes","type":1,"key":"badPass","raw":2,"top":4,"color":"#f6c745"}},{"title":"Pass Accuracy","value":{"value":"98%","title":"Pass Accuracy"},"overall":{"value":"100%","title":"Pass Accuracy","type":1,"key":"pass_accuracy","raw":"98%","top":0,"color":"#479d6c"}}]},{"title":"Kicking","stats":[{"title":"Successful Penalties","value":{"value":3,"title":"Successful Penalties"},"overall":{"value":"14%","title":"Successful Penalties","type":1,"key":"penaltyGoal","raw":3,"top":21,"color":"#d75e37"}},{"title":"Successful Conversions","value":{"value":1,"title":"Successful Conversions"},"overall":{"value":"2%","title":"Successful Conversions","type":1,"key":"conversion","raw":1,"top":65,"color":"#cf403a"}},{"title":"Kicks in Play","value":{"value":47,"title":"Kicks in Play"},"overall":{"value":"24%","title":"Kicks in Play","type":1,"key":"kicksInPlay","raw":47,"top":200,"color":"#de7a37"}},{"title":"Drop Goals","value":{"value":0,"title":"Drop Goals"},"overall":{"value":"2%","title":"Drop Goals","type":1,"key":"dropGoal","raw":0,"top":1,"color":"#cf403a"}},{"title":"Goals Converted","value":{"value":4,"title":"Goals Converted"},"overall":{"value":"5%","title":"Goals Converted","type":1,"key":"successfulGoals","raw":4,"top":77,"color":"#d14739"}}]},{"title":"Discipline","stats":[{"title":"Penalties Conceded","value":{"value":4,"title":"Penalties Conceded"},"overall":{"value":"44%","title":"Penalties Conceded","type":1,"key":"penaltyConceded","raw":4,"top":9,"color":"#f0b540"}},{"title":"Yellow Cards","value":{"value":0,"title":"Yellow Cards"},"overall":{"value":"2%","title":"Yellow Cards","type":1,"key":"yellowCard","raw":0,"top":1,"color":"#cf403a"}},{"title":"Red Cards","value":{"value":0,"title":"Red Cards"},"overall":{"value":"2%","title":"Red Cards","type":1,"key":"redCard","raw":0,"top":0,"color":"#ce3d3b"}}]}]}},{"competition":{"rid":"1002","oid":"421","ovid":"2074","name":"Japan Rugby League One","logo":"https:\/\/eu-cdn.rugbypass.com\/images\/competitions\/logos\/png\/japan-rugby-league-one.png?v=1762927429","logoCircle":"https:\/\/eu-cdn.rugbypass.com\/images\/competitions\/logos\/circle\/japan-rugby-league-one.png?v=1762927428","season":{"season":202301,"years":{"2023":2023,"2024":2024},"label":"2023\/2024","completed":1,"standings":1,"started":1,"months":0,"games":100},"stats":{"success":1,"stats":{"teamId":1154,"carries":2,"metresMade":37,"passes":2,"neutral":2,"postContactMetres":1,"carryDistance":37,"metresInContact":1,"kicksInPlay":2,"attackingKicks":2,"kickBounced":1,"kickChargedDown":1,"kickMetres":25,"allKickMetres":25,"defensiveCatch":2,"defensiveCatchSuccess":2,"points":0,"appearances":1,"minutesPlayed":21},"topPlayerStats":{"conversion":{"id":191904,"value":66},"penaltyGoal":{"id":100133,"value":24},"dropGoal":{"id":226247,"value":2},"missedConversion":{"id":100133,"value":26},"missedPenaltyGoal":{"id":126623,"value":3},"goalAttempts":{"id":100133,"value":117},"missedGoals":{"id":100133,"value":27},"successfulGoals":{"id":100133,"value":90},"points":{"id":191904,"value":217},"percentGoals":{"id":209290,"value":100},"appearances":{"id":102428,"value":18},"minutesPlayed":{"id":102428,"value":1374},"minutesPlayedFirstHalf":{"id":226247,"value":280},"minutesPlayedSecondHalf":{"id":226228,"value":240},"yellowCard":{"id":126623,"value":2},"penaltyConceded":{"id":176870,"value":18},"penaltyDefence":{"id":176870,"value":15},"notRollingAway":{"id":176870,"value":5},"foulPlay":{"id":176870,"value":6},"offFeetAtRuck":{"id":185336,"value":1},"wrongSideAtRuck":{"id":185336,"value":1},"carries":{"id":102428,"value":189},"metresMade":{"id":239638,"value":1201},"passes":{"id":223050,"value":414},"offload":{"id":191904,"value":27},"tryAssist":{"id":180823,"value":16},"defenderBeaten":{"id":180823,"value":68},"cleanBreak":{"id":239638,"value":21},"totalTurnovers":{"id":191904,"value":27},"crossedGainline":{"id":226228,"value":60},"failedGainline":{"id":226247,"value":69},"neutral":{"id":102428,"value":100},"badPass":{"id":180823,"value":4},"forwardPass":{"id":226228,"value":2},"lostBallForced":{"id":110774,"value":3},"droppedBallUnforced":{"id":102428,"value":10},"lostInRuckOrMaul":{"id":239638,"value":6},"accidentalKnockOn":{"id":185336,"value":1},"handlingError":{"id":191904,"value":16},"dominantContact":{"id":239638,"value":26},"errors":{"id":191904,"value":27},"postContactMetres":{"id":239638,"value":164},"breakAssist":{"id":223050,"value":30},"carryDistance":{"id":102428,"value":1509},"metresInContact":{"id":239638,"value":164},"kickError":{"id":100133,"value":11},"kicksInPlay":{"id":226247,"value":179},"retainedKick":{"id":199094,"value":31},"tryKick":{"id":100133,"value":6},"territorial":{"id":226247,"value":135},"contestable":{"id":199094,"value":39},"attackingKicks":{"id":199094,"value":78},"kickBounced":{"id":199094,"value":70},"kickChargedDown":{"id":226247,"value":7},"penaltyKickMetres":{"id":180823,"value":2829},"kickMetres":{"id":226247,"value":6192},"allKickMetres":{"id":180823,"value":8792},"tackle":{"id":191904,"value":152},"missedTackle":{"id":226228,"value":36},"turnoverWon":{"id":191904,"value":8},"tackleTurnoverWon":{"id":176870,"value":5},"dominantTackleContact":{"id":191904,"value":4},"totalAttemptedTackles":{"id":191904,"value":185},"totalSuccessfulTackles":{"id":191904,"value":152},"totalUnsuccessfulTackles":{"id":226228,"value":53},"jackalTurnoverWon":{"id":185336,"value":1},"counterRuck":{"id":185336,"value":2},"outOfGame":{"id":126623,"value":19},"backInGame":{"id":126623,"value":16},"percentTackleMade":{"id":191904,"value":82.16},"wonClean":{"id":191904,"value":5},"lineoutsWonOwnThrow":{"id":180823,"value":5},"lineoutThrowsWon":{"id":191904,"value":5},"restartRetained":{"id":199094,"value":7},"restartOppError":{"id":223050,"value":5},"restartOppCollection":{"id":126623,"value":107},"restartOwnError":{"id":245074,"value":4},"restartNot10":{"id":185336,"value":1},"restartOutOfPlay":{"id":245074,"value":2},"totalRestarts":{"id":126623,"value":115},"restartsRetained":{"id":191904,"value":9},"restart22m":{"id":250478,"value":3},"restart50m":{"id":126623,"value":105},"restartGoalLine":{"id":180823,"value":9},"percentRestartsRetained":{"id":226228,"value":50},"attackingCatch":{"id":144888,"value":3},"attackingCatchSuccess":{"id":223050,"value":2},"defensiveCatch":{"id":102428,"value":87},"defensiveCatchSuccess":{"id":102428,"value":78},"restartCatch":{"id":100133,"value":25},"restartCatchSuccess":{"id":100133,"value":25},"tapBack":{"id":199094,"value":3},"aerialContest":{"id":199094,"value":4},"aerialContestWon":{"id":223050,"value":2},"percentAerialContestWon":{"id":223050,"value":66.67},"tryScored":{"id":144888,"value":6},"penaltyOffence":{"id":233301,"value":8},"notReleasing":{"id":233301,"value":7},"carriedOver":{"id":250478,"value":1},"fiftyTwentyTwoKick":{"id":191904,"value":2},"interception":{"id":233301,"value":2},"contestedBreakdown":{"id":233301,"value":2},"missedDropGoal":{"id":211284,"value":2},"offside":{"id":191904,"value":5},"carriedInTouch":{"id":126623,"value":2},"jackalPenaltyWon":{"id":191904,"value":2},"restartKickInTouch":{"id":191904,"value":1},"lostHandlingError":{"id":226228,"value":1},"lineoutThrowsLost":{"id":226228,"value":1},"kickBox":{"id":211284,"value":1},"sinBinEnd":{"id":220466,"value":2},"otherError":{"id":126623,"value":2},"wrongSideAtMaul":{"id":223063,"value":1},"deliberateKnockOn":{"id":199094,"value":2},"accidentalOffside":{"id":199094,"value":1},"handsInRuck":{"id":102428,"value":1},"offsideAtKick":{"id":223050,"value":1},"attemptedInterception":{"id":223050,"value":1},"otherOffence":{"id":100133,"value":1},"wonTap":{"id":226247,"value":1},"throwBack":{"id":226247,"value":1},"upperBodyTackles":{"id":176870,"value":11},"lowerBodyTackles":{"id":245074,"value":5},"percentLowerBodyTackles":{"id":245074,"value":62.5},"percentUpperBodyTackles":{"id":164609,"value":87.5}}},"epoch":1716703500},"main":{"totalMinsPlayed":21,"main":[{"value":0,"title":"Points"},{"value":2,"title":"Kicks in Play"},{"value":0,"title":"Goal Converted"},{"value":0,"title":"Line Breaks"},{"value":0,"title":"Defenders Beaten"},{"value":0,"title":"Tries"},{"value":0,"title":"Try Assists"}],"profile":[{"value":"2%","title":"Points","type":1,"key":"points","raw":0,"top":217,"color":"#cf403a"},{"value":"2%","title":"Kicks in Play","type":1,"key":"kicksInPlay","raw":2,"top":179,"color":"#cf403a"},{"value":"2%","title":"Goal Converted","type":1,"key":"successfulGoals","raw":0,"top":90,"color":"#cf403a"},{"value":"2%","title":"Line Breaks","type":1,"key":"cleanBreak","raw":0,"top":21,"color":"#cf403a"},{"value":"2%","title":"Defenders Beaten","type":1,"key":"defenderBeaten","raw":0,"top":68,"color":"#cf403a"},{"value":"2%","title":"Tries","type":1,"key":"tryScored","raw":0,"top":6,"color":"#cf403a"},{"value":"2%","title":"Try Assists","type":1,"key":"tryAssist","raw":0,"top":16,"color":"#cf403a"}]},"group":{"groups":[{"title":"Attack","stats":[{"title":"Points","value":{"value":0,"title":"Points"},"overall":{"value":"2%","title":"Points","type":1,"key":"points","raw":0,"top":217,"color":"#cf403a"}},{"title":"Tries","value":{"value":0,"title":"Tries"},"overall":{"value":"2%","title":"Tries","type":1,"key":"tryScored","raw":0,"top":6,"color":"#cf403a"}},{"title":"Line Breaks","value":{"value":0,"title":"Line Breaks"},"overall":{"value":"2%","title":"Line Breaks","type":1,"key":"cleanBreak","raw":0,"top":21,"color":"#cf403a"}},{"title":"Carries","value":{"value":2,"title":"Carries"},"overall":{"value":"2%","title":"Carries","type":1,"key":"carries","raw":2,"top":189,"color":"#cf403a"}},{"title":"Carries Per Minute","value":{"value":0.1,"title":"Carries Per Minute"},"overall":{"value":"2%","title":"Carries Per Minute","type":1,"key":"carries","raw":0,"top":189,"color":"#cf403a"}},{"title":"Metres Carried","value":{"value":37,"title":"Metres Carried"},"overall":{"value":"3%","title":"Metres Carried","type":1,"key":"metresMade","raw":37,"top":1201,"color":"#d0433a"}},{"title":"Turnovers Won","value":{"value":0,"title":"Turnovers Won"},"overall":{"value":"2%","title":"Turnovers Won","type":1,"key":"turnoverWon","raw":0,"top":8,"color":"#cf403a"}},{"title":"Defenders Beaten","value":{"value":0,"title":"Defenders Beaten"},"overall":{"value":"2%","title":"Defenders Beaten","type":1,"key":"defenderBeaten","raw":0,"top":68,"color":"#cf403a"}},{"title":"Post Contact Metres","value":{"value":1,"title":"Post Contact Metres"},"overall":{"value":"2%","title":"Post Contact Metres","type":1,"key":"postContactMetres","raw":1,"top":164,"color":"#cf403a"}}]},{"title":"Defence","stats":[{"title":"Tackles Made","value":{"value":0,"title":"Tackles Made"},"overall":{"value":"2%","title":"Tackles Made","type":1,"key":"totalAttemptedTackles","raw":0,"top":185,"color":"#cf403a"}},{"title":"Tackles Completed","value":{"value":0,"title":"Tackles Completed"},"overall":{"value":"2%","title":"Tackles Completed","type":1,"key":"totalSuccessfulTackles","raw":0,"top":152,"color":"#cf403a"}},{"title":"Dominant Tackles","value":{"value":0,"title":"Dominant Tackles"},"overall":{"value":"2%","title":"Dominant Tackles","type":1,"key":"dominantTackleContact","raw":0,"top":4,"color":"#cf403a"}},{"title":"Tackles Per Minute","value":{"value":0,"title":"Tackles Per Minute"},"overall":{"value":"2%","title":"Tackles Per Minute","type":1,"key":"tackle","raw":0,"top":152,"color":"#cf403a"}},{"title":"Turnovers Won","value":{"value":0,"title":"Turnovers Won"},"overall":{"value":"2%","title":"Turnovers Won","type":1,"key":"turnoverWon","raw":0,"top":8,"color":"#cf403a"}}]},{"title":"Passing","stats":[{"title":"Try Assists","value":{"value":0,"title":"Try Assists"},"overall":{"value":"2%","title":"Try Assists","type":1,"key":"tryAssist","raw":0,"top":16,"color":"#cf403a"}},{"title":"Successful Passes","value":{"value":2,"title":"Successful Passes"},"overall":{"value":"2%","title":"Successful Passes","type":1,"key":"passes","raw":2,"top":414,"color":"#cf403a"}},{"title":"Bad Passes","value":{"value":0,"title":"Bad Passes"},"overall":{"value":"2%","title":"Bad Passes","type":1,"key":"badPass","raw":0,"top":4,"color":"#cf403a"}},{"title":"Pass Accuracy","value":{"value":"100%","title":"Pass Accuracy"},"overall":{"value":"100%","title":"Pass Accuracy","type":1,"key":"pass_accuracy","raw":"100%","top":0,"color":"#479d6c"}}]},{"title":"Kicking","stats":[{"title":"Successful Penalties","value":{"value":0,"title":"Successful Penalties"},"overall":{"value":"2%","title":"Successful Penalties","type":1,"key":"penaltyGoal","raw":0,"top":24,"color":"#cf403a"}},{"title":"Successful Conversions","value":{"value":0,"title":"Successful Conversions"},"overall":{"value":"2%","title":"Successful Conversions","type":1,"key":"conversion","raw":0,"top":66,"color":"#cf403a"}},{"title":"Kicks in Play","value":{"value":2,"title":"Kicks in Play"},"overall":{"value":"2%","title":"Kicks in Play","type":1,"key":"kicksInPlay","raw":2,"top":179,"color":"#cf403a"}},{"title":"Drop Goals","value":{"value":0,"title":"Drop Goals"},"overall":{"value":"2%","title":"Drop Goals","type":1,"key":"dropGoal","raw":0,"top":2,"color":"#cf403a"}},{"title":"Goals Converted","value":{"value":0,"title":"Goals Converted"},"overall":{"value":"2%","title":"Goals Converted","type":1,"key":"successfulGoals","raw":0,"top":90,"color":"#cf403a"}}]},{"title":"Discipline","stats":[{"title":"Penalties Conceded","value":{"value":0,"title":"Penalties Conceded"},"overall":{"value":"2%","title":"Penalties Conceded","type":1,"key":"penaltyConceded","raw":0,"top":18,"color":"#cf403a"}},{"title":"Yellow Cards","value":{"value":0,"title":"Yellow Cards"},"overall":{"value":"2%","title":"Yellow Cards","type":1,"key":"yellowCard","raw":0,"top":2,"color":"#cf403a"}},{"title":"Red Cards","value":{"value":0,"title":"Red Cards"},"overall":{"value":"2%","title":"Red Cards","type":1,"key":"redCard","raw":0,"top":0,"color":"#ce3d3b"}}]}]}}]
[{"title":"Japan Rugby League One","logo":"Japan Rugby League One","id":"2074","games":[{"title":"Tokyo Sungoliath vs Black Rams Tokyo","date":"9 May 2026","dateSmall":"9 May","time":1778391000,"compLogo":"https:\/\/eu-cdn.rugbypass.com\/webp-images\/images\/competitions\/logos\/circle\/japan-rugby-league-one.png.webp?maxw=72&v=1762927428","compTitle":"Japan Rugby League One","draw":false,"win":false,"opposition":{"name":"Tokyo Sungoliath","id":"3908","logo":"https:\/\/eu-cdn.rugbypass.com\/webp-images\/images\/team-images\/logos\/png\/5209.png.webp?maxw=72&v=1762927735"},"stats":{"mins":12,"tries":0,"yellow_cards":0,"red_cards":0,"conversions":0}},{"title":"Black Rams Tokyo vs Kubota Spears","date":"2 May 2026","dateSmall":"2 May","time":1777780800,"compLogo":"https:\/\/eu-cdn.rugbypass.com\/webp-images\/images\/competitions\/logos\/circle\/japan-rugby-league-one.png.webp?maxw=72&v=1762927428","compTitle":"Japan Rugby League One","draw":false,"win":false,"opposition":{"name":"Kubota Spears","id":"1525","logo":"https:\/\/eu-cdn.rugbypass.com\/webp-images\/images\/team-images\/logos\/png\/5204.png.webp?maxw=72&v=1762927735"},"stats":{"mins":80,"tries":0,"yellow_cards":0,"red_cards":0,"conversions":0}},{"title":"Honda Heat vs Black Rams Tokyo","date":"17 Apr 2026","dateSmall":"17 Apr","time":1776420000,"compLogo":"https:\/\/eu-cdn.rugbypass.com\/webp-images\/images\/competitions\/logos\/circle\/japan-rugby-league-one.png.webp?maxw=72&v=1762927428","compTitle":"Japan Rugby League One","draw":false,"win":true,"opposition":{"name":"Mie Honda Heat","id":"6343","logo":"https:\/\/eu-cdn.rugbypass.com\/webp-images\/images\/team-images\/logos\/png\/10005202.png.webp?maxw=72&v=1762927733"},"stats":{"mins":6,"tries":0,"yellow_cards":0,"red_cards":0,"conversions":0}},{"title":"Black Rams Tokyo vs Kobe Kobelco Steelers","date":"4 Apr 2026","dateSmall":"4 Apr","time":1775361600,"compLogo":"https:\/\/eu-cdn.rugbypass.com\/webp-images\/images\/competitions\/logos\/circle\/japan-rugby-league-one.png.webp?maxw=72&v=1762927428","compTitle":"Japan Rugby League One","draw":false,"win":false,"opposition":{"name":"Kobelco Kobe Steelers","id":"1314","logo":"https:\/\/eu-cdn.rugbypass.com\/webp-images\/images\/team-images\/logos\/png\/5203.png.webp?maxw=72&v=1762927735"},"stats":{"mins":22,"tries":0,"yellow_cards":0,"red_cards":0,"conversions":0}},{"title":"Black Rams Tokyo vs Mitsubishi DynaBoars","date":"28 Mar 2026","dateSmall":"28 Mar","time":1774762200,"compLogo":"https:\/\/eu-cdn.rugbypass.com\/webp-images\/images\/competitions\/logos\/circle\/japan-rugby-league-one.png.webp?maxw=72&v=1762927428","compTitle":"Japan Rugby League One","draw":false,"win":true,"opposition":{"name":"Mitsubishi Sagamihara Dynaboars","id":"1652","logo":"https:\/\/eu-cdn.rugbypass.com\/webp-images\/images\/team-images\/logos\/png\/594.png.webp?maxw=72&v=1762927735"},"stats":{"mins":13,"tries":0,"yellow_cards":0,"red_cards":0,"conversions":0}},{"title":"Saitama Wild Knights vs Black Rams Tokyo","date":"20 Mar 2026","dateSmall":"20 Mar","time":1774071000,"compLogo":"https:\/\/eu-cdn.rugbypass.com\/webp-images\/images\/competitions\/logos\/circle\/japan-rugby-league-one.png.webp?maxw=72&v=1762927428","compTitle":"Japan Rugby League One","draw":false,"win":false,"opposition":{"name":"Saitama Wild Knights","id":"3459","logo":"https:\/\/eu-cdn.rugbypass.com\/webp-images\/images\/team-images\/logos\/png\/19567.png.webp?maxw=72&v=1762927734"},"stats":{"mins":19,"tries":0,"yellow_cards":0,"red_cards":0,"conversions":0}},{"title":"Black Rams Tokyo vs Shizuoka Blue Revs","date":"13 Mar 2026","dateSmall":"13 Mar","time":1773460800,"compLogo":"https:\/\/eu-cdn.rugbypass.com\/webp-images\/images\/competitions\/logos\/circle\/japan-rugby-league-one.png.webp?maxw=72&v=1762927428","compTitle":"Japan Rugby League One","draw":false,"win":true,"opposition":{"name":"Shizuoka BlueRevs","id":"4749","logo":"https:\/\/eu-cdn.rugbypass.com\/webp-images\/images\/team-images\/logos\/png\/5212.png.webp?maxw=72&v=1762927735"},"stats":{"mins":11,"tries":0,"yellow_cards":0,"red_cards":0,"conversions":1}},{"title":"Black Rams Tokyo vs Urayasu D-Rocks","date":"20 Feb 2026","dateSmall":"20 Feb","time":1771646400,"compLogo":"https:\/\/eu-cdn.rugbypass.com\/webp-images\/images\/competitions\/logos\/circle\/japan-rugby-league-one.png.webp?maxw=72&v=1762927428","compTitle":"Japan Rugby League One","draw":false,"win":true,"opposition":{"name":"Urayasu D-Rocks","id":"4788","logo":"https:\/\/eu-cdn.rugbypass.com\/webp-images\/images\/team-images\/logos\/png\/10005207.png.webp?maxw=72&v=1762927733"},"stats":{"mins":3,"tries":0,"yellow_cards":0,"red_cards":0,"conversions":0}},{"title":"Yokohama Canon Eagles vs Black Rams Tokyo","date":"13 Feb 2026","dateSmall":"13 Feb","time":1771038000,"compLogo":"https:\/\/eu-cdn.rugbypass.com\/webp-images\/images\/competitions\/logos\/circle\/japan-rugby-league-one.png.webp?maxw=72&v=1762927428","compTitle":"Japan Rugby League One","draw":false,"win":true,"opposition":{"name":"Yokohama Canon Eagles","id":"2008","logo":"https:\/\/eu-cdn.rugbypass.com\/webp-images\/images\/team-images\/logos\/png\/5200.png.webp?maxw=72&v=1762927735"},"stats":{"mins":11,"tries":0,"yellow_cards":0,"red_cards":0,"conversions":2}},{"title":"Black Rams Tokyo vs Saitama Wild Knights","date":"6 Feb 2026","dateSmall":"6 Feb","time":1770436800,"compLogo":"https:\/\/eu-cdn.rugbypass.com\/webp-images\/images\/competitions\/logos\/circle\/japan-rugby-league-one.png.webp?maxw=72&v=1762927428","compTitle":"Japan Rugby League One","draw":false,"win":false,"opposition":{"name":"Saitama Wild Knights","id":"3459","logo":"https:\/\/eu-cdn.rugbypass.com\/webp-images\/images\/team-images\/logos\/png\/19567.png.webp?maxw=72&v=1762927734"},"stats":{"mins":14,"tries":0,"yellow_cards":0,"red_cards":0,"conversions":0}},{"title":"Mitsubishi DynaBoars vs Black Rams Tokyo","date":"23 Jan 2026","dateSmall":"23 Jan","time":1769232600,"compLogo":"https:\/\/eu-cdn.rugbypass.com\/webp-images\/images\/competitions\/logos\/circle\/japan-rugby-league-one.png.webp?maxw=72&v=1762927428","compTitle":"Japan Rugby League One","draw":false,"win":true,"opposition":{"name":"Mitsubishi Sagamihara Dynaboars","id":"1652","logo":"https:\/\/eu-cdn.rugbypass.com\/webp-images\/images\/team-images\/logos\/png\/594.png.webp?maxw=72&v=1762927735"},"stats":{"mins":58,"tries":0,"yellow_cards":0,"red_cards":0,"conversions":0}},{"title":"Kobe Kobelco Steelers vs Black Rams Tokyo","date":"16 Jan 2026","dateSmall":"16 Jan","time":1768619100,"compLogo":"https:\/\/eu-cdn.rugbypass.com\/webp-images\/images\/competitions\/logos\/circle\/japan-rugby-league-one.png.webp?maxw=72&v=1762927428","compTitle":"Japan Rugby League One","draw":false,"win":false,"opposition":{"name":"Kobelco Kobe Steelers","id":"1314","logo":"https:\/\/eu-cdn.rugbypass.com\/webp-images\/images\/team-images\/logos\/png\/5203.png.webp?maxw=72&v=1762927735"},"stats":{"mins":22,"tries":0,"yellow_cards":0,"red_cards":0,"conversions":1}},{"title":"Toyota Verblitz vs Black Rams Tokyo","date":"9 Jan 2026","dateSmall":"9 Jan","time":1768023000,"compLogo":"https:\/\/eu-cdn.rugbypass.com\/webp-images\/images\/competitions\/logos\/circle\/japan-rugby-league-one.png.webp?maxw=72&v=1762927428","compTitle":"Japan Rugby League One","draw":false,"win":true,"opposition":{"name":"Toyota Verblitz","id":"1886","logo":"https:\/\/eu-cdn.rugbypass.com\/webp-images\/images\/team-images\/logos\/png\/5211.png.webp?maxw=72&v=1762927735"},"stats":{"mins":25,"tries":0,"yellow_cards":0,"red_cards":0,"conversions":0}},{"title":"Black Rams Tokyo vs Honda Heat","date":"10 May 2025","dateSmall":"10 May","time":1746941400,"compLogo":"https:\/\/eu-cdn.rugbypass.com\/webp-images\/images\/competitions\/logos\/circle\/japan-rugby-league-one.png.webp?maxw=72&v=1762927428","compTitle":"Japan Rugby League One","draw":false,"win":true,"opposition":{"name":"Mie Honda Heat","id":"6343","logo":"https:\/\/eu-cdn.rugbypass.com\/webp-images\/images\/team-images\/logos\/png\/10005202.png.webp?maxw=72&v=1762927733"},"stats":{"mins":80,"tries":0,"yellow_cards":0,"red_cards":0,"conversions":0}},{"title":"Tokyo Sungoliath vs Black Rams Tokyo","date":"2 May 2025","dateSmall":"2 May","time":1746244800,"compLogo":"https:\/\/eu-cdn.rugbypass.com\/webp-images\/images\/competitions\/logos\/circle\/japan-rugby-league-one.png.webp?maxw=72&v=1762927428","compTitle":"Japan Rugby League One","draw":false,"win":false,"opposition":{"name":"Tokyo Sungoliath","id":"3908","logo":"https:\/\/eu-cdn.rugbypass.com\/webp-images\/images\/team-images\/logos\/png\/5209.png.webp?maxw=72&v=1762927735"},"stats":{"mins":80,"tries":0,"yellow_cards":0,"red_cards":0,"conversions":0}},{"title":"Saitama Wild Knights vs Black Rams Tokyo","date":"25 Apr 2025","dateSmall":"25 Apr","time":1745645400,"compLogo":"https:\/\/eu-cdn.rugbypass.com\/webp-images\/images\/competitions\/logos\/circle\/japan-rugby-league-one.png.webp?maxw=72&v=1762927428","compTitle":"Japan Rugby League One","draw":false,"win":false,"opposition":{"name":"Saitama Wild Knights","id":"3459","logo":"https:\/\/eu-cdn.rugbypass.com\/webp-images\/images\/team-images\/logos\/png\/19567.png.webp?maxw=72&v=1762927734"},"stats":{"mins":80,"tries":1,"yellow_cards":0,"red_cards":0,"conversions":0}},{"title":"Black Rams Tokyo vs Toyota Verblitz","date":"12 Apr 2025","dateSmall":"12 Apr","time":1744522200,"compLogo":"https:\/\/eu-cdn.rugbypass.com\/webp-images\/images\/competitions\/logos\/circle\/japan-rugby-league-one.png.webp?maxw=72&v=1762927428","compTitle":"Japan Rugby League One","draw":false,"win":true,"opposition":{"name":"Toyota Verblitz","id":"1886","logo":"https:\/\/eu-cdn.rugbypass.com\/webp-images\/images\/team-images\/logos\/png\/5211.png.webp?maxw=72&v=1762927735"},"stats":{"mins":51,"tries":0,"yellow_cards":0,"red_cards":0,"conversions":0}},{"title":"Black Rams Tokyo vs Kubota Spears","date":"5 Apr 2025","dateSmall":"5 Apr","time":1743917400,"compLogo":"https:\/\/eu-cdn.rugbypass.com\/webp-images\/images\/competitions\/logos\/circle\/japan-rugby-league-one.png.webp?maxw=72&v=1762927428","compTitle":"Japan Rugby League One","draw":false,"win":false,"opposition":{"name":"Kubota Spears","id":"1525","logo":"https:\/\/eu-cdn.rugbypass.com\/webp-images\/images\/team-images\/logos\/png\/5204.png.webp?maxw=72&v=1762927735"},"stats":{"mins":17,"tries":0,"yellow_cards":0,"red_cards":0,"conversions":0}},{"title":"Black Rams Tokyo vs Kobe Kobelco Steelers","date":"29 Mar 2025","dateSmall":"29 Mar","time":1743312600,"compLogo":"https:\/\/eu-cdn.rugbypass.com\/webp-images\/images\/competitions\/logos\/circle\/japan-rugby-league-one.png.webp?maxw=72&v=1762927428","compTitle":"Japan Rugby League One","draw":false,"win":false,"opposition":{"name":"Kobelco Kobe Steelers","id":"1314","logo":"https:\/\/eu-cdn.rugbypass.com\/webp-images\/images\/team-images\/logos\/png\/5203.png.webp?maxw=72&v=1762927735"},"stats":{"mins":2,"tries":0,"yellow_cards":0,"red_cards":0,"conversions":0}},{"title":"Shizuoka Blue Revs vs Black Rams Tokyo","date":"21 Mar 2025","dateSmall":"21 Mar","time":1742621400,"compLogo":"https:\/\/eu-cdn.rugbypass.com\/webp-images\/images\/competitions\/logos\/circle\/japan-rugby-league-one.png.webp?maxw=72&v=1762927428","compTitle":"Japan Rugby League One","draw":false,"win":false,"opposition":{"name":"Shizuoka BlueRevs","id":"4749","logo":"https:\/\/eu-cdn.rugbypass.com\/webp-images\/images\/team-images\/logos\/png\/5212.png.webp?maxw=72&v=1762927735"},"stats":{"mins":5,"tries":0,"yellow_cards":0,"red_cards":0,"conversions":0}},{"title":"Yokohama Canon Eagles vs Black Rams Tokyo","date":"14 Mar 2025","dateSmall":"14 Mar","time":1742016600,"compLogo":"https:\/\/eu-cdn.rugbypass.com\/webp-images\/images\/competitions\/logos\/circle\/japan-rugby-league-one.png.webp?maxw=72&v=1762927428","compTitle":"Japan Rugby League One","draw":false,"win":true,"opposition":{"name":"Yokohama Canon Eagles","id":"2008","logo":"https:\/\/eu-cdn.rugbypass.com\/webp-images\/images\/team-images\/logos\/png\/5200.png.webp?maxw=72&v=1762927735"},"stats":{"mins":12,"tries":0,"yellow_cards":0,"red_cards":0,"conversions":0}},{"title":"Mitsubishi DynaBoars vs Black Rams Tokyo","date":"28 Feb 2025","dateSmall":"28 Feb","time":1740798000,"compLogo":"https:\/\/eu-cdn.rugbypass.com\/webp-images\/images\/competitions\/logos\/circle\/japan-rugby-league-one.png.webp?maxw=72&v=1762927428","compTitle":"Japan Rugby League One","draw":false,"win":true,"opposition":{"name":"Mitsubishi Sagamihara Dynaboars","id":"1652","logo":"https:\/\/eu-cdn.rugbypass.com\/webp-images\/images\/team-images\/logos\/png\/594.png.webp?maxw=72&v=1762927735"},"stats":{"mins":14,"tries":0,"yellow_cards":0,"red_cards":0,"conversions":0}},{"title":"Black Rams Tokyo vs Toshiba Brave Lupus","date":"21 Feb 2025","dateSmall":"21 Feb","time":1740193200,"compLogo":"https:\/\/eu-cdn.rugbypass.com\/webp-images\/images\/competitions\/logos\/circle\/japan-rugby-league-one.png.webp?maxw=72&v=1762927428","compTitle":"Japan Rugby League One","draw":false,"win":false,"opposition":{"name":"Toshiba Brave Lupus Tokyo","id":"3342","logo":"https:\/\/eu-cdn.rugbypass.com\/webp-images\/images\/team-images\/logos\/png\/19702.png.webp?maxw=72&v=1762927734"},"stats":{"mins":72,"tries":0,"yellow_cards":0,"red_cards":0,"conversions":0}},{"title":"Black Rams Tokyo vs Urayasu D-Rocks","date":"14 Feb 2025","dateSmall":"14 Feb","time":1739597400,"compLogo":"https:\/\/eu-cdn.rugbypass.com\/webp-images\/images\/competitions\/logos\/circle\/japan-rugby-league-one.png.webp?maxw=72&v=1762927428","compTitle":"Japan Rugby League One","draw":false,"win":true,"opposition":{"name":"Urayasu D-Rocks","id":"4788","logo":"https:\/\/eu-cdn.rugbypass.com\/webp-images\/images\/team-images\/logos\/png\/10005207.png.webp?maxw=72&v=1762927733"},"stats":{"mins":80,"tries":2,"yellow_cards":0,"red_cards":0,"conversions":0}},{"title":"Black Rams Tokyo vs Shizuoka Blue Revs","date":"7 Feb 2025","dateSmall":"7 Feb","time":1738983600,"compLogo":"https:\/\/eu-cdn.rugbypass.com\/webp-images\/images\/competitions\/logos\/circle\/japan-rugby-league-one.png.webp?maxw=72&v=1762927428","compTitle":"Japan Rugby League One","draw":false,"win":false,"opposition":{"name":"Shizuoka BlueRevs","id":"4749","logo":"https:\/\/eu-cdn.rugbypass.com\/webp-images\/images\/team-images\/logos\/png\/5212.png.webp?maxw=72&v=1762927735"},"stats":{"mins":59,"tries":0,"yellow_cards":0,"red_cards":0,"conversions":0}},{"title":"Kobe Kobelco Steelers vs Black Rams Tokyo","date":"31 Jan 2025","dateSmall":"31 Jan","time":1738378800,"compLogo":"https:\/\/eu-cdn.rugbypass.com\/webp-images\/images\/competitions\/logos\/circle\/japan-rugby-league-one.png.webp?maxw=72&v=1762927428","compTitle":"Japan Rugby League One","draw":false,"win":false,"opposition":{"name":"Kobelco Kobe Steelers","id":"1314","logo":"https:\/\/eu-cdn.rugbypass.com\/webp-images\/images\/team-images\/logos\/png\/5203.png.webp?maxw=72&v=1762927735"},"stats":{"mins":71,"tries":0,"yellow_cards":0,"red_cards":0,"conversions":0}},{"title":"Kubota Spears vs Black Rams Tokyo","date":"17 Jan 2025","dateSmall":"17 Jan","time":1737169200,"compLogo":"https:\/\/eu-cdn.rugbypass.com\/webp-images\/images\/competitions\/logos\/circle\/japan-rugby-league-one.png.webp?maxw=72&v=1762927428","compTitle":"Japan Rugby League One","draw":false,"win":false,"opposition":{"name":"Kubota Spears","id":"1525","logo":"https:\/\/eu-cdn.rugbypass.com\/webp-images\/images\/team-images\/logos\/png\/5204.png.webp?maxw=72&v=1762927735"},"stats":{"mins":69,"tries":0,"yellow_cards":0,"red_cards":0,"conversions":1}},{"title":"Toyota Verblitz vs Black Rams Tokyo","date":"10 Jan 2025","dateSmall":"10 Jan","time":1736574000,"compLogo":"https:\/\/eu-cdn.rugbypass.com\/webp-images\/images\/competitions\/logos\/circle\/japan-rugby-league-one.png.webp?maxw=72&v=1762927428","compTitle":"Japan Rugby League One","draw":false,"win":false,"opposition":{"name":"Toyota Verblitz","id":"1886","logo":"https:\/\/eu-cdn.rugbypass.com\/webp-images\/images\/team-images\/logos\/png\/5211.png.webp?maxw=72&v=1762927735"},"stats":{"mins":80,"tries":1,"yellow_cards":0,"red_cards":0,"conversions":0}},{"title":"Black Rams Tokyo vs Saitama Wild Knights","date":"3 Jan 2025","dateSmall":"3 Jan","time":1735963200,"compLogo":"https:\/\/eu-cdn.rugbypass.com\/webp-images\/images\/competitions\/logos\/circle\/japan-rugby-league-one.png.webp?maxw=72&v=1762927428","compTitle":"Japan Rugby League One","draw":false,"win":false,"opposition":{"name":"Saitama Wild Knights","id":"3459","logo":"https:\/\/eu-cdn.rugbypass.com\/webp-images\/images\/team-images\/logos\/png\/19567.png.webp?maxw=72&v=1762927734"},"stats":{"mins":16,"tries":0,"yellow_cards":0,"red_cards":0,"conversions":0}},{"title":"Black Rams Tokyo vs Tokyo Sungoliath","date":"27 Dec 2024","dateSmall":"27 Dec","time":1735358400,"compLogo":"https:\/\/eu-cdn.rugbypass.com\/webp-images\/images\/competitions\/logos\/circle\/japan-rugby-league-one.png.webp?maxw=72&v=1762927428","compTitle":"Japan Rugby League One","draw":false,"win":true,"opposition":{"name":"Tokyo Sungoliath","id":"3908","logo":"https:\/\/eu-cdn.rugbypass.com\/webp-images\/images\/team-images\/logos\/png\/5209.png.webp?maxw=72&v=1762927735"},"stats":{"mins":5,"tries":0,"yellow_cards":0,"red_cards":0,"conversions":0}},{"title":"Honda Heat vs Black Rams Tokyo","date":"20 Dec 2024","dateSmall":"20 Dec","time":1734750600,"compLogo":"https:\/\/eu-cdn.rugbypass.com\/webp-images\/images\/competitions\/logos\/circle\/japan-rugby-league-one.png.webp?maxw=72&v=1762927428","compTitle":"Japan Rugby League One","draw":false,"win":false,"opposition":{"name":"Mie Honda Heat","id":"6343","logo":"https:\/\/eu-cdn.rugbypass.com\/webp-images\/images\/team-images\/logos\/png\/10005202.png.webp?maxw=72&v=1762927733"},"stats":{"mins":80,"tries":0,"yellow_cards":0,"red_cards":0,"conversions":0}},{"title":"Black Rams Tokyo vs Toyota Verblitz","date":"4 May 2024","dateSmall":"4 May","time":1714887300,"compLogo":"https:\/\/eu-cdn.rugbypass.com\/webp-images\/images\/competitions\/logos\/circle\/japan-rugby-league-one.png.webp?maxw=72&v=1762927428","compTitle":"Japan Rugby League One","draw":false,"win":false,"opposition":{"name":"Toyota Verblitz","id":"1886","logo":"https:\/\/eu-cdn.rugbypass.com\/webp-images\/images\/team-images\/logos\/png\/5211.png.webp?maxw=72&v=1762927735"},"stats":{"mins":21,"tries":0,"yellow_cards":0,"red_cards":0,"conversions":0}}]}]
Kotaro Ito Stats
Stats compared to other Fly Halfs
![]() {{selectedCompetition.competition.name}} {{selectedCompetition.competition.season.label}}
-
![]() {{item.competition.name}} {{item.competition.season.label}}
{{graphStats[0].value}}
{{graphStats[0].title}}
{{graphStats[1].value}}
{{graphStats[1].title}}
{{graphStats[2].title}}
{{graphStats[2].value}}
{{graphStats[3].title}}
{{graphStats[3].value}}
{{graphStats[4].title}}
{{graphStats[4].value}}
{{graphStats[5].value}}
{{graphStats[5].title}}
Kotaro Ito Stats
Stats compared to other Fly Halfs
{{item.title}}
{{item.value}}
Match Stats
![]() {{selectedMatchesComp}}
- All
-
![]() {{item.title}}
9 May 2026
9 May
L
v

Tokyo Sungoliath
2 May 2026
2 May
L
v

Kubota Spears
17 Apr 2026
17 Apr
W
v

Mie Honda Heat
4 Apr 2026
4 Apr
L
v

Kobelco Kobe Steelers
28 Mar 2026
28 Mar
W
v

Mitsubishi Sagamihara Dynaboars
20 Mar 2026
20 Mar
L
v

Saitama Wild Knights
13 Mar 2026
13 Mar
W
v

Shizuoka BlueRevs
20 Feb 2026
20 Feb
W
v

Urayasu D-Rocks
13 Feb 2026
13 Feb
W
v

Yokohama Canon Eagles
6 Feb 2026
6 Feb
L
v
Saitama Wild Knights
{{game.date}}
{{game.dateSmall}}
W L
v
![]()
{{game.stats.mins}}
{{game.stats.tries}}
{{game.stats.conversions}}
{{game.stats.yellow_cards}}
{{game.stats.red_cards}}
Kotaro Ito Performance Analysis
Japan Rugby League One 2025/2026
Kotaro Ito featured in 16 matches during the 2025/2026 Japan Rugby League One, representing BlackRams Tokyo. Results included 8 wins and 8 losses.
Kotaro Ito represented BlackRams Tokyo in the 2025/2026 Japan Rugby League One season, who finished 4th in the regular season table.
Kotaro Ito played 296 minutes across the Japan Rugby League One 2025/2026. In attack he made 204m with ball in hand, beating 13 defenders and scoring 0 tries. Defensively he completed 23 tackles at a rate of 1.44 per game.
In the Japan Rugby League One 2025/2026, Kotaro Ito completed 57 passes at an accuracy of 92%, contributing 0 try assists and making 91 touches.