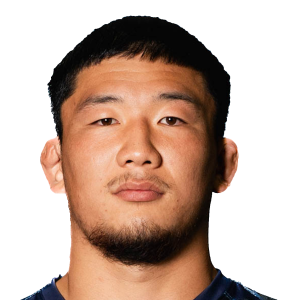
Kazuki Ban News

International
Uruguay star handed 13-game ban for knee-breaking tackle
Beno Obano set to bring England career to a halt with Top 14 move
Bath in battle to keep hold of England prop Beno Obano
Ben Gunter’s remarkable journey from Brisbane groundskeeper to Japan star
Latest
Apologetic Tomás Albornoz cops ban for angry confrontation
'We’ve brought in big men who like to bang': Alex Sanderson
There's been an update on the Gonzalo Quesada match-day ban
World Rugby statement: Gonzalo Quesada banned under new match official abuse process
Italy lock handed lengthy ban after Nations Championship red card
England name Six Nations regular as George Furbank's replacement
[{"competition":{"rid":"1002","oid":"421","name":"Japan Rugby League One","logo":"https:\/\/eu-cdn.rugbypass.com\/images\/competitions\/logos\/png\/japan-rugby-league-one.png?v=1762927429","logoCircle":"https:\/\/eu-cdn.rugbypass.com\/images\/competitions\/logos\/circle\/japan-rugby-league-one.png?v=1762927428","season":{"type":"opta","season":2026,"years":{"2025":2025,"2026":2026},"label":"2025\/2026","completed":1,"standings":1,"started":1,"months":0,"games":114},"stats":{"success":1,"stats":{"att_ruck_arrival_effectiveness":0.9,"att_scrum_involvement_perc":0.89,"av_gain":1.17,"av_post_contact_metres":1.08,"bad_passes":1,"balls_played_total":27,"balls_played_with_hands":27,"carries":23,"carries_crossed_gain_line":13,"carries_not_made_gain_line":7,"carries_one_out_drive":18,"carries_one_out_drive_metres":18,"carries_pick_and_go":2,"carries_pick_and_go_metres":3,"carries_support_metres":3,"carry_dominant":7,"carry_neutral":16,"defenders_beaten":1,"dominant_carry_percent":0.3,"dominant_tackles":2,"handling_error":1,"metres":27,"minutes_played_total":257,"missed_tackles":12,"passes":4,"pen_defs":2,"pen_offs":2,"penalties_conceded":4,"player_id":37877,"player_team_id":5202,"points":0,"post_contact_metres":25,"ruck_arrival":77,"ruck_arrival_attack":59,"ruck_arrival_defence":18,"ruck_arrivals_within_1st_3":73,"tackle_height_legs":20,"tackle_height_legs_percentage":1.27,"tackle_height_lower_torso":17,"tackle_height_lower_torso_percentage":1.08,"tackle_height_no_contact":6,"tackle_height_no_contact_percentage":0.38,"tackle_height_upper_torso":20,"tackle_height_upper_torso_percentage":1.27,"tackle_offload_allowed":8,"tackle_penalty_conceded":1,"tackle_try_saver":1,"tackle_turnover":1,"tackles":42,"tackles_success":0.67,"tackles_total_attempted":63,"total_games":11,"total_tackles":63,"touches":28,"turnovers_conceded":1,"turnovers_won":1},"topPlayerStats":{"att_ruck_arrival_effectiveness":{"id":56066,"value":1},"att_scrum_involvement_perc":{"id":56066,"value":1},"av_gain":{"id":30970,"value":4.9},"av_post_contact_metres":{"id":62133,"value":4.9},"bad_passes":{"id":36518,"value":8},"balls_played_total":{"id":36518,"value":162},"balls_played_with_hands":{"id":36518,"value":162},"carries":{"id":36518,"value":133},"carries_crossed_gain_line":{"id":36518,"value":87},"carries_not_made_gain_line":{"id":18582,"value":44},"carries_one_out_drive":{"id":36518,"value":93},"carries_one_out_drive_metres":{"id":36518,"value":202},"carries_pick_and_go":{"id":65334,"value":15},"carries_pick_and_go_metres":{"id":37874,"value":52},"carries_support_metres":{"id":36545,"value":43},"carry_dominant":{"id":36518,"value":52},"carry_ineffective":{"id":58075,"value":8},"carry_neutral":{"id":36518,"value":77},"def_ruck_arrival_effectiveness":{"id":58206,"value":0.5},"dominant_carry_percent":{"id":62133,"value":1},"dominant_tackles":{"id":36518,"value":12},"handling_error":{"id":36518,"value":10},"line_break_assists":{"id":58073,"value":3},"metres":{"id":36518,"value":367},"minutes_played_total":{"id":58073,"value":1173},"missed_tackles":{"id":59219,"value":27},"offloads":{"id":36518,"value":23},"passes":{"id":36518,"value":54},"pen_defs":{"id":32321,"value":24},"pen_offs":{"id":23998,"value":8},"penalties_conceded":{"id":32321,"value":29},"player_id":{"id":70084,"value":70084},"player_team_id":{"id":20601,"value":19702},"points":{"id":36518,"value":30},"post_contact_metres":{"id":36518,"value":358},"ruck_arrival":{"id":37874,"value":326},"ruck_arrival_attack":{"id":37874,"value":273},"ruck_arrival_defence":{"id":34481,"value":60},"ruck_arrivals_within_1st_3":{"id":20930,"value":269},"tackle_height_legs":{"id":43575,"value":80},"tackle_height_legs_percentage":{"id":25156,"value":3.2},"tackle_height_lower_torso":{"id":20930,"value":61},"tackle_height_lower_torso_percentage":{"id":28938,"value":4},"tackle_height_no_contact":{"id":58207,"value":11},"tackle_height_no_contact_percentage":{"id":62133,"value":1},"tackle_height_upper_torso":{"id":37874,"value":72},"tackle_height_upper_torso_percentage":{"id":30970,"value":3.33},"tackle_offload_allowed":{"id":59219,"value":11},"tackles":{"id":37874,"value":153},"tackles_success":{"id":28938,"value":1},"tackles_total_attempted":{"id":37874,"value":187},"tackles_try_conceded":{"id":36558,"value":4},"total_games":{"id":37874,"value":21},"total_tackles":{"id":37874,"value":187},"touches":{"id":36518,"value":164},"turnovers_conceded":{"id":36518,"value":10},"clean_breaks":{"id":18582,"value":4},"tackle_turnover":{"id":36518,"value":4},"turnovers_won":{"id":61896,"value":5},"yellow_cards":{"id":30972,"value":2},"defenders_beaten":{"id":36518,"value":28},"lineout_takes":{"id":36508,"value":8},"tackle_penalty_conceded":{"id":20930,"value":6},"tackle_try_saver":{"id":58073,"value":3},"kick_metres":{"id":24416,"value":44},"kicks_from_hand":{"id":24416,"value":1},"tries":{"id":36518,"value":6},"lineouts_to_own_player":{"id":56066,"value":4},"lineouts_won":{"id":56066,"value":4},"throws_lost":{"id":56066,"value":5},"try_assist":{"id":59219,"value":1},"lineout_won_steal":{"id":37874,"value":1},"carries_kick_return":{"id":36518,"value":2},"carries_kick_return_metres":{"id":36518,"value":4},"retained_kicks_percentage":{"id":23418,"value":1},"red_cards":{"id":24043,"value":1}}}},"main":{"totalMinsPlayed":257,"main":[{"value":0.67,"title":"Tackles Completed"},{"value":23,"title":"Carries"},{"value":0,"title":"Tries"},{"value":27,"title":"Metres Carried"},{"value":1,"title":"Turnovers Won"},{"value":2,"title":"Dominant Tackles"},{"value":0,"title":"Try Assists"}],"profile":[{"value":"67%","title":"Tackles Completed","type":1,"key":"tackles_success","raw":0.67,"top":1,"color":"#b0bb45"},{"value":"17%","title":"Carries","type":1,"key":"carries","raw":23,"top":133,"color":"#d96636"},{"value":"2%","title":"Tries","type":1,"key":"tries","raw":0,"top":6,"color":"#cf403a"},{"value":"7%","title":"Metres Carried","type":1,"key":"metres","raw":27,"top":367,"color":"#d24c39"},{"value":"20%","title":"Turnovers Won","type":1,"key":"turnovers_won","raw":1,"top":5,"color":"#dc6f37"},{"value":"17%","title":"Dominant Tackles","type":1,"key":"dominant_tackles","raw":2,"top":12,"color":"#d96636"},{"value":"2%","title":"Try Assists","type":1,"key":"try_assist","raw":0,"top":1,"color":"#cf403a"}]},"group":{"groups":[{"title":"Attack","stats":[{"title":"Points","value":{"value":0,"title":"Points"},"overall":{"value":"2%","title":"Points","type":1,"key":"points","raw":0,"top":30,"color":"#cf403a"}},{"title":"Tries","value":{"value":0,"title":"Tries"},"overall":{"value":"2%","title":"Tries","type":1,"key":"tries","raw":0,"top":6,"color":"#cf403a"}},{"title":"Line Breaks","value":{"value":0,"title":"Line Breaks"},"overall":{"value":"2%","title":"Line Breaks","type":1,"key":"clean_breaks","raw":0,"top":4,"color":"#cf403a"}},{"title":"Carries","value":{"value":23,"title":"Carries"},"overall":{"value":"17%","title":"Carries","type":1,"key":"carries","raw":23,"top":133,"color":"#d96636"}},{"title":"Carries Per Minute","value":{"value":0.09,"title":"Carries Per Minute"},"overall":{"value":"2%","title":"Carries Per Minute","type":1,"key":"carries","raw":0,"top":133,"color":"#cf403a"}},{"title":"Metres Carried","value":{"value":27,"title":"Metres Carried"},"overall":{"value":"7%","title":"Metres Carried","type":1,"key":"metres","raw":27,"top":367,"color":"#d24c39"}},{"title":"Defenders Beaten","value":{"value":1,"title":"Defenders Beaten"},"overall":{"value":"4%","title":"Defenders Beaten","type":1,"key":"defenders_beaten","raw":1,"top":28,"color":"#d04439"}},{"title":"Turnovers Won","value":{"value":1,"title":"Turnovers Won"},"overall":{"value":"20%","title":"Turnovers Won","type":1,"key":"turnovers_won","raw":1,"top":5,"color":"#dc6f37"}},{"title":"Defenders Beaten","value":{"value":1,"title":"Defenders Beaten"},"overall":{"value":"4%","title":"Defenders Beaten","type":1,"key":"defenders_beaten","raw":1,"top":28,"color":"#d04439"}},{"title":"Touches","value":{"value":28,"title":"Touches"},"overall":{"value":"17%","title":"Touches","type":1,"key":"touches","raw":28,"top":164,"color":"#d96636"}},{"title":"Post Contact Metres","value":{"value":25,"title":"Post Contact Metres"},"overall":{"value":"7%","title":"Post Contact Metres","type":1,"key":"post_contact_metres","raw":25,"top":358,"color":"#d24c39"}}]},{"title":"Defence","stats":[{"title":"Tackles Made","value":{"value":42,"title":"Tackles Made"},"overall":{"value":"27%","title":"Tackles Made","type":1,"key":"tackles","raw":42,"top":153,"color":"#e18238"}},{"title":"Tackles Completed","value":{"value":0.67,"title":"Tackles Completed"},"overall":{"value":"67%","title":"Tackles Completed","type":1,"key":"tackles_success","raw":0.67,"top":1,"color":"#b0bb45"}},{"title":"Dominant Tackles","value":{"value":2,"title":"Dominant Tackles"},"overall":{"value":"17%","title":"Dominant Tackles","type":1,"key":"dominant_tackles","raw":2,"top":12,"color":"#d96636"}},{"title":"Tackles Per Minute","value":{"value":0.16,"title":"Tackles Per Minute"},"overall":{"value":"2%","title":"Tackles Per Minute","type":1,"key":"tackles","raw":0,"top":153,"color":"#cf403a"}},{"title":"Turnovers Won","value":{"value":1,"title":"Turnovers Won"},"overall":{"value":"20%","title":"Turnovers Won","type":1,"key":"turnovers_won","raw":1,"top":5,"color":"#dc6f37"}},{"title":"Ruck Arrival Effectiveness","value":{"value":0,"title":"Ruck Arrival Effectiveness"},"overall":{"value":"2%","title":"Ruck Arrival Effectiveness","type":1,"key":"def_ruck_arrival_effectiveness","raw":0,"top":0.5,"color":"#cf403a"}}]},{"title":"Passing","stats":[{"title":"Try Assists","value":{"value":0,"title":"Try Assists"},"overall":{"value":"2%","title":"Try Assists","type":1,"key":"try_assist","raw":0,"top":1,"color":"#cf403a"}},{"title":"Successful Passes","value":{"value":4,"title":"Successful Passes"},"overall":{"value":"7%","title":"Successful Passes","type":1,"key":"passes","raw":4,"top":54,"color":"#d24c39"}},{"title":"Bad Passes","value":{"value":1,"title":"Bad Passes"},"overall":{"value":"13%","title":"Bad Passes","type":1,"key":"bad_passes","raw":1,"top":8,"color":"#d75c37"}},{"title":"Pass Accuracy","value":{"value":"80%","title":"Pass Accuracy"},"overall":{"value":"100%","title":"Pass Accuracy","type":1,"key":"pass_accuracy","raw":"75%","top":0,"color":"#479d6c"}}]},{"title":"Discipline","stats":[{"title":"Penalties Conceded","value":{"value":4,"title":"Penalties Conceded"},"overall":{"value":"14%","title":"Penalties Conceded","type":1,"key":"penalties_conceded","raw":4,"top":29,"color":"#d75e37"}},{"title":"Yellow Cards","value":{"value":0,"title":"Yellow Cards"},"overall":{"value":"2%","title":"Yellow Cards","type":1,"key":"yellow_cards","raw":0,"top":2,"color":"#cf403a"}},{"title":"Red Cards","value":{"value":0,"title":"Red Cards"},"overall":{"value":"2%","title":"Red Cards","type":1,"key":"red_cards","raw":0,"top":1,"color":"#cf403a"}}]}]}}]
[{"title":"Japan Rugby League One","logo":"Japan Rugby League One","id":"421","games":[{"title":"Mie Honda Heat vs Toyota Verblitz","date":"9 May 2026","dateSmall":"9 May","time":1778339400,"compLogo":"https:\/\/eu-cdn.rugbypass.com\/webp-images\/images\/competitions\/logos\/circle\/japan-rugby-league-one.png.webp?maxw=72&v=1762927428","compTitle":"Japan Rugby League One","draw":false,"opposition":{"name":"Toyota Verblitz","logo":"https:\/\/eu-cdn.rugbypass.com\/webp-images\/images\/team-images\/logos\/png\/5211.png.webp?maxw=72&v=1762927735"},"win":true,"stats":{"mins":32,"tries":0,"yellow_cards":0,"red_cards":0,"conversions":0}},{"title":"Kobelco Kobe Steelers vs Mie Honda Heat","date":"2 May 2026","dateSmall":"2 May","time":1777725000,"compLogo":"https:\/\/eu-cdn.rugbypass.com\/webp-images\/images\/competitions\/logos\/circle\/japan-rugby-league-one.png.webp?maxw=72&v=1762927428","compTitle":"Japan Rugby League One","draw":false,"opposition":{"name":"Kobelco Kobe Steelers","logo":"https:\/\/eu-cdn.rugbypass.com\/webp-images\/images\/team-images\/logos\/png\/5203.png.webp?maxw=72&v=1762927735"},"win":false,"stats":{"mins":25,"tries":0,"yellow_cards":0,"red_cards":0,"conversions":0}},{"title":"Kubota Spears vs Mie Honda Heat","date":"25 Apr 2026","dateSmall":"25 Apr","time":1777120200,"compLogo":"https:\/\/eu-cdn.rugbypass.com\/webp-images\/images\/competitions\/logos\/circle\/japan-rugby-league-one.png.webp?maxw=72&v=1762927428","compTitle":"Japan Rugby League One","draw":false,"opposition":{"name":"Kubota Spears","logo":"https:\/\/eu-cdn.rugbypass.com\/webp-images\/images\/team-images\/logos\/png\/5204.png.webp?maxw=72&v=1762927735"},"win":false,"stats":{"mins":24,"tries":0,"yellow_cards":0,"red_cards":0,"conversions":0}},{"title":"Mie Honda Heat vs BlackRams Tokyo","date":"17 Apr 2026","dateSmall":"17 Apr","time":1776445200,"compLogo":"https:\/\/eu-cdn.rugbypass.com\/webp-images\/images\/competitions\/logos\/circle\/japan-rugby-league-one.png.webp?maxw=72&v=1762927428","compTitle":"Japan Rugby League One","draw":false,"opposition":{"name":"BlackRams Tokyo","logo":"https:\/\/eu-cdn.rugbypass.com\/webp-images\/images\/team-images\/logos\/png\/5208.png.webp?maxw=72&v=1762927735"},"win":false,"stats":{"mins":35,"tries":0,"yellow_cards":0,"red_cards":0,"conversions":0}},{"title":"Mie Honda Heat vs Tokyo Sungoliath","date":"4 Apr 2026","dateSmall":"4 Apr","time":1775300700,"compLogo":"https:\/\/eu-cdn.rugbypass.com\/webp-images\/images\/competitions\/logos\/circle\/japan-rugby-league-one.png.webp?maxw=72&v=1762927428","compTitle":"Japan Rugby League One","draw":false,"opposition":{"name":"Tokyo Sungoliath","logo":"https:\/\/eu-cdn.rugbypass.com\/webp-images\/images\/team-images\/logos\/png\/5209.png.webp?maxw=72&v=1762927735"},"win":true,"stats":{"mins":24,"tries":0,"yellow_cards":0,"red_cards":0,"conversions":0}},{"title":"Urayasu D-Rocks vs Mie Honda Heat","date":"29 Mar 2026","dateSmall":"29 Mar","time":1774787400,"compLogo":"https:\/\/eu-cdn.rugbypass.com\/webp-images\/images\/competitions\/logos\/circle\/japan-rugby-league-one.png.webp?maxw=72&v=1762927428","compTitle":"Japan Rugby League One","draw":false,"opposition":{"name":"Urayasu D-Rocks","logo":"https:\/\/eu-cdn.rugbypass.com\/webp-images\/images\/team-images\/logos\/png\/10005207.png.webp?maxw=72&v=1762927733"},"win":true,"stats":{"mins":24,"tries":0,"yellow_cards":0,"red_cards":0,"conversions":0}},{"title":"Urayasu D-Rocks vs Mie Honda Heat","date":"29 Mar 2026","dateSmall":"29 Mar","time":1774787400,"compLogo":"https:\/\/eu-cdn.rugbypass.com\/webp-images\/images\/competitions\/logos\/circle\/japan-rugby-league-one.png.webp?maxw=72&v=1762927428","compTitle":"Japan Rugby League One","draw":false,"opposition":{"name":"Mie Honda Heat","logo":"https:\/\/eu-cdn.rugbypass.com\/webp-images\/images\/team-images\/logos\/png\/10005202.png.webp?maxw=72&v=1762927733"},"win":false,"stats":{"mins":24,"tries":0,"yellow_cards":0,"red_cards":0,"conversions":0}},{"title":"Toshiba Brave Lupus Tokyo vs Mie Honda Heat","date":"22 Mar 2026","dateSmall":"22 Mar","time":1774182600,"compLogo":"https:\/\/eu-cdn.rugbypass.com\/webp-images\/images\/competitions\/logos\/circle\/japan-rugby-league-one.png.webp?maxw=72&v=1762927428","compTitle":"Japan Rugby League One","draw":false,"opposition":{"name":"Toshiba Brave Lupus Tokyo","logo":"https:\/\/eu-cdn.rugbypass.com\/webp-images\/images\/team-images\/logos\/png\/19702.png.webp?maxw=72&v=1762927734"},"win":true,"stats":{"mins":19,"tries":0,"yellow_cards":0,"red_cards":0,"conversions":0}},{"title":"Mie Honda Heat vs Yokohama Canon Eagles","date":"14 Mar 2026","dateSmall":"14 Mar","time":1773486000,"compLogo":"https:\/\/eu-cdn.rugbypass.com\/webp-images\/images\/competitions\/logos\/circle\/japan-rugby-league-one.png.webp?maxw=72&v=1762927428","compTitle":"Japan Rugby League One","draw":false,"opposition":{"name":"Yokohama Canon Eagles","logo":"https:\/\/eu-cdn.rugbypass.com\/webp-images\/images\/team-images\/logos\/png\/5200.png.webp?maxw=72&v=1762927735"},"win":false,"stats":{"mins":21,"tries":0,"yellow_cards":0,"red_cards":0,"conversions":0}},{"title":"Mie Honda Heat vs Toshiba Brave Lupus Tokyo","date":"7 Feb 2026","dateSmall":"7 Feb","time":1770465600,"compLogo":"https:\/\/eu-cdn.rugbypass.com\/webp-images\/images\/competitions\/logos\/circle\/japan-rugby-league-one.png.webp?maxw=72&v=1762927428","compTitle":"Japan Rugby League One","draw":false,"opposition":{"name":"Toshiba Brave Lupus Tokyo","logo":"https:\/\/eu-cdn.rugbypass.com\/webp-images\/images\/team-images\/logos\/png\/19702.png.webp?maxw=72&v=1762927734"},"win":true,"stats":{"mins":12,"tries":0,"yellow_cards":0,"red_cards":0,"conversions":0}},{"title":"Mie Honda Heat vs Urayasu D-Rocks","date":"24 Jan 2026","dateSmall":"24 Jan","time":1769256000,"compLogo":"https:\/\/eu-cdn.rugbypass.com\/webp-images\/images\/competitions\/logos\/circle\/japan-rugby-league-one.png.webp?maxw=72&v=1762927428","compTitle":"Japan Rugby League One","draw":false,"opposition":{"name":"Urayasu D-Rocks","logo":"https:\/\/eu-cdn.rugbypass.com\/webp-images\/images\/team-images\/logos\/png\/10005207.png.webp?maxw=72&v=1762927733"},"win":true,"stats":{"mins":25,"tries":0,"yellow_cards":0,"red_cards":0,"conversions":0}},{"title":"Mie Honda Heat vs Urayasu D-Rocks","date":"24 Jan 2026","dateSmall":"24 Jan","time":1769256000,"compLogo":"https:\/\/eu-cdn.rugbypass.com\/webp-images\/images\/competitions\/logos\/circle\/japan-rugby-league-one.png.webp?maxw=72&v=1762927428","compTitle":"Japan Rugby League One","draw":false,"opposition":{"name":"Mie Honda Heat","logo":"https:\/\/eu-cdn.rugbypass.com\/webp-images\/images\/team-images\/logos\/png\/10005202.png.webp?maxw=72&v=1762927733"},"win":false,"stats":{"mins":25,"tries":0,"yellow_cards":0,"red_cards":0,"conversions":0}},{"title":"Tokyo Sungoliath vs Mie Honda Heat","date":"17 Jan 2026","dateSmall":"17 Jan","time":1768655100,"compLogo":"https:\/\/eu-cdn.rugbypass.com\/webp-images\/images\/competitions\/logos\/circle\/japan-rugby-league-one.png.webp?maxw=72&v=1762927428","compTitle":"Japan Rugby League One","draw":false,"opposition":{"name":"Tokyo Sungoliath","logo":"https:\/\/eu-cdn.rugbypass.com\/webp-images\/images\/team-images\/logos\/png\/5209.png.webp?maxw=72&v=1762927735"},"win":false,"stats":{"mins":16,"tries":0,"yellow_cards":0,"red_cards":0,"conversions":0}}]}]
Kazuki Ban Stats
Stats compared to other Props
![]() {{selectedCompetition.competition.name}} {{selectedCompetition.competition.season.label}}
{{selectedCompetition.competition.name}} {{selectedCompetition.competition.season.label}} -
![]() {{item.competition.name}} {{item.competition.season.label}}
{{item.competition.name}} {{item.competition.season.label}}
{{graphStats[0].value}}
{{graphStats[0].title}}
{{graphStats[1].value}}
{{graphStats[1].title}}
{{graphStats[2].title}}
{{graphStats[2].value}}
{{graphStats[3].title}}
{{graphStats[3].value}}
{{graphStats[4].title}}
{{graphStats[4].value}}
{{graphStats[5].value}}
{{graphStats[5].title}}
Kazuki Ban Stats
Stats compared to other Props
{{item.title}}
{{item.value}}
Match Stats
![]() {{selectedMatchesComp}}
{{selectedMatchesComp}} - All
-
![]() {{item.title}}
{{item.title}}
9 May 2026
9 May
W
v

Toyota Verblitz
2 May 2026
2 May
L
v

Kobelco Kobe Steelers
25 Apr 2026
25 Apr
L
v

Kubota Spears
17 Apr 2026
17 Apr
L
v

BlackRams Tokyo
4 Apr 2026
4 Apr
W
v

Tokyo Sungoliath
29 Mar 2026
29 Mar
W
v

Urayasu D-Rocks
29 Mar 2026
29 Mar
L
v

Mie Honda Heat
22 Mar 2026
22 Mar
W
v

Toshiba Brave Lupus Tokyo
14 Mar 2026
14 Mar
L
v

Yokohama Canon Eagles
7 Feb 2026
7 Feb
W
v
Toshiba Brave Lupus Tokyo
{{game.date}}
{{game.dateSmall}}
W L
v
![]()
{{game.stats.mins}}
{{game.stats.tries}}
{{game.stats.conversions}}
{{game.stats.yellow_cards}}
{{game.stats.red_cards}}
Kazuki Ban Performance Analysis
Japan Rugby League One 2025/2026
Kazuki Ban featured in 10 matches during the 2025/2026 Japan Rugby League One, representing Tochigi Honda Heat. Results included 5 wins and 5 losses.
Kazuki Ban represented Tochigi Honda Heat in the 2025/2026 Japan Rugby League One season, who finished 5th in the regular season table.
Kazuki Ban played 257 minutes across the Japan Rugby League One 2025/2026. In attack he made 27m with ball in hand, beating 1 defenders and scoring 0 tries. Defensively he completed 42 tackles at a rate of 4.2 per game.
In the Japan Rugby League One 2025/2026, Kazuki Ban completed 4 passes at an accuracy of 80%, contributing 0 try assists and making 28 touches.